Click Switch for Philips Hue: Review
When you buy through links in this article, I may earn an affiliate commission. Learn More.
The biggest frustration with using smart lighting in your home is the lack of an intuitive way to turn the lights on and off if you don’t have your phone handy and can’t use a voice assistant for whatever reason. Philips has been investing effort over the last year in bringing on third party partners to address this.
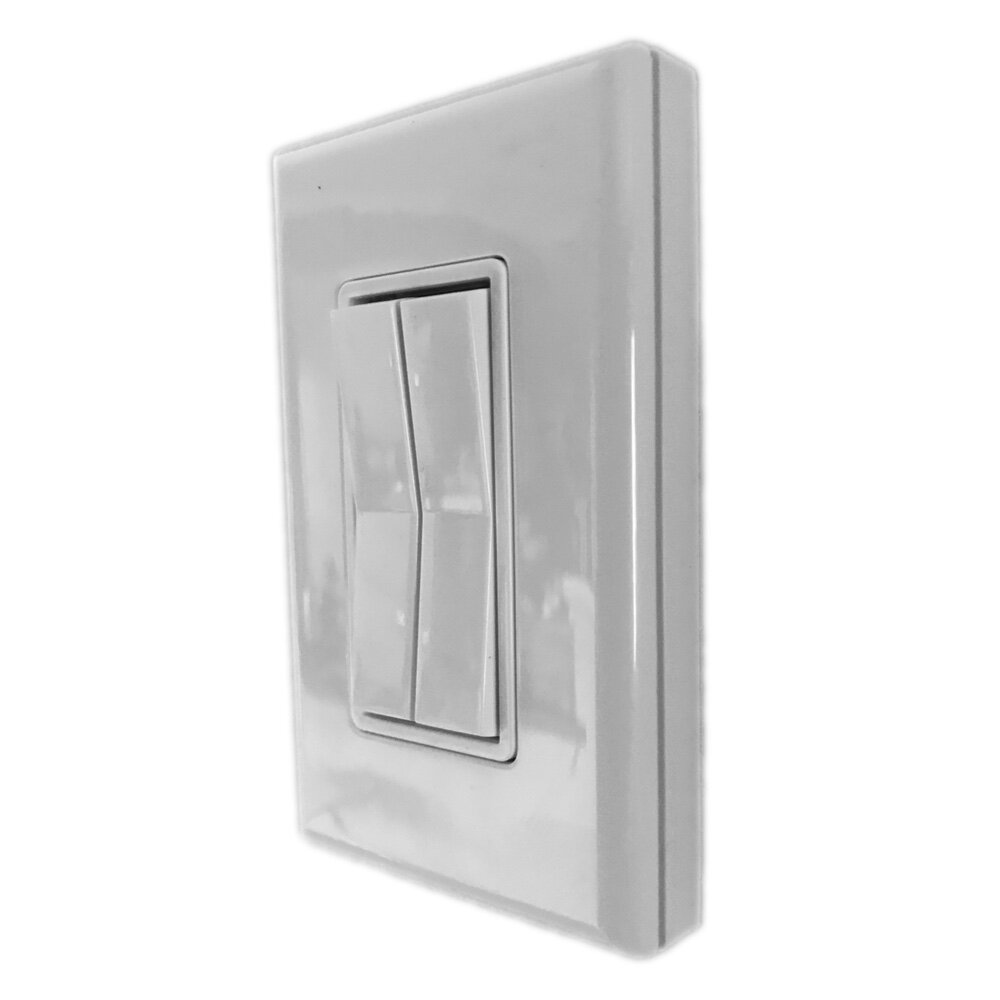
The Friends of Hue program has started to deliver a variety of devices that enhance the smart lighting experience, and the Click switch from Illumra (under the brand RunLessWire) is a particularly interesting addition to the Hue ecosystem as it offers a more typical one or two gang switch design, and like the Hue Tap requires no wiring and also needs no batteries.
The Click can be mounted in a standard wall box in place of an existing switch but requires no wiring at all. This not only makes it particularly appealing for those who don’t have a neutral wire to their light switches, but also means it can also be stuck anywhere with the included 3M Command Adhesive strips creating very versatile configuration options.
If you’re looking for a smart switch that offers super simple installation and a fairly conventional light switch look, the Click may be what you are looking for.
Click for Philips Hue
✔ Supports HomeKit, Alexa, Google Assistant
✔ No Wiring
✔ No Batteries
✔ Wall Box or adhesive mounting
✔ Wire nuts included
✘ Requires Hue Bridge
Up Front Considerations
While the Click communicates using ZigBee, it’s important to note that it only works with the Philips Hue system, and requires a Hue bridge to work at all. This must be a second generation bridge (the square one, not the round one). The bridge provides smart home integration and the switch will offer the same functionality as other Hue switches and buttons in your platform of choice.
The technology used to enable switches to be complete un-powered like this one requires a mechanical component, and this creates an audible click when pressed. This can be slightly louder than a conventional toggle switch, so be aware of that if you specifically need something quiet.
What’s in the box?
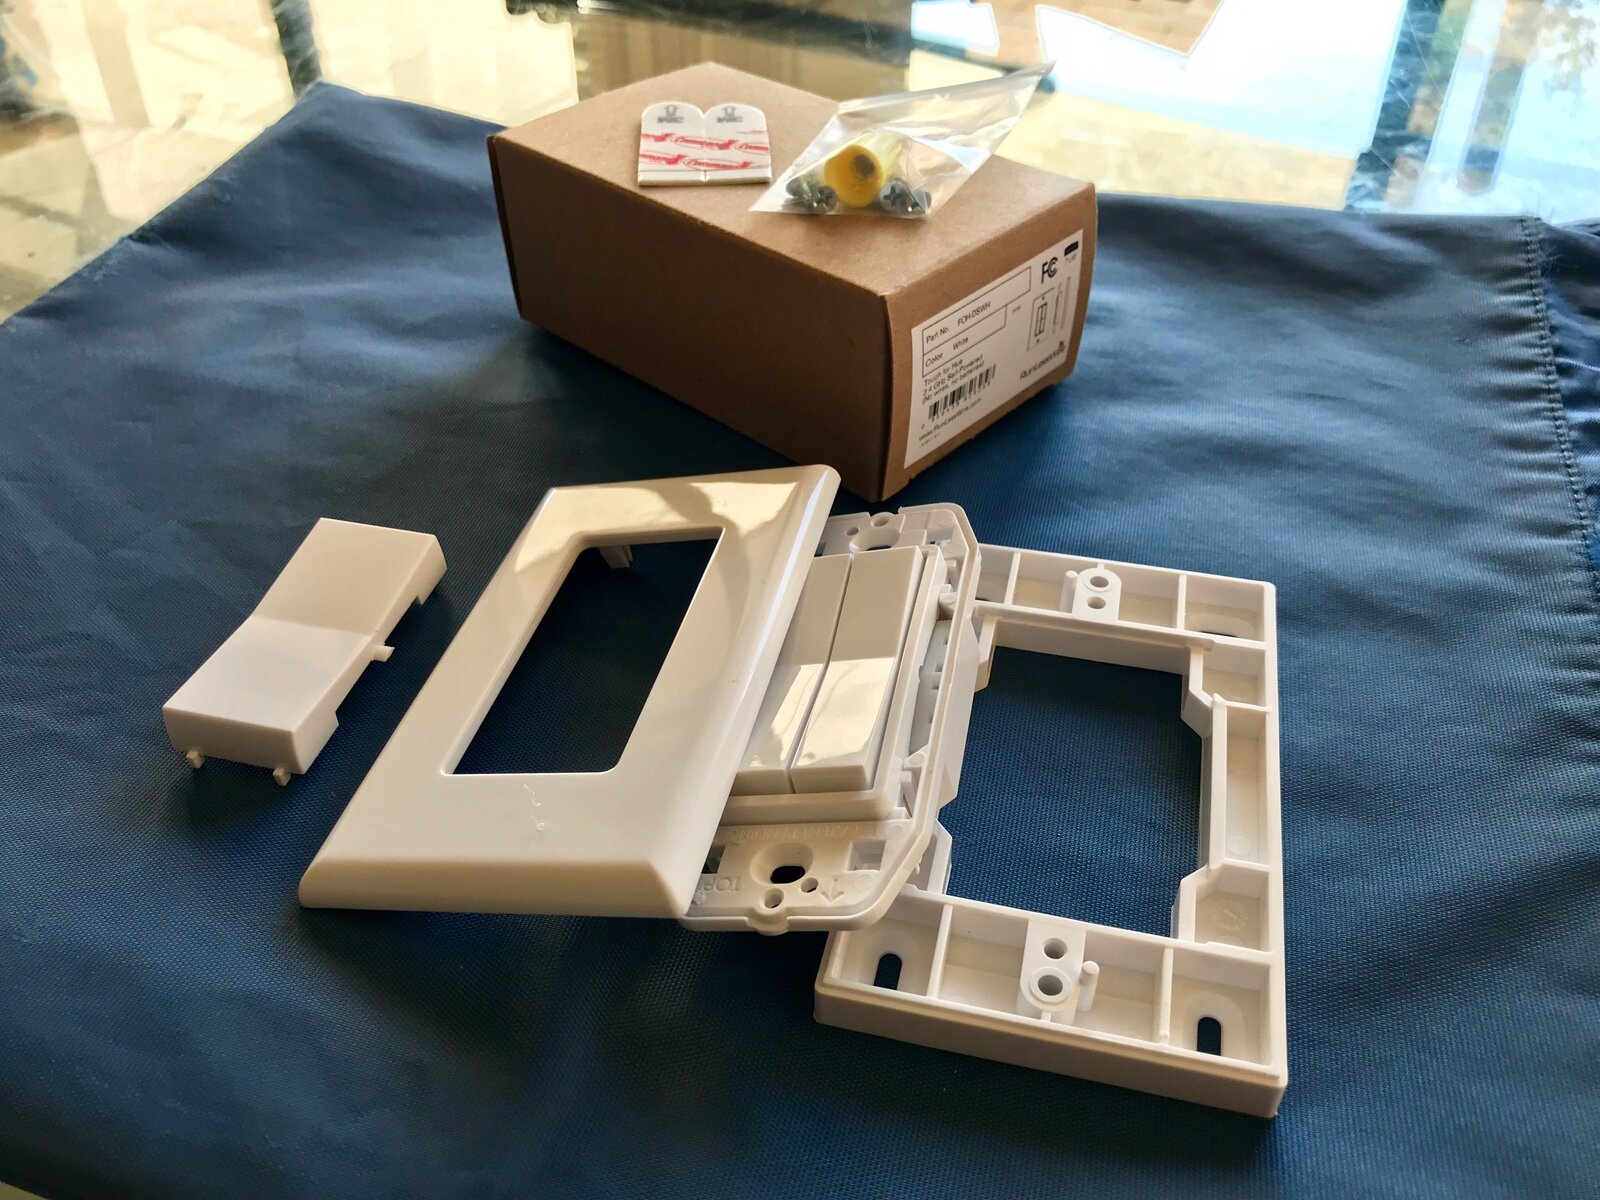
The Click is designed to resemble a conventional light switch, although as with any smart switch it is, by necessity, stateless (it doesn’t actually stay in a given position, but rather acts more like a push button). The switch itself can be configured as either a single or dual gang switch using the provided rocker insert and clicks into the back plate.
The back plate resembles a typical light switch, including screw holes to match standard wall switch junction boxes. The key difference here is that the back is flush, so it can alternatively be mounted with 3M Command Adhesive strips, which are also included.
This gives a unique flexibility of placement by allowing it to replace an existing in-wall switch, or be mounted anywhere you like for convenience in addition to any existing light switches. This arrangement may be desirable in a few situations, such as having a combination of conventional lighting and smart lighting in the same room.
Finally, and importantly, wall screws and a standard wire nut are included for the switch replacement option. The wire nut allows you to permanently join the wires inside the wall box so the smart light remains on, thus avoiding the issue of having someone turn the wall switch off rendering your smart light unresponsive.
Click Switch Features
If you’ve seen Philips’ own Hue Tap switch, you’ll have a fairly good idea of what the Click is. It’s based on the same piezo-electric harvesting technology which allows it to generate it’s own electricity. This works by using a specific combination of metals that create an electrical charge when flexed together. While the charge is small, the fact that the Hue system uses the very low power ZigBee protocol for communication means that it provides enough juice to send the signal that a button has been pressed.
This combination of technologies enables the Click to be not only completely wireless, but also requires no battery. This results in an extremely simple installation that also offers literally zero maintenance operation.
Like the Tap, the Click has four buttons, but has them arranged as two toggle switches which makes it a lot more intuitive to use as a light switch. As noted above, these are not true toggle switches as a smart switch can’t remain in a fixed state. This is because the light state can be changed independently of the switch by software, whether it be automations from other devices, an app, or a voice assistant.
It’s curious that even with the buttons configured in the same on/off arrangement as a light switch I’ve found you have to think about which button to press to turn the light on or off more than you would normally. This is probably because in the case of a conventional switch there is only ever one option, the one it’s not currently in. Still, having a more conventional appearance does make it more intuitive than the Tap, which is designed more like a remote control than a light switch.
For the decor conscious, the Click offers another advantage over many other smart switches; it comes in six common colors to better match your existing switches. In addition to white, you can get it in light almond, ivory, brown, black, and gray.
Installation
Honestly, this is where the Click has a big advantage over other smart switch options. With no wiring and no battery you really just need to stick it on the wall somewhere, but the best use is to replace an existing switch where the room lighting is completely smart. In that event you really want the lights powered all the time, and installing a smart switch of any kind will achieve that by hard wiring the power to the light.
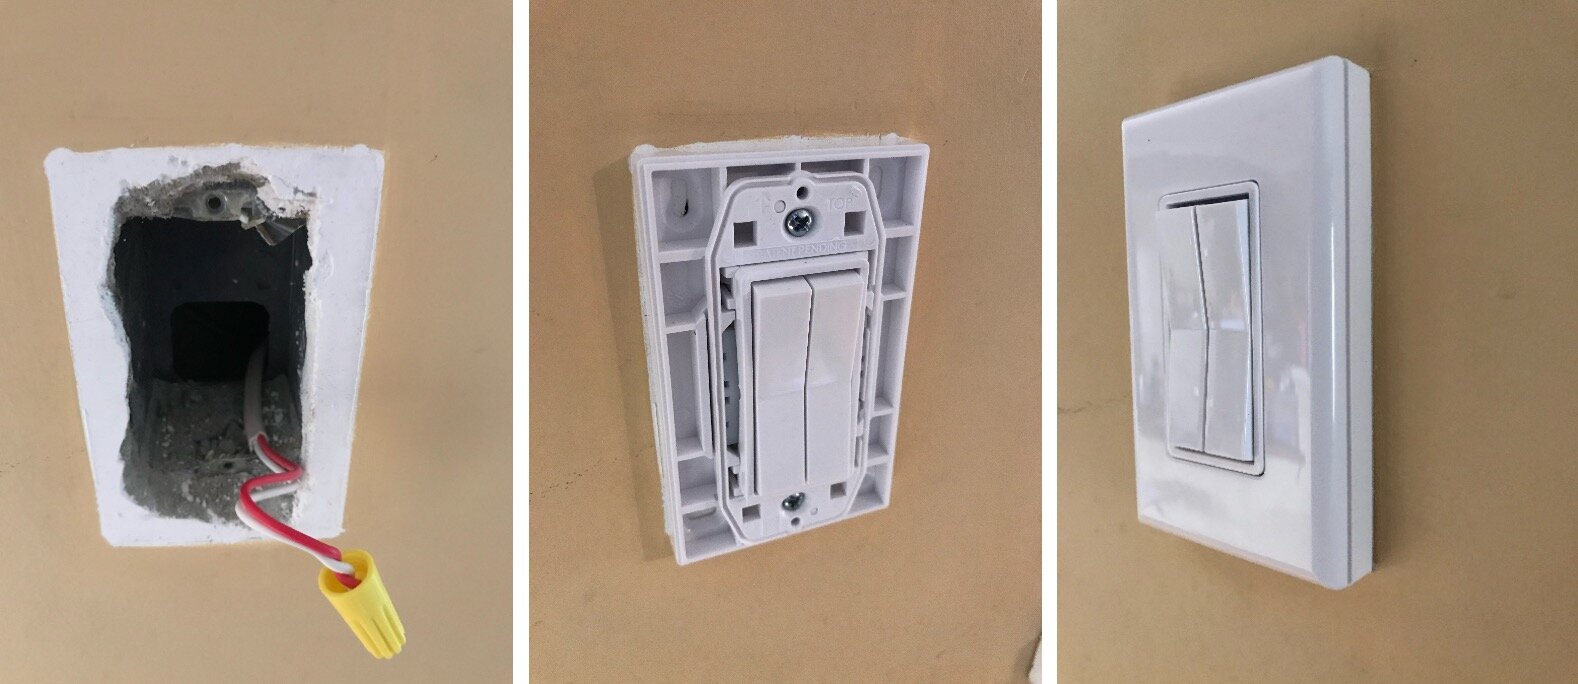
The Click is targeted at the arrangement where the light switch has only a single wire and no neutral is present, or the neutral is already joined in a bypass arrangement. You simply switch off the power at the switch box, then unscrew and remove the existing switch.
Installing the Click
Take the live (power in) and load (out to the light) wires left behind and hold them together while twisting them into the wire nut. This will safely join them, and they can be tucked back into the junction box.
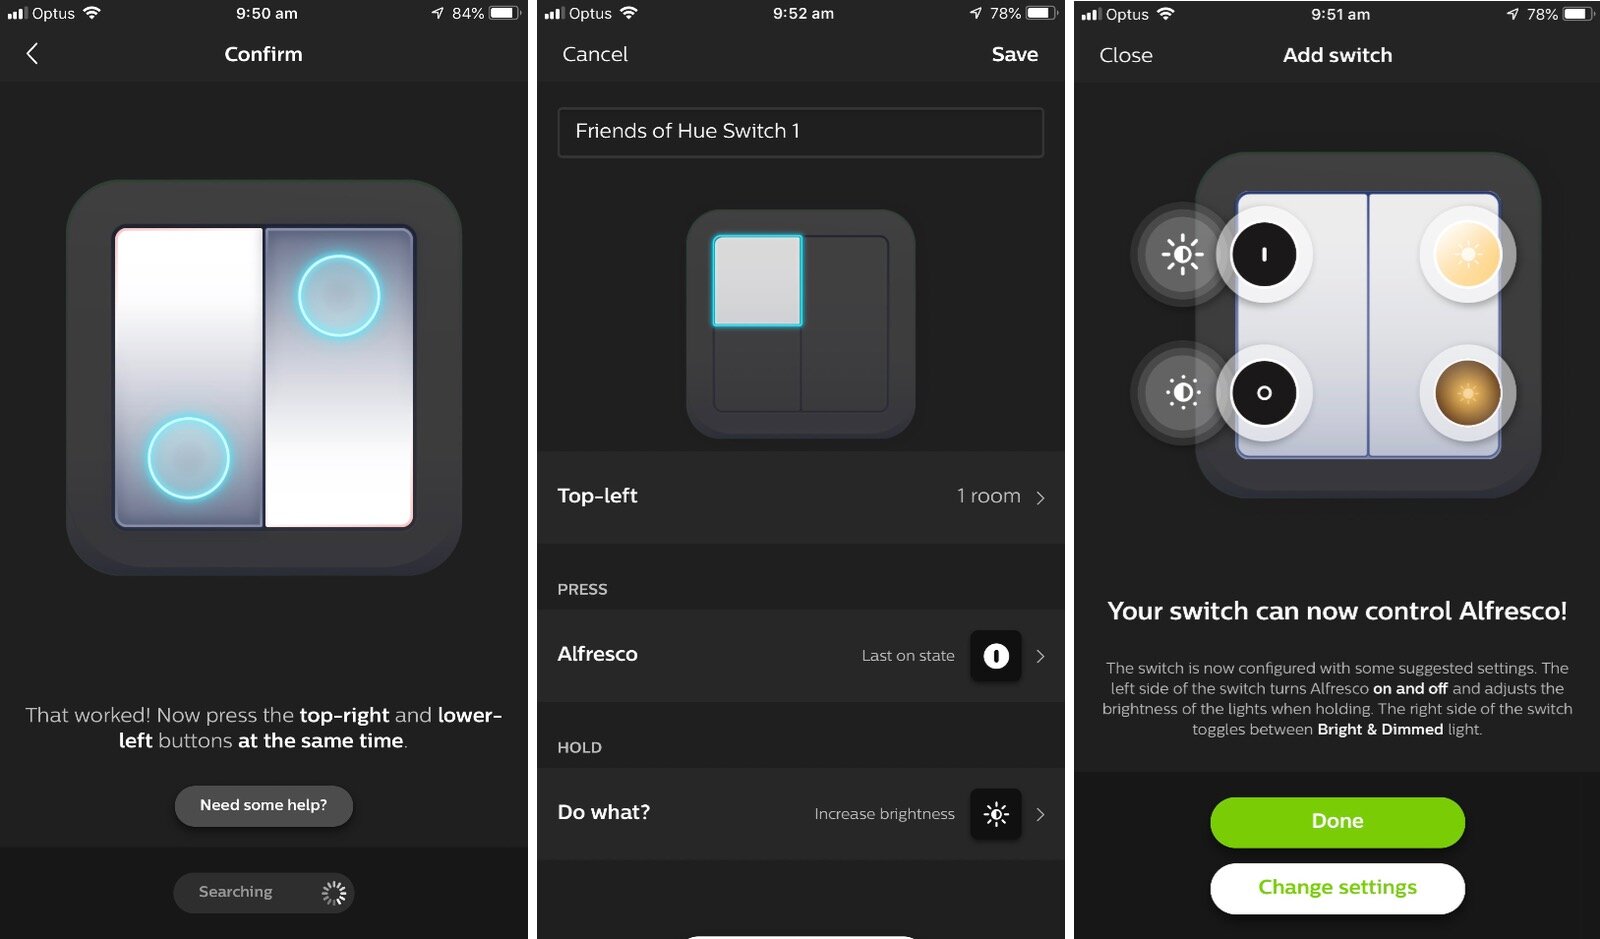
Once done, just screw the Click into place using the provided screws and you’re done. The switch comes in the dual gang configuration in the box, so if you only want a single gang you need to swap out the rocker before installing it in the back plate. Be aware that you need to configure it in the Hue app first, as the pairing process requires pressing buttons on both sides. So long as you do that first it’s not an issue, you can then adjust the configuration as you wish any time in the app.
The Hue app will guide you through configuring the buttons, which is very similar to configuring other Hue accessories and is fairly self explanatory.
Pairing and button setup
Each of the four buttons can be configured individually through the Hue app, and the setup process gives you some convenient options here. You can either set up each pair as on/off for two different rooms (the Hue system only controls lights at the room level, not individually), or you can opt for using the second pair to select different scenes instead. In the case of the on/off option, the switch will also work as a dimmer when the buttons are held down.
Alternatively, if you use Apple’s HomeKit, the Click can be configured through that instead. This loses the dimmer functionality but allows you to control any other HomeKit device or scene, which can add a lot of potential. For instance, you can have one on/off pair for the light in a room while the other controls a power outlet, fan or even a garage door. I have one set up to control a light on the left, an an Eve Energy that operates a water feature on the right.
Real World Usage
For me, I’ve found the Click to be very responsive and 100% reliable. Zigbee devices tend to offer fast response time as a significant benefit of the technology, and this has been on par with Hue’s own Dimmer and Tap products. Even when using it through HomeKit I’ve experienced excellent response time, even where I’ve had intermittent delays using a Tap switch in the same room.
A small minority of users have reported poor, unreliable response, which may be a result of individual home setups. While Zigbee offers a self maintaining mesh network that generally prevents these issues, it’s still possible to place the switch too far from another Hue device, or in an area with unusually high interference which would adversely affect performance.
Another complaint has been with the loudness of the ‘click’. This is a side effect of the piezo-electric power source as it actually requires the mechanical action to generate a charge. The same sound can be experienced with Philips’ own version of this technology, and it does feel different to a normal switch action. I’d consider them about the same in terms of manual force required and sound, but the Click is possibly slightly louder simply due to the form factor of the device being more open. This may be a consideration if you need a quiet option, say for a child’s bedroom. Personally, I find it a small price to pay for an actual wireless wall switch replacement.
Alternatives
There aren’t a lot of truly wireless in-wall options on the market, which is really where the Click shines, but there are other ways to achieve the same thing. Here are a few good options for different scenarios:
Lutron Aurora Dimmer
The Aurora is a great option from a well recognized home automation brand, and it fits right over your existing switch. The switch lever slots into the back of the Aurora and it’s clamped into place with the locking screw. This is elegant in that it keeps the switch in the on position while also ‘replacing it’ with a smart dimmer switch.
The Aurora works by simply pressing it for on/off functionality, and turning it for dimmer control. The downside it that it actually uses the toggle lever itself as an attachment point, so it’s only suitable for US style toggle switches. It’s also battery powered so it will need periodic replacement, but lasts a long while.
Philips Hue Tap Switch
The Tap is the device most similar to the functionality in that it also uses piezo-electric harvesting to run without batteries. It’s also very similar in that it has four buttons that can be individually programmed. The Tap is, however, designed more like a scene remote than a light switch. While you can certainly configure it as such, the function of the buttons is less intuitive to guests or others who may not know how it is configured.
The back plate can be fixed to the wall as a switch using the supplied adhesive backing. The Tap itself is attached to the back plate with a twist lock, so it can easily be moved around, suitable to it’s remote control intent.
Philips Hue Dimmer
For a more affordable option you could look at the very capable Hue Dimmer. A battery powered dimmer that sports on/off and up/down dimmer buttons in a rectangular remote format. The Dimmer attaches magnetically to a wall plate which is the same size as a standard switch face plate. While intended to stick on the wall with the supplied adhesive backing strips, it can be installed over a wall box in the same way as the Click, although you’ll have to source your own wire nuts.
It’s simple, cost effective, and easy to use. It’s also offers some additional convenience as you can simply take the remote off the wall and keep it close to hand if required. Of course the downside is you (or the kids) might misplace it as it’s fairly small.
The Verdict
If you’re running a Hue setup, adding wall switches can be a great addition to improve accessibility for all members of the household and your guests in particular. Being able to add those switches any where you like, wiring or not, allows the Click to command a premium price. There are cheaper options, but not with the conventional switch form factor and versatility the Click offers.
Getting the old manual switches out of the picture solves a number of problems, notably that of keeping the power to your smart lights on. The Click offers one of the simplest and least intrusive ways to do this for those with the Philips Hue system.


