Getting Started With Home Assistant
If you’ve been using a consumer smart home system for a while you’ve no doubt run into frustrating limitations with either device support or automation capabilities. Google, Amazon, and Apple make very approachable systems for people getting started. These platforms offer quite a bit of functionality to keep you going, but if you really get into building a comprehensive smart home then, sooner or later, you’ll hit a wall.
This has certainly been my experience with Apple HomeKit. I’ve gone to considerable lengths and expense to find workaround for those limitations, but jumping into the open-source Home Assistant platform might well save you a lot of hassle and added complexity. It can seem a daunting prospect, but I should have done it sooner.
What To Expect From Home Assistant
Open-source projects like this can often be arcane affairs with limited support and not for the faint of heart, but Home Assistant has been going for over 10 years now, has become the second most active project on GitHub, and has matured considerably in both user experience and support.
The idea of the platform is openness. Giving users the freedom to build the smart home they want, using the hardware they want, built on whatever technology they want. To this end Home Assistant supports all communication protocols, and officially supports a wide range of popular devices and other services like weather forecasts, translators, and voice assistants.
If the product you want to use isn’t officially supported, there’s a good chance someone in the community has built support for it you can use, and you can of course build your own add-ons if you have the inclination. Home Assistant evolves faster than any other platform, with new releases every month adding more features and device support.
The user interface is quite polished, and companion apps are available to make it as easy to use on mobile devices as any of the major commercial platforms. Even so, there’s still a lot to get your head around when starting out. The very nature of Home Assistant that gives power back to the users also inevitably exposes a lot more technical details than you might be used to.
Home Assistant Basics
When I started using Home Assistant, it was navigating this surge of new information and terminology that was the most daunting. To help smooth your introduction and avoid scaring you off I figured it would be best to start there.
Devices and Entities
Smart home devices are rarely as simplistic as the tech majors would like us to believe. Even basic devices will have more elements to them than are necessarily exposed to the user’s view in consumer level platforms. This is even more true when we look at devices with multiple functions like multi-outlet sockets or sensors that measure multiple values.
Home Assistant defines a Device as the overarching hardware, with each element or aspect of that device known as an Entity. These Entities further come in different categories: Controls, Configuration, Sensors, Diagnostic and so forth. Each of these can provide something useful for either monitoring or automation in various scenarios. Let’s take an Eve Energy smart plug as an example.
The Eve Energy is a Device. It has a firmware version, a serial number, and various network information associated with it at the device level. It also has a Device Name which is distinct from the names of its Entities. Even though it’s a basic smart plug with just on/off functionality, it actually has 6 entities:
1 Control - the actual on/off switch that can be controlled.
1 Configuration item - in this case this is the power-on behavior to use after a power failure.
4 Diagnostic items - these provide power monitoring and include Current, Voltage, Power, and Energy consumption over time.
The key thing here is that you’ll be dealing with entities day-to-day rather than the device itself. Control and Sensor entities will show up automatically on your dashboard, and it is the name of these entities that you’ll use with voice commands if you use them.
In the following screenshots you can see the device information for an Eve Energy. Note the sections further down for different entity types. We can see the entity ‘Death Star’ (the actual switch) showing in the Overview dashboard.
We can select any combination of Devices or Entities in the History section of the user interface to view historical logging of the data for each. When selecting a Device you’ll get all the entities by default. To be more specific, we can select just the entities we need. In the screenshot I’ve selected just the Control and the Energy diagnostic to show.
The Eve Energy device info page
Note the control shows on the dashboard
The History function makes the distinction clearer
Attributes
Something you’ll encounter as you start building automation rules is attributes. These are not obvious elsewhere in the UI, but when you want to query a specific value then these allow us to get more granular. Attributes hold specific values for an entity, but not all entities have them. You’ll often see attributes on sensors, or devices with sensors included in them.
For example, an ambient light sensor may have an attribute for ‘light level’. You can see these attributes when you click on an entity on the dashboard, or by going to
Settings > Devices & services > Entities
Clicking on an entity will open its controls or history view (depending on the entity type). At the bottom of the window will be a drop-down list for Attributes if it has any, although there are some exceptions. One notable exception is thermostat type controls. These have a custom display page that integrates the thermostat set point and other AC controls, as well as sensor attribute values like temperature and humidity.
You generally won’t have to go looking for these attributes, they’ll simply be presented as an option in the visual editor when making an automation if they are present.
Integrations and Add-ons
Integrations
OK, so how do we get devices into Home Assistant? We use Integrations. If you’ve used a tool like Homebridge that has plugins to allow the use of different devices, then you’ll be familiar with how Integrations work too. Integrations provide the means for Home Assistant to talk to specific devices (usually by brand) and services. Services are useful tools that you might want to use to display information in a dashboard or use for automation purposes, like weather forecasts, text-to-speech, shopping lists, Sun position and so forth.
You can find your integrations in Devices and Services under the Settings menu of the Home Assistant user interface. Home Assistant is able to detect a whole bunch of devices on your network automatically and offers these in here as Discovered integrations you can set up. There’s plenty of others that you’ll need to add manually, though.
Home Assistant has hundreds of supported integrations ready to go. Simply use the Add Integration button on the Devices and Services list to open the list. It’s a long list, so you’ll need to use the search bar, but browsing through it can also give you some inspiration for things to add you might not have thought of, such as Minecraft, IFTTT, Amazon Web Services and much more.
If you don’t find what you need, there’s always the community. Many more integrations have been created by third party developers and can be found on GitHub. These will require varying degrees of effort and technical knowledge to implement, however. That’s beyond the scope of this introductory guide, but sticking with the official integrations for now will give you plenty to get started.
Add-ons
There are plenty of things that you might want to do with your newly unlocked smart home that involve more than just connecting devices. That’s where Add-ons come in. These are essentially companion apps that can extend the functionality of Home Assistant. Some good examples of this include:
Matter Server - Adds a websocket server to enable Matter Support, allowing the pairing and use of Matter devices.
OpenThread Border Router - Creates a new Border Router for HomeAssistant to use to integrate with Thread devices. Useful if you don’t have another third-party Border Router already.
AirSonos - Adds AirPlay capability for your connected Sonos devices.
Mosquito Broker - Adds an MQTT Broker that you can use to build integrations with home grown smart devices.
Get HACS - A helpful integration tool for the Home Assistant Community Store.
Add-ons are a bit special, and their availability is dependent on how you installed Home Assistant. You’ll need to factor this in when deciding how to get started. There are quite a few add-ons in the ‘store’ but they’re far less numerous than the integration offerings. This is simply because these address specific functionality requirements rather than the myriad device types that are out there. You’ll only likely come in here if you have a very specific need, and some of these might actually be installed by default for you, like the Matter server.
Add-ons are only available if you've used the Home Assistant Operating System or Home Assistant Supervised installation method. If you installed Home Assistant using any other method then you cannot use add-ons. Often you can achieve the same manually, refer to the documentation by the vendor of the application you'd like to install.
These two Settings options are key
My configured integrations
The Add-ons menu. Colored lines are installed.
Basic Automations
Once you have your devices hooked up, you’ll probably want to get started with automating things. Setting up basic Scenes and Automations is actually quite straightforward if you’ve used other platforms like Alexa or HomeKit, but Home Assistant has far more power under the hood once you start to get more experienced with the system.
You access these features in the same way as devices - through the Settings menu. Simply select Automations & scenes to get started.
You’ll see 4 sections on this page:
Automations - Make stuff happen based on a triggering action.
Scenes - A group of specific actions or settings to apply together.
Scripts - More complex and dynamic actions that can be run from the dashboard or an automation.
Blueprints - Preset templates made by the community that can be used to create specific automations quickly.
Automations consist of three basic elements:
A trigger - this determines when the automation is run.
Conditions - optional limitations on when the automation should run e.g. time of day, a sensor value, presence of a person etc.
Actions - the set of actions to perform.
You should also be aware of Automation Modes. Modes define how multiple triggers will behave for an automation. You change the mode from the ‘three dots’ menu in the top right corner of the automation editor. These modes really only come into play if you have complex automations that may run over a period of time, so it’s not something you need to worry about while getting started.
There are 4 modes, which are fairly self-explanatory:
Single - the default, ignore the second trigger while the automation is still running.
Restart - Cancel the current automation and start it again.
Queued - Run the automation again after the current one is finished.
Parallel - Run multiple copies of the automation simultaneously.
From the Automations page, we start a new one by clicking the Add Automation button in the bottom right. This will open the visual editor. The blank automation will have a section for each of the three elements it needs. For each of these you’ll need to add them using the + Add … button under each section of the visual editor.
Triggers
When you create an automation, you must specify one or more triggers. Home Assistant provides many trigger types and more can be added by services that you add to your installation. In most cases, though, you’ll probably use the three default types: Device, Entity, or Time and Location.
Each of these has specific types of actions they can respond to. Devices are the simplest and will jump you right into the configuration. You’ll need to select a device from your list, and that device will define what triggers it supports. You simply choose one from the available options.
Devices aren’t always the way to go, however. If you want to base your trigger on the state or value of something (like a sensor), you may need to choose Entity as the trigger type. You need to choose which you want: value or state. This will determine how you configure the trigger. You might need to play around with Device and Entity triggers to see which supports the automation you are trying to build the best.
Time and Location provides the common time and geolocation trigger types you find in most smart homes. This is how you define automations based on date, time, sun position, or someone coming or going.
Conditions
Conditions are very similar in appearance to triggers as they are based on the same types of data. Conditions are always AND in that they must also be true for the trigger to work, but they don’t cause the trigger themselves.
You can have any number of conditions based on various time, location, or device state values, and these are selected the same as for Triggers. Conditions are super useful for providing more ‘intelligence’ to your automations so that they don’t just fire off indiscriminately.
Actions
Now we get to the meat of the automation. What do you actually want it to do?
Actions in Home Assistant come in a huge variety, both built-in for various different types of devices, plus additional actions based on the services you have installed. These additional actions come under the Other Actions option of the Add Action list. For basic automations, let’s just look at a couple of basic ones: Light and Scene.
The Light action allows you to turn on or off a light, or toggle it so you don’t have to know what state it’s in. To set the state of a light other than on or off you’ll need to use a scene.
The Scene action allows you to run a scene you have previously created, like other platforms do. This would be the typical use of this action. It also allows you to control scenes by building one on the fly, creating a new permanent scene, or deleting them.
Building Blocks
Instead of adding Conditions of Actions directly, you can add Building Blocks instead. These are script-like commands that allow you to build more complex and dynamic automations.
These feel a lot like the kinds of actions you can use when scripting Shortcuts on iOS, with predefined blocks that can take variables and act on them. Once you've got a handle on basic automations you'll probably want to start playing with these to make your automations more interesting.
Don’t Have Home Assistant Yet?
If you haven’t pulled the trigger on setting up a Home Assistant instance yet, you’ll have to decide what you’re going to run it on and thus how you’re going to get it installed. As noted above the installation method will have some other implications like whether Add-ons will be available to you.
Being an open platform, you can run it on just about anything and have a choice of how much control you want over the host device. Home Assistant offers their own operating system, or you can install it on one of your choice using a manual install, container or virtual machine.
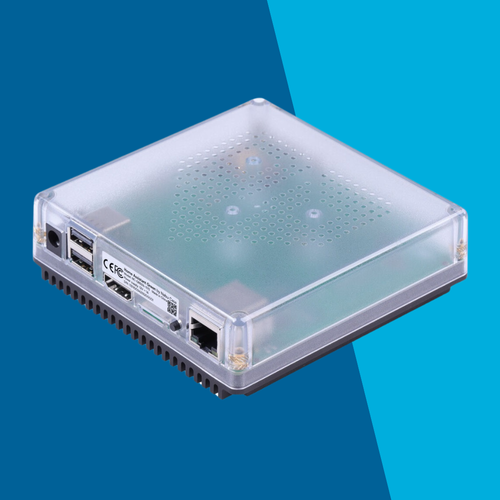
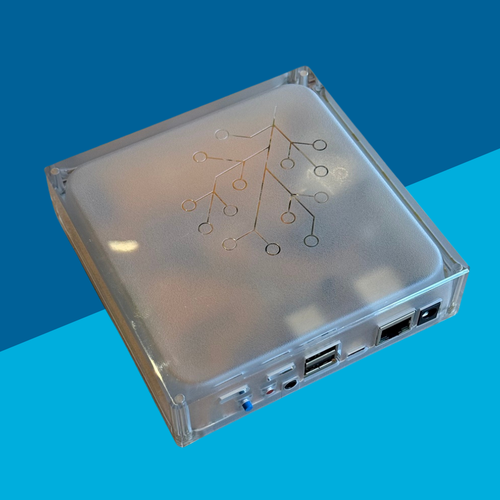
My recommendation for new users who don’t have a system ready to install it on is to go with Home Assistant’s own hardware. The easiest option is the Home Assistant Green. This provides a compact, low power host device that is ready to go out of the box. The Home Assistant Yellow is a great option if you’re a bit more comfortable with hardware configuration and want some more capability.
Easiest

Home Assistant Green
A compact, low power smart hub that comes with Home Assistant pre-installed and ready to go. With 4GB of RAM and 32GB of storage on board you'll be set to run a decent sized smart home with Wi-Fi and cloud-based devices. Use the provided USB ports to add dongles for other hardware types like ZigBee, Thread, Z-Wave and Bluetooth.
Extension

Home Assistant Yellow
The big brother of the Green, this smart hub has ZigBee/Thread radio built in making it great for Thread/Matter devices. Choose you're own compute module to suit you needs with up to 8GB of RAM and 32GB on board storage. If that's not anough you also have an expansion slot for M.2 SSD storage and the option of going with Power over Ethernet instead of a plug pack.
With an understanding of the basics and a good hardware platform to host your own instance you’ll be able to get set up and tinkering with Home Assistant.
Home Assistant integrates seamlessly with other major platforms, so you can begin migrating things over bit by bit and learn as you go while unlocking things that you couldn’t do before and still retaining control through those other apps and voice assistants. It’s a win-win and worth sinking your teeth into if you’re enthusiastic about home automation.


