
How To Use SwitchBot With HomeKit
If you’re a user of the growing range of SwitchBot smart home devices and want to get into Apple’s HomeKit ecosystem, or if you already use HomeKit and are interested in using some SwitchBot products, you’ll need a way to bring those two systems together.
SwitchBot products generally use Bluetooth for communication, which HomeKit supports, but they aren’t HomeKit certified so you won’t have any way to add them as accessories. The new SwitchBot Hub 2 provides a way to do this via Matter, but with some significant limitations.
I had hoped this would provide a clean, official way to do this integration. Unfortunately, the limitations and reliability issues with Matter in general at the moment mean I’ve still been left wanting a better solution. Thankfully, there is just such a solution available, but it does take a bit of work.
Does SwitchBot Work With HomeKit?
Yes, SwitchBot does have some official HomeKit support, both in the form of their cost effective smart plug and the new Hub 2 Matter bridge.
While the Hub 2 does offer some limited integration with a subset of SwitchBot products, it leaves a lot to be desired in terms of how those devices present in HomeKit, the limited types of devices supported, and a small limit on how many can be bridged via the hub.
By using the powerful third-party software called Homebridge, we can actually get far better integration that covers all SwitchBot products, including IR remotes through the hub, and much better control about how they appear in the Home app.
Contents
Which SwitchBot Products Work With HomeKit?
Up until recently, SwitchBot products have only had limited Siri integration via the Siri Shortcuts app. This does allow for voice control of your SwitchBot devices, but only using pre-baked commands, and sharing these with multiple household members is a real pain since Shortcuts are created per-user on their personal devices.
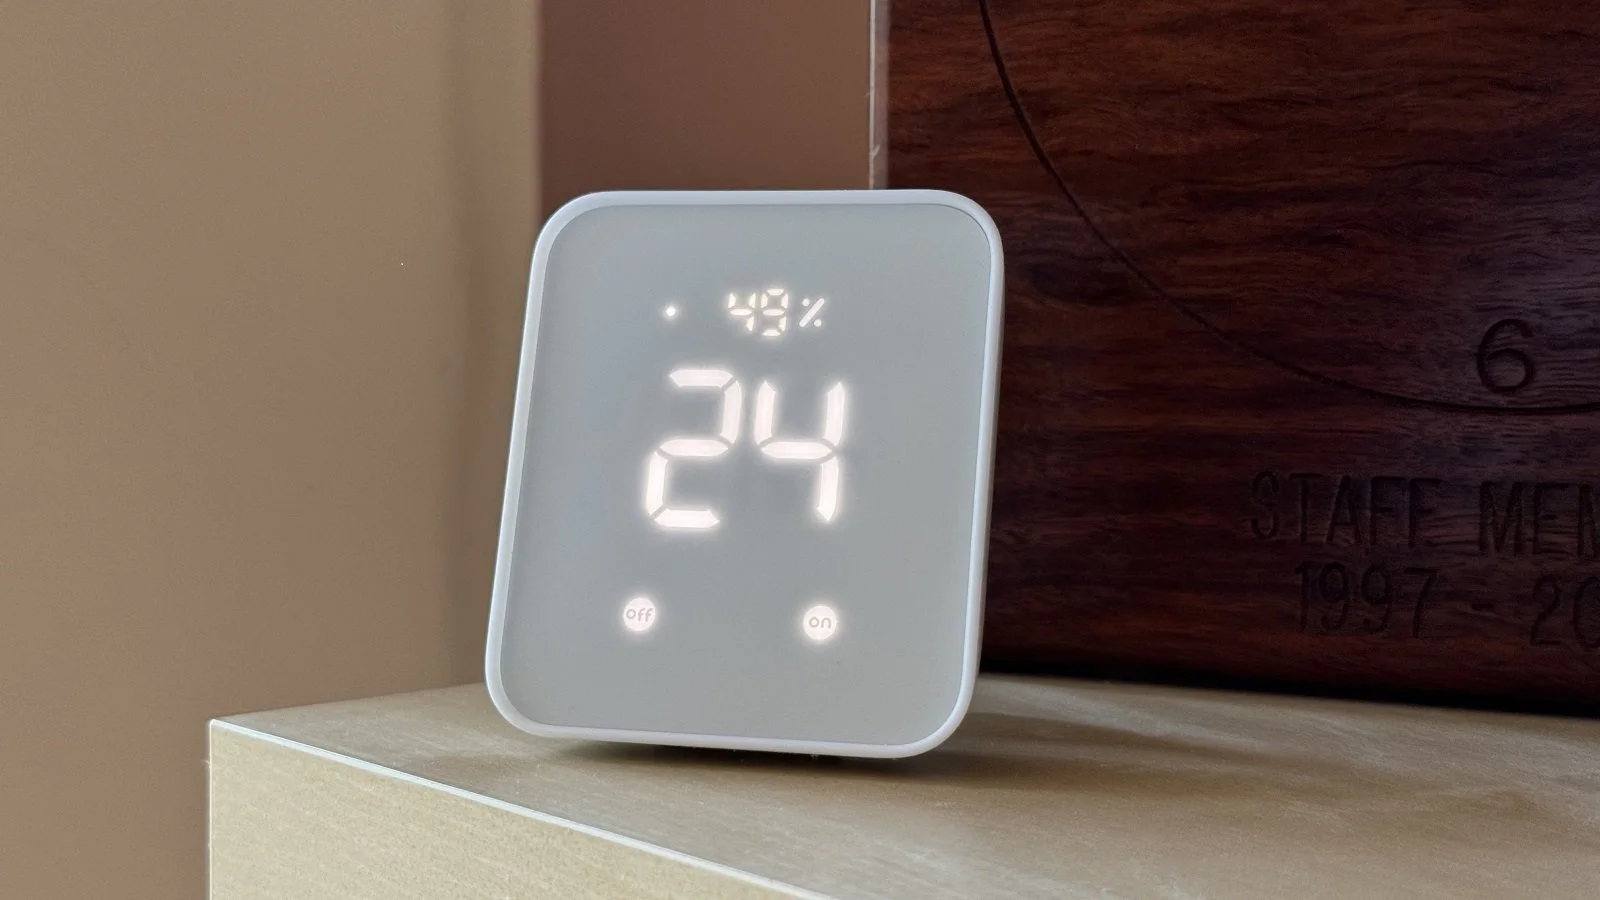
SwitchBot now has two devices with some form of HomeKit support. The SwitchBot Plug Mini is a certified HomeKit accessory that is a compact, affordable, 120V smart plug that works over both Wi-Fi and Bluetooth and has in-depth energy monitoring (through the SwitchBot app).
The new SwitchBot Hub 2 support the Matter smart home standard and provides for integration of up to 6 Bluetooth SwitchBot devices. This integration is still a work in progress, the device selection is limited, and the presentation in the Home app is also fairly basic.
To use other SwitchBot products in HomeKit and be able to integrate them into scenes and automations we need to use a third-party solution call HomeBridge.
SwitchBot Hub 2
SwitchBot Plug Mini
What Is HomeBridge?
HomeBridge is a piece of software that runs quietly in the background somewhere on your home network and acts just like a normal smart home bridge device, just like the Philips Hue Bridge and similar. Being open source, it’s free to use, and runs on a wide variety of computer platforms, so you’ll be able to find an option that works for you.
Just like formally supported bridges, it translates the device maker’s commands to and from HomeKit. HomeKit only requires the bridge device to be supported, so any devices that connect to the bridge will be recognized by HomeKit automatically.
Normally such devices are defined by the bridge maker but in HomeBridge (being third party bridge software) it’s defined by third party plugins, kind of like Alexa skills. There are hundreds available that you can simply install to add those devices to your HomeKit smart home, so on top of the SwitchBot plugin you’ll be able to find all sorts of other useful opportunities once you have HomeBridge installed.
In order to be able to communicate with your SwitchBot devices, you’ll need to have one of their hubs so your Wi-Fi network can talk to them. The appropriate plugin provides a connection between the hub and your Home Hub allowing HomeKit to see your Ring devices just like any other HomeKit accessory.

How To Get HomeBridge
Since HomeBridge is very light on resources, you don’t need a heavy lifting server to run it, and you want it to sit in the background and do it’s thing 24/7. As such, the best way to run it is on an inexpensive Raspberry Pi. These are tiny computers about the size of a deck of cards, similar to other smart home bridge devices, so they’re easy to place out of the way and you don’t have to worry about heat or noise.
I find messing around with smart home stuff and integration projects can be fun, but if you’re going to make something a permanent feature of your smart home you ultimately need it to be reliable and low maintenance. For that reason, we’re going to use a version called HOOBS (HomeBridge Out Of Box System), which has taken care of all the fiddly bits for you.
HOOBS runs right out of the box - hence the name. All you have to do is connect it to your network and you’ll be ready to start installing plugins using its easy-to-use interface. Afterwards you can use that interface, or a nice companion iPhone app, to do the odd update to the bridge or the plugins with a couple of taps, just like any other accessory.
HOOBS offers three ways to get your initial setup done and have a server up and running quickly. In order of increasing cost (and simplicity) these are:
Buy a Raspberry Pi and Download the image to put it on a Micro SD card yourself.
Buy a Raspberry Pi and buy a pre-imaged Micro SD card from HOOBS.
Buy a pre-configured Raspberry Pi based device provided by them.
Getting Started Checklist
Your HomeKit setup needs to include a home hub to ensure HomeBridge can work reliably.
A Raspberry Pi device (for option 1 or 2). I recommend this starter kit as it has everything you’ll need. You’ll need a 3B+ or 4 model to handle video streaming from multiple cameras.
(Note: The global chip shortage impacted availability and pricing of these devices. I’ve listed the most cost-effective option at the time of writing. You might be able to find the individual parts for less).
A HOOBS image if you didn’t go for the pre-built unit (option 3). You can buy this preinstalled on a MicroSD card from the HOOBS site, or you can download it onto your own. See my HOOBS Guide for how to get the image onto your card. It’s a bit more work, but it’s the cheapest option.
How To Add SwitchBot to HomeKit Using HOOBS
There are five main steps to getting this up and running, and we’ll look at each in detail. The high-level steps are:
Plug in the Raspberry Pi.
Connect HOOBS to your network.
Pair HOOBS with HomeKit.
Install the SwitchBot plugin.
Connect the plugin to your SwitchBot account.
1 - Connect the Raspberry Pi
Unbox your Pi, insert the prepared MicroSD card, and power it up. If you have a monitor connected, you’ll see some instructions for setting up WiFi and connecting to the user interface, but you don’t have to.
Note that you don’t need to connect a mouse or keyboard to the Raspberry Pi.
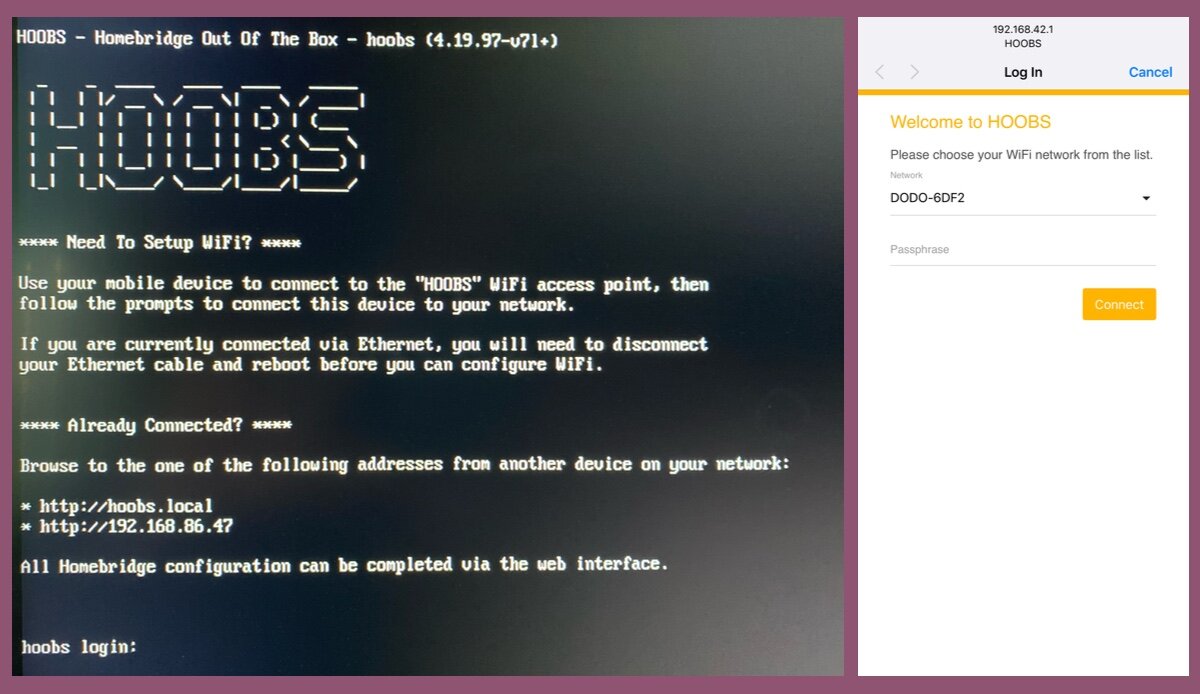
Boot screen (Left), iPhone Wi-Fi Setup (Right)
2 - Set up HOOBS on your network
HOOBS has taken care of network configuration already if your using a wired Ethernet connection, otherwise you just need to connect to it’s temporary Wi-Fi network. This is similar to the way many other smart devices do their setup.
On your iPhone check for the Wi-Fi network ‘HOOBS’. Once you connect to that, you’ll be prompted to select your Wi-Fi network, and enter the passphrase. This will configure the HOOBS box on your network. Don’t worry if you mess it up, the process will reset itself if the connection fails, and you can start over.
Once the connection is up and running, you simply fire up a web browser and connect to the HOOBS interface by going to http://hoobs.local.
You’ll need to enter a username and password to use as your administrator account, be sure to write these down.
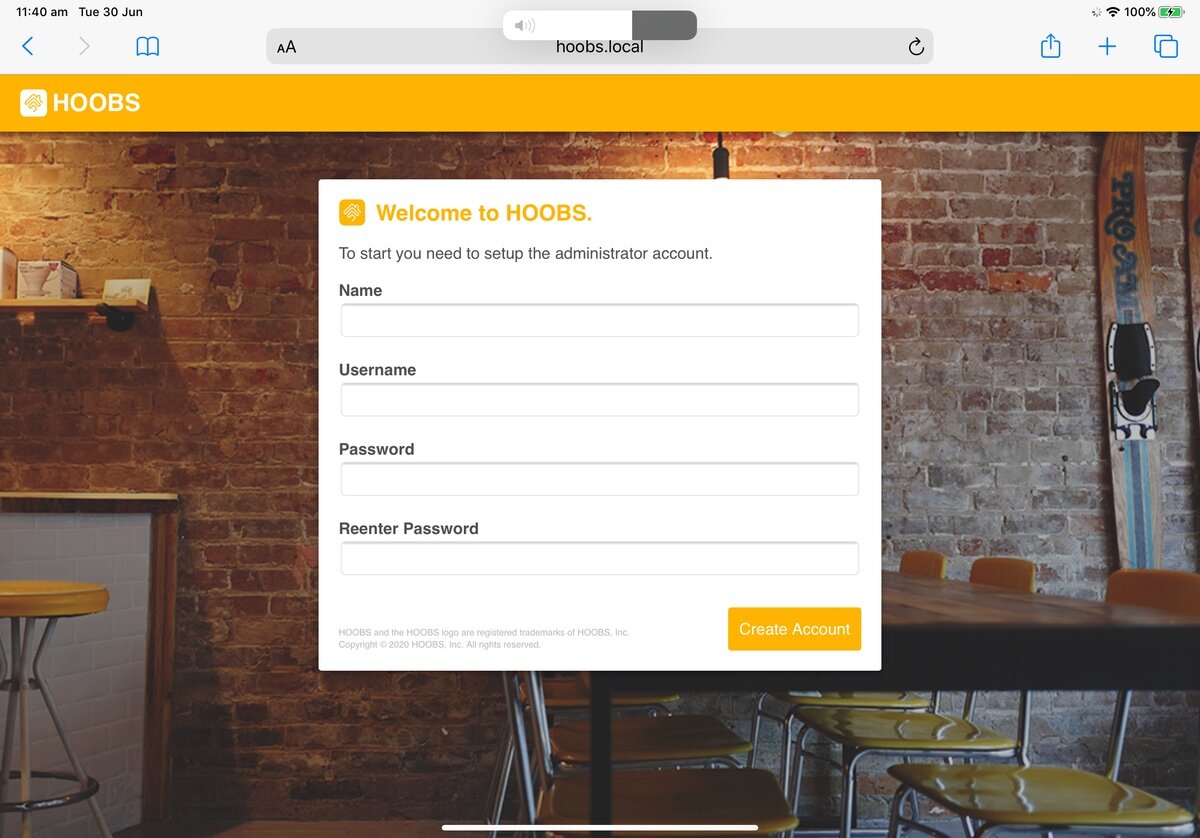
HOOBS Welcome Screen
3 - Pair HOOBS with HomeKit
At this point we’ll take advantage of a feature of HOOBS and create our first virtual bridge. HOOBS allows the creation of multiple HomeKit bridges so that you can segregate your plugins and their configuration. You’ll likely end up using your HOOBS server for more than just SwitchBot and, while can run all your plugins under one bridge, there are two good reasons for doing segregating them.
Firstly, plugins can sometimes crash and take down the whole bridge. That’s a nuisance and can be harder to troubleshoot. Second, if you mess something up you can simply remove that Bridge and start over without affecting any of your other devices.
Click the Bridges option on the left menu.
Click Add Bridge at the top.
Enter a name for the new bridge, such as “SwitchBot Bridge”.
Click Save. The bridge will start and you should see a notification in the bottom right corner to this effect.
Click on the bridge name in the list. A QR code will be shown for HomeKit pairing.
Go through the normal HomeKit ‘Add Accessory’ process and scan the code.
You will see a warning that it’s not a certified accessory, click Add Anyway.
Select a Room in your Home app to place the bridge, I just use the room where the Raspberry Pi is located.
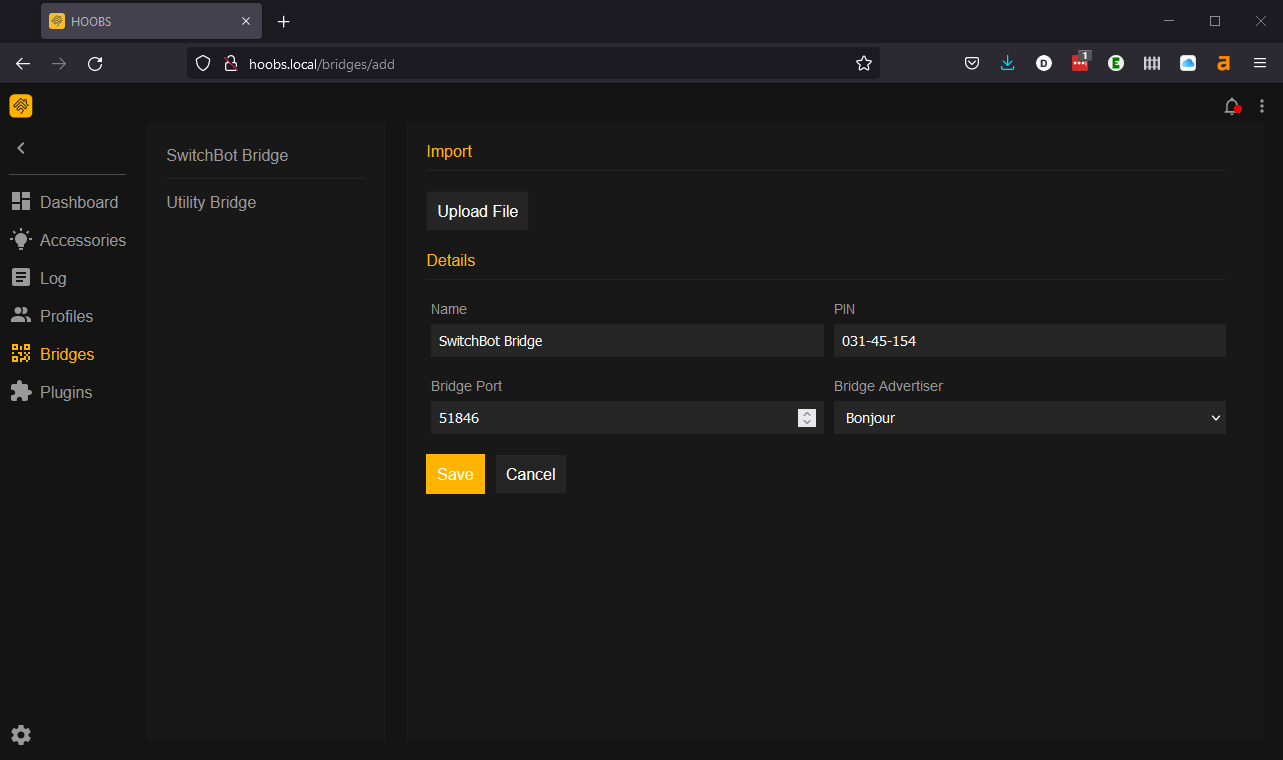
Creating the SwitchBot bridge in HOOBS
4 - Install the SwitchBot plugin
With our bridge up and running, we can now install the plugin we need. We could have done this first and selected the option for HOOBS to create a bridge for us, but it’s better to see how these things are distinct steps and make sure the pairing process goes smoothly before we get into device configuration.
Click the Plugins icon on the left menu.
Leave the next panel on Library and click the Search box above the list of plugins.
Enter switchbot and press enter.
Click the first SwitchBot item, with the Certified badge on it.
Click Install.
On the Install page select the bridge we already created at the bottom.
Click Install in the bottom right corner.
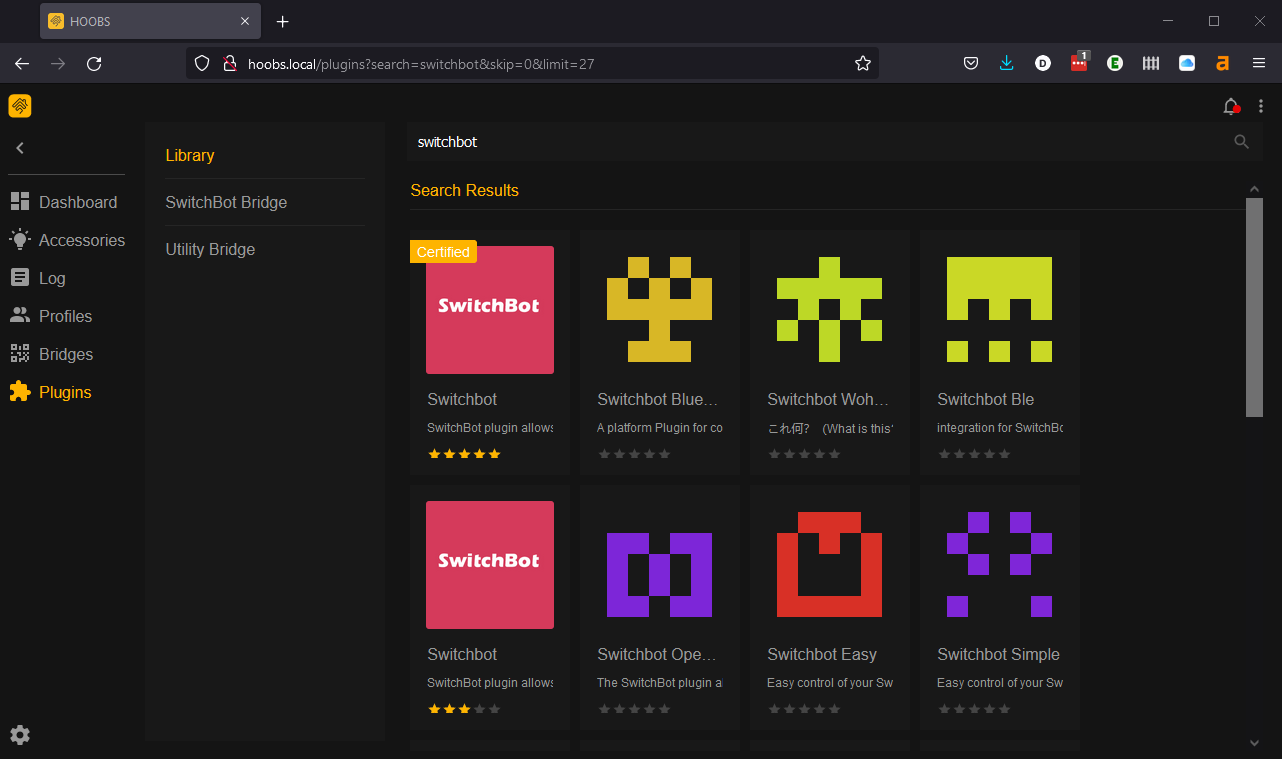
HOOBS plugin search page with SwitchBot results
5 - Connect your SwitchBot account to the plugin
This bit gets a little fiddly and is not as straightforward as most plugins. The info provided in the plugin documentation is also not accurate for a HOOBS install as it’s focused on the base HomeBridge implementation.
Most of the time Certified plugins will have a guided configuration interface which provides for a safe, reliable way of modifying the configuration file for that plugin. The SwitchBot configuration interface presents a different authentication field than is actually required, so we’ll have to edit the config manually. We can use the interface for the device configuration tasks afterwards.
Click on the cog wheel in the bottom left corner and then click Advanced in the next panel.
This will show the configuration file for the bridge. If you have multiple bridges they will be list across the top as tabs for easy access.
I’ve put the required base configuration for the SwitchBot plugin below as text so you can copy and paste it easily. The asterisks are the portions you’ll need to replace with your own token and secret values.
To get these, you’ll need to go into the SwitchBot app on your phone and access the Developer Settings like this:
Make sure you have a SwitchBot account and are logged in in the app.
Tap Profile at the bottom.
Tap Preferences.
App Tap on App Version 10 times to unlock Developer Options.
Tap on Developer Options, there you will see the two values you need. The first is to be copied into the token field, the second into the secret field.
{
   “accessories”: [],
   “platforms”: [
      {
      “credentials”: {
         “token”: “**************************”,
         “secret”: “*********************”,
         “notice”: “Keep your token a secret!”
      },
      “platform”: “SwitchBot",
      “name”: “SwitchBot”
   }
}
Once you’ve copied in the credential values, click Save at the bottom of the configuration screen and the bridge will restart.
If all goes well the plugin will detect any SwitchBot devices added to your account and populate them automatically in HomeKit. They will default to the same room as the bridge was assigned. You can move and rename them in the Apple Home app as normal.
Note that some devices, such as the SwitchBot Meter room sensor will need to have Cloud Service turned on in the SwitchBot app to be able to send data through.
Extra Configuration Options
For some devices, like the SwitchBot Bot itself, you may need to specify some extra configuration. There are also some preferences for how and what to show in HomeKit. To access these, simply click the Cog Wheel in the bottom left, and then on the SwitchBot plugin in the list on the next pane. You can also go via Plugins > bridgename > plugin > Configuration but the other way is quicker.
If you have a Bot set up as a button pusher you’ll probably want to set it in the plugin to Press instead of the default Switch behavior. It will work either way but as a switch it will show as being in an on or off state in HomeKit, which is not what we want.
Scroll past the Credentials section to Options. You’ll see a number of things you can adjust there, but we’ll want to click on the + icon to add a new device definition.
You’ll need the Bot’s Device ID. You get that from the SwitchBot app by tapping on the device and going to Device Info at the bottom of the settings page. Simply type the BLE MAC into the Device ID field in HOOBS without the colons.
Enter the Device Name you want to show in HomeKit.
Select the Device Type as Bot.
Select the Mode you want, Press in this case.
Select the Type of Device to show in HomeKit, I use Switch for these. You can customize the icon in the Home app anyway.
Scroll to the bottom and click Save to restart the bridge.
You can click on the Log menu option on the left to verify everything is set correctly by making sure there are no red errors shown after the start up.
Which SwitchBot Devices are Supported?
Most SwitchBot devices work with the HomeBridge plugin. This includes the Humidifier, Meter, Motion Sensor, Contact Sensor, Curtain, all lights and strips, Plugs, and of course, the Bot.
IR devices are also supported via the hub (which provides programmable IR control). Not all IR remote functions are supported in HomeKit, but basic on/off and volume controls will work for a wide variety of devices such as TVs, set top boxes, fans, vacuum cleaners, speakers, heaters and so forth.
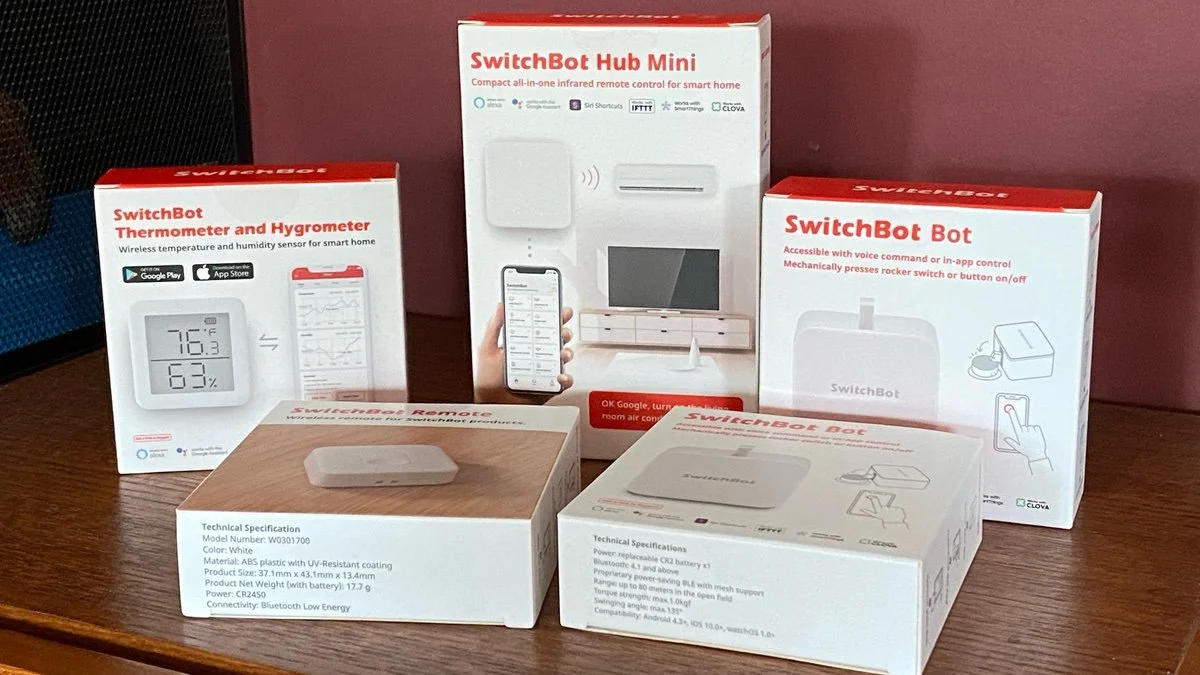
The SwitchBot starter kit
What else can Homebridge do?
Once you have a HomeBridge or HOOBS instance running in your HomeKit setup, you can start adding other plugins. Many of these add HomeKit support for specific products and services, like Ring, Sensibo Sky, Chamberlain, Broadlink, and even Alexa. Others provide useful enhancements to HomeKit such as Dummy Switches.
If you have other unsupported smart home devices, it’s worth searching the plugin list to see if there is something there you can use. With over 2000 plugins available there’s a good chance. This also opens up other options for selecting accessories to buy, as it’s quite likely there will be a plugin for it, and for enhancing your automations by connecting to online services like weather forecasts.
Conclusion
The SwitchBot device ecosystem is growing constantly, and these devices all have the potential to be useful in HomeKit beyond just their base functionality. Once they’re added, you can start to create automation rules and scenes tying all your devices together. The SwitchBot Hub 2 provides a way to officially add some of these devices, but it falls well short of what can be done with Homebridge.
The ability to connect all manner of additional smart home devices, sensors and switches to your HomeKit automations, and leverage the motion detection capabilities of the cameras is super useful. Siri commands can be used by anyone in the house to control SwitchBot devices, and the ability to integrate with other third-party devices only extends the utility of this plug-in.
HomeBridge can be setup on a Raspberry Pi that can be left to run just like any other smart hub, and once you have it, you’ll likely find other products you want to use it with to expand your HomeKit setup.


