SwitchBot Bot Review: A Smart Automatic Button Pusher
If you’re a smart home enthusiast like me, you have an ever present desire to be able to control all your stuff through your smart home. Whether it be automation rules, voice controls or a smart phone app (usually all three), it adds a level of convenience and, potentially, intelligence to your home.
Of course, while we can buy or replace many electronic devices in our home with smart version now, there are some that simply don’t have any options, or we don’t want to replace a perfectly good appliance just for that.
It’s these cases where the SwitchBot from comes into play. It’s a tiny little box with a mechanical ‘finger’ that can be commanded to extend and press whatever button or switch you need pressed. It’s not suited to every situation, but in many cases it can solve these ‘dumb’ device issues and allow them to be activated remotely through rules and apps.
To get the most of out Switchbot you’ll also need their Hub, which also doubles as an programmable IR remote to cover off some more of those non-smart appliances you may have. Let’s take a look at how this works, starting with the hardware itself.
SwitchBot Bot: The Automatic Button Pusher
SwitchBot Bot
✔ Bluetooth local control
✔ Press or Switch modes
✔ Battery powered
✔ Supports Alexa, Google Assistant, Siri Shortcuts, IFTTT, and SmartThings
✔ Black or White models
✘ Needs a hub for smart control
while SwitchBot was the original name of this gadget, the company has expanded it’s offerings to include a wide range of smart devices, so this particular product is now the SwitchBot ‘Bot’. The device itself is very simple; A Bluetooth controlled, battery powered lever that can be stuck onto whatever you need pushed.
The Bot itself comes with an adhesive pad already attached, and a spare one in the box if you want to move it later. You’ll also get two adhesive ‘addons’ that allow it to push AND pull a suitable toggle switch. These addons stick onto the switch and have a nylon loop which hooks into a slot in the lever of the Bot so it can do it’s thing.
The CR2 battery is already installed in the box with a plastic tab to keep it isolated. Just pull the tab and you’re good to go.
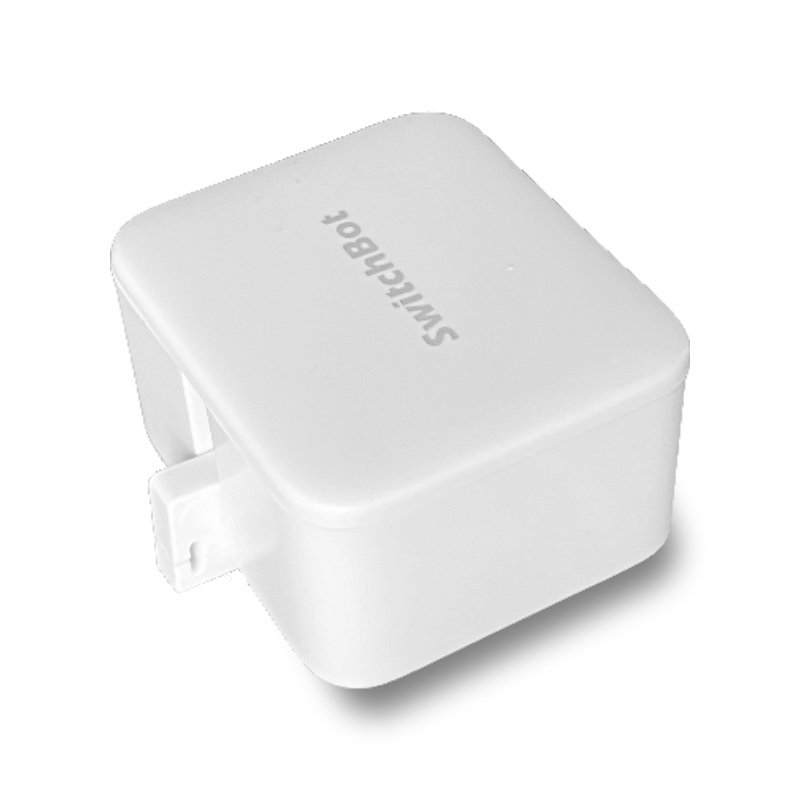
The Hub Mini which I paired this with is just a simple flat square device with a single button (for pairing and reset) and a USB port for power. The plastic is translucent to allow for the IR signals to pass through, which gives it a bit of a cheap 90s look. You get a mini USB cable, but no wall adapter. I don’t mind this as we’re probably all swimming in USB chargers by now, and any basic 1 amp model will do.
You can place the hub on a flat surface, or wall mount it by hanging it from a screw or using the supplied adhesive strip. Placement will depend on where you need IR signal if you want to use that functionality, but you can easily stick it in a cupboard if you only want to bridge the SwitchBot to your smart home.

SwitchBot and Hub Mini unbox
Installation and Setup
This is pretty trivial if you do it in the right order. I wanted to try the Bot without the hub first, so I just pulled the battery tab and installed the app. Sure enough as soon as the app opened there was the SwitchBot. I could control it right away, and there’s no need to create an account. If your happy just using the SwitchBot app, this is great news.
Next I installed the Hub. Simply plug it in, hold the pairing button and add it in the app. It detected no problem and allowed me to enter my WiFi info. This could be a bit easier as I had to type in my SSID as well as the passphrase, which is a little odd but no big deal. It connected to the WiFi easily enough and appeared in the app. Here is where I fell into a some difficulty.
You need to add the devices to your ‘home’ in the app. The SwitchBot appears by default in the Bots Nearby tab and can be used from there, but you can’t enable smart home integration while they are in that state. You need to add them to your home first. This is not obvious, and is not mentioned in the support information on setting up cloud integration. To fix this I had to ‘add’ a new SwitchBot, selecting the existing one and then assigning it to the home. Once done I could then turn on Cloud support in the SwitchBot’s settings.
Even if you’re not using a cloud-based service and just want to create a Siri Shortcut, you still need to do this, otherwise it doesn’t present any actions to the Shortcuts app. if you set up the hub first, and then add the Bot this would probably have been more intuitive.

Setting up SwitchBot
How Does it Stack Up?
The first thing that stands out when installing SwitchBot is how far it protrudes from whatever surface you attach it to. It’s certainly not something that will blend in easily, although you can opt for black or white models to help make it somewhat less obtrusive. Given what it needs to do it’s actually an amazingly compact device. In the space roughly equivalent to a coffee pod you’ve got a long lasting battery, and a high toque motor able to press and pull buttons and switches, along with the armature that actually does the work.
The design also allows for manual operation of the button, as the Bot sits next to, rather than on top of, the button concerned. Even so, it’s not suitable for all use cases. It won’t work with capacitive touch controls of course, and it has some trouble with particularly small buttons. Switches are more limited in that the shape and size needs to be such that you can attach the addons with enough leverage to be able to pull them up. Generally these need to be large paddle type toggle switches.
As an example, I’ve used one on my printer to turn it on. It’s networked but goes into deep sleep so it’s not reachable and we have to go to the printer and press the power button to wake it up first, so this seemed like an excellent use case. The power button is a small rubbery button that is recessed flush with the printer control panel. The Bot’s arm can push down below the bottom of the device to a small extent, but combined with the rubber material it wasn’t quite enough to activate it once installed. I resolved this by sticking a small piece of silicon (from a non scratch furniture pad) to the end of the arm to give it a bit more downward motion.
A small rubberized tip would be a good design improvement here, even though the arm would no longer be able to sit flush when not in use. Obviously this is an edge case as the button I needed to use was flush mounted and soft, but I can also see issues with larger buttons where you need to press in the center to get it to trigger correctly as the arm is quite short.
I’ve found the Bot’s to be generally responsive, but occasionally they time out when using the app. Trying again works fine, so this may just be a Bluetooth quirk. Using voice commands has also been quite good, and this is where we really start to see the utility of these devices.
Speaking of Bluetooth, range would be expected to be an issue, particularly if we are dependent on the hub for smart control. SwitchBot has addressed this with a proprietary BT Mesh technology. I was admittedly skeptical about this, so I placed the hub at one end of the house in a cupboard, with my printer Bot around the middle, and a second Bot down the opposite end of the house. I then went to the farthest point from the second Bot (further than the hub) and triggered it in the app. It worked perfectly.
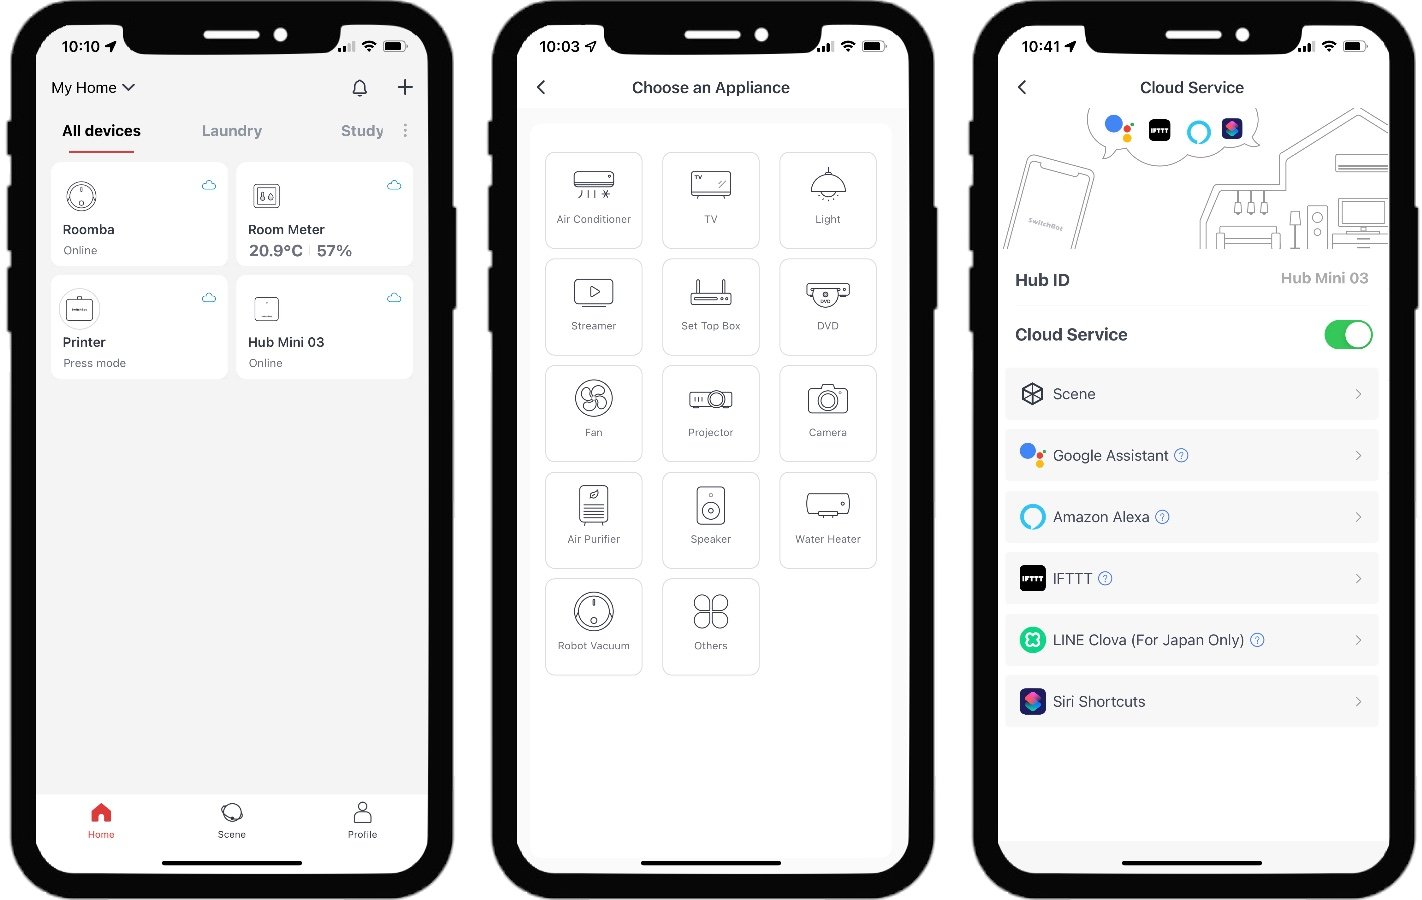
SwitchBot app screens
Moving to the Hub Mini then, you may be asking why do we need a hub for smart control? The answer is simple. Bluetooth doesn’t connect to the internet. in order to connect your SwitchBots to Alexa, Google Assistant, Siri, IFTTT, or SmartThings they will need to be on your WiFi network. The Hub provides that bridge between Bluetooth and WiFi. The Bots themselves can’t support WiFi as they would drain their small batteries way too fast to be practical, so we have to use a combination of technologies here.
SwitchBot have made having the hub a value proposition, though, by incorporating IR blaster functionality as well. This makes it a programmable universal IR remote control which can then give you similar smart home control over remote controlled devices like TVs, Air Conditions, Fans, Set Top Boxes, and even robot vaccums.
When adding a device you select the type first, which will define the buttons the app provides to you. The Switch Bot app can automatically recognize a wide range of manufacturers and pre-configure those buttons for you by detecting one of the button commands from your existing remote control. If your brand isn’t recognized, you can program the relevant buttons manually by shooting each of them at the hub and having it record the signal.
Of course, you can then take each of those buttons and turn them into voice commands to use with your smart home platform of choice.
The Hub is limited to controlling IR devices only, but offers a good range of appliance types. If you need to control RF devices you could look to the Bond Bridge instead, which does both, but with a more limited range of appliance types.
The Verdict
By covering IR devices, and physical buttons, SwitchBot can add smart control to a wide variety of those stubbornly dumb device categories around the home. I still prefer to go for natively smart devices for aesthetic and functionality reasons, but there are many cases where this isn’t an option. For those ‘holes’ in your smart home the SwitchBot may just be what you need.
The Bots themselves are simple to set up, easy to install in most cases, and work reliably. The need for a hub is understandable, if a little frustrating, in order to harness the low power benefits of Bluetooth with the connectivity of WiFi. New technology is coming to solve this, but right now SwitchBot has done what they need to do to make this work.
The best way to get started with SwitchBot is to pick up their starter pack which gives you two Bots, the Hub Mini, a remote and a neat little room temperature display. You can pick these up direct from SwitchBot globally, along with a range of other compatible smart devices.