
Chamberlain Home Bridge Review: Easy But Not Great
When you buy through links in this article, I may earn an affiliate commission. Learn More.
So you have a Chamberlain group (or LiftMaster) myQ enabled garage door motor and want to add Apple HomeKit support for myQ? There are a few ways to do this, the most obvious being Chamberlain’s own myQ Home Bridge device with HomeKit support.
Consider carefully if this is the best option, however. The Chamberlain group hasn’t been making any friends in the smart home market of late, with what could be called anti-consumer behavior. Without getting into details, there have been a number of cases where access has been blocked, dropped or pay walled. The ongoing nature of these disruptions creates some uncertainty with any access you may have to their myQ service going forward.
What’s worse is that Chamberlain have officially discontinued the HomeKit compatible myQ Home Bridge citing low demand. While they have promised that existing devices will continue to work, they haven’t demonstrated much in the way of good faith when it comes to their smart home customers. You can still get them for now, though, so if you still want to explore that option, we’ll take a look at the device.
There are also good alternatives for Wi-Fi garage door openers in general, and for Apple HomeKit a couple of options stand out depending on your current setup and budget. Let’s take a look at the official solution first.
Up Front Considerations
The first thing to keep in mind is that for any official smart home support, you’ll need a myQ enabled garage door opener. MyQ technology is Chamberlain’s proprietary communication system that allows their myQ app to talk to other myQ smart devices like door remotes, lights, cameras, and their internet service, on top of your myQ garage door.
Many garage door motors now support myQ, and not just one’s from the Chamberlain group. This only allows them to talk to other myQ devices, though. To actually use that feature, you’ll need a bridge device in order to connect to it to your home network so you can use a smart home platform or smart phone app.
Keep in mind basic physical security as well. All these smarts are great, but if a thief can simply open your door with a piece of wire, then having a door in the first place is a bit pointless.
Some Terminology Notes
There are a couple of terms that need to be clarified in this discussion. ‘Garage door opener’ is a term that is used loosely to mean different parts of the system. For clarity I’ll use them as below:
A residential garage door opener is a smart device that connects to your Wi-Fi network and allows for app control so you can use and monitor your garage door remotely. This may act as a bridge to your garage door motor, depending on how it connects. The myQ Smart Garage Hub is the basic myQ version of this, but doesn’t support HomeKit.
A garage door motor is the actual hardware that opens and closes the garage doors, usually mounted on the ceiling of you garage.
Additionally, a myQ Home Bridge is the name of Chamerlain’s official HomeKit enabled garage door opener for myQ hardware, while Homebridge is an open source bridge solution that provides HomeKit integration for a wide variety of third party products and services.
Official myQ HomeKit hub Overview

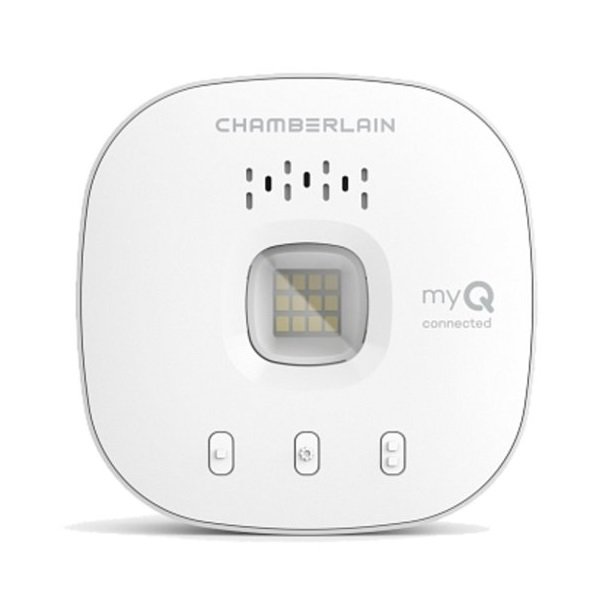
MyQ Home Bridge
✔ Supports HomeKit, IFTTT
✔ Wall mount included
✘ Poor setup instructions/support
✘ Requires internet connection
✘ US compatibility only
There are a few myQ garage door opener devices that act as a translators between myQ and Wi-Fi. The myQ Home Bridge devices (both Chamberlain and LiftMaster branded equivalents) are specific models designed with HomeKit support in addition to that basic function.
You don’t need both types for a set up to get HomeKit support, a myQ Home Bridge model will suffice, and will also act as a normal myQ bridge/gateway allowing connection of you door opener to Chamberlain’s cloud service and myQ app.
The two models you’ll be looking for are either the Chamberlain myQ-G0303-SP or the LiftMaster MYQ 819LMB. They’re identical apart from the label.
If you’re outside the US, you’re likely out of luck. The bridge only supports US voltage sockets, and only US garage door frequencies. Many countries have different frequencies approved for door openers, so they won’t be able to communicate even if they have myQ. The alternatives below will work though.
Features
The official myQ Home Bridge is a typical smart hub, in that it’s a box that plugs into power and connects to your Wi-Fi. There’s not much else to it physically, and all the configuration takes place in Chamberlains myQ smart phone app. Even if you opt to only use HomeKit, you’ll still need to set up this app first, and it still needs to connect to the internet.
Once you have you door joined to the bridge and the bridge to HomeKit, you’ll get a fully functional garage door accessory in the Apple Home app. You can open and close the door with a tap, or with Siri voice commands.
The myQ service also communicates the door state quite well, with not only open and closed status, but when it’s in transit as well. You can configure notifications on the door so it pings you when it opens and closes, and constrain those messages by time and who is at home (based on your Apple Home membership).
The myQ service also offers a secure in garage delivery feature using the Amazon Key service. You simply need to connect your myQ account to the Amazon Key app if you are in one of the select regions where this is currently available.
The notifications can be a little temperamental at times, although I’ve found them reasonably reliable. Sometimes you won’t get a notification until you check the Home app and force a query against the myQ service. It’s unclear if this is a HomeKit issue or due to the fact that all the status info is still passing through the Chamberlains cloud service as well.
Installation
As the bridge needs to communicate wirelessly with both your garage door motor and your home network, you’ll need to find a location where it can do both. myQ is reasonably reliable as a radio protocol (it has to be able to receive the remote signal from the car after all), but you don’t want to place it too far from the garage.
A power socket is required, which will limit placement options, but as it comes with a mount it can be fairly easily installed on the wall or ceiling of the garage and make use of the sockets in there.
Setup
This is where things can get problematic. So long as you are installing the myQ Home Bridge as your first myQ bridge/hub, it’s not too bad. You get the bridge installed and powered up, then download the myQ app on your phone and do the setup from there.
Yes, you need to set up the myQ app and an account on their cloud service first, get your garage door paired with it, and only then do the HomeKit pairing, also from the myQ app instead of the Home app.
HomeKit allows for secure local control, but as the Home Bridge is still a normal myQ device as well, it still expects and needs to have access to the myQ internet service to work at all.
If you have a myQ bridge already, transferring a door opener from a non-HomeKit bridge to the myQ Home Bridge has caused a lot of pain for many, and is not well documented.
Real World Performance
While the myQ Home Bridge is still dependent on the myQ cloud, response time is not impacted as much as I would have expected. However, because you’re going through the bridge, a mandated warning period is built in for safety reasons. This is a regulatory requirement for any ‘remote access’ so that anyone in the garage knows the door is going to move.
The rather annoying requirement here is for a five second audible alarm. Flashing the light on the motor is also required, but less of an issue.
This is specifically a US example and other regions will vary. Australia, for example, doesn’t require the alarm, only the light. This isn’t Chamberlain’s fault, of course, but a consequence of accessing the door control through a device that means you may be ‘out of line of sight’.
A bigger concern, however, is the number of users that have had issues with the myQ Home Bridge product. Issues range from simply not responding reliably or giving notifications in a timely manner through HomeKit, Wi-Fi issues, and losing configuration after a power failure. Almost 20% of user reviews cite these kinds of problems, which would give anyone pause.
The Unofficial MyQ HomeKit Intergation
myQ Smart Garage Hub
✔ Supports Google Assistant, IFTTT
✔ Wi-Fi Enabled
✔ Inexpensive
✔ Second door via addon sensor
✘ Requires DIY additions for HomeKit
✘ Cloud based via myQ app
By combining a non-HomeKit MyQ hub with the third party Homebridge intergation software we can achieve the exact same solution as Chamberlain’s official device, but without the limitations.
This option is a little more complicated to set up, but works with standard MyQ hardware with no extra devices in your garage. It’s also a great option if you have multiple myQ enabled garage doors and don’t want to buy multiple garage door openers as it’s completely wireless. You’ll still be able to leverage secure in-garage delivery if that’s something you want as well.
What you’ll need to get started depends on what you already have in your setup. Specifically, you’ll need a (non-HomeKit) myQ garage door opener like the myQ-G040101-ES or Liftmaster MyQ Garage controller.
You’ll also need to set up a Homebridge install (the open-source bridge solution, not the official device) to act as a translator between the MyQ hub and HomeKit. You can set up this solution pretty easily now and run it on a small Raspberry Pi device, just like any other smart home hub you might have.
If you don’t have either, then you may be better off going with a standalone smart garage door opener from a cost perspective. These devices don’t use MyQ, but do integrate well with HomeKit, and will probably run you less than getting everything for this DIY solution. Keep in mind that once you have a Homebridge server set up it can be used to connect to over 2000 other non-HomeKit products and services. This makes it a very powerful addition to your HomeKit setup, and a must for power users.
Using the myQ plugin in Homebridge, you’ll get full HomeKit support including door state and transit progress in the Apple Home app, notifications on all your Apple devices, and the ability to integrate it with HomeKit automations. Chamberlain updates their API regularly which tends to break things, but the developer is actively supporting it and along with good community support you’ll have a plugin update usually within a day to get things working again.
I’ve used this method for years, and it works perfectly apart from the odd outage noted above. It’s telling that the plugin developer does own an official myQ Home Bridge device, but uses this method instead because it’s more reliable.

HomeKit myQ Integration Guide
For more information about integrating HomeKit and myQ see this comprehensive guide.
Alternatives
If Homebridge isn’t for you, then you can look to a third party HomeKit enabled garage door opener. These smart devices plug into your door motor and allow you to trigger open and close actions directly, as if pressing the remote button. These devices need to be located with your door motor and will need their own power outlet. They typically use W-Fi to connect to your home network and provide a simple, reliable method of getting HomeKit control without any dependence on Chamberlain.
For newer models of Chamberlain door motors, you may need an optional adapter along with the base device. Each brand has these and covers them in their compatibility checks. I’ve linked those under each model.
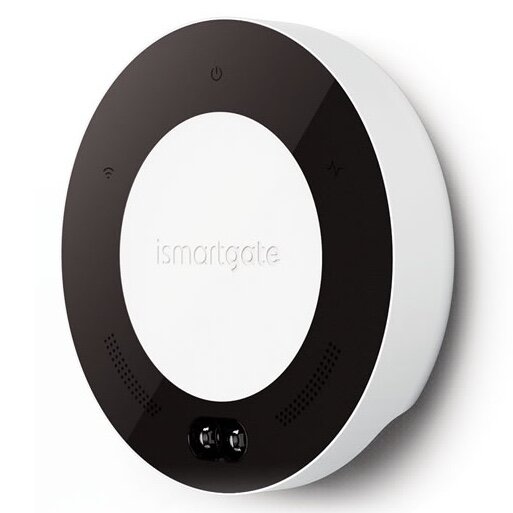
iSmartGate
✔ Supports HomeKit, Google, IFTTT, SmartThings
✔ Wi-Fi Enabled
✔ Door position sensor included
✔ Supports time limited user access (in app)
✔ Local control
✘ Instructions only online
✘ Most expensive option
Garage door motors typically have a wiring terminal block that is used for various things, such as obstruction sensors, lighting, or a hard wired open button.
The latter is used by a number of third party residential garage door openers like this one. They simply connect to the button terminals and trigger the door in the same way as a physical button would. Be sure to confirm you’re specific garage motor is supported using their compatibility checker.
Notably, this approach mitigates any ‘remote access’ warning period when closing the door because the motor acts as if you’ve pressed a physical button in the garage.
While this is the more expensive option, the iSmartGate LITE (formerly known as GoGoGate) offers better platform compatibility, and true local HomeKit support. There’s also no subscription required for any of the supported platforms, and it’s usable in any region. There’s also a PRO model that allows wiring up to three door openers from the one device, so this is a great option if you have multiple garage doors in the same location.
As a garage door opener like this doesn’t have any awareness of the motor state via the button terminals, it also comes with a wireless door position sensor. This simply sticks onto the garage door and tells the device whether it’s up or down.
Keep in mind this is a critical piece of the solution though, and the batteries used are a bit uncommon, known as LR1 N size E90. You’ll probably want to have some on hand, as when the sensor stops working the Garage door will show as Not Responding in Apple HomeKit. Apart from that the biggest issue people have had is not having setup instructions included with the product.
The iSmartGate website does have good step by step instructions and video to cover this, but if you’re trying to follow that on your phone at the same time as doing the steps it can be a bit clumsy.
Overall this is probably the best garage door opener on the market right now, and that’s reflected in the price.
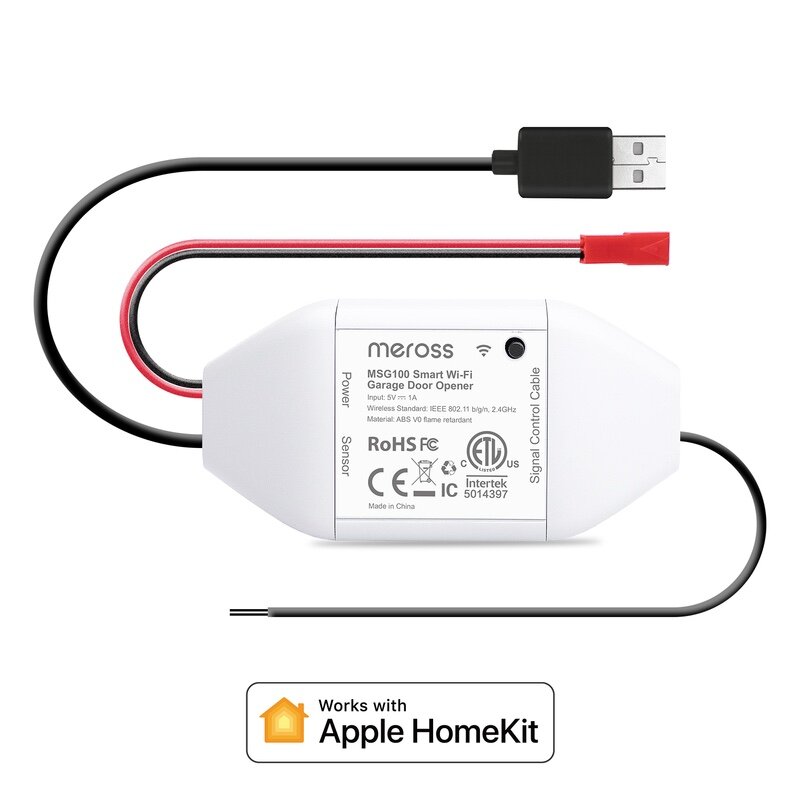
Meross Smart Wi-Fi
✔ Supports HomeKit, Alexa, Google, SmartThings
✔ Wi-Fi Enabled
✔ Door position sensor included
✔ Local control
✔ Easy Installation
✘ Door sensor is wired
The Meross Smart Wi-Fi Garage Door Opener (you’ll want the MSG100HK model) operates along the same lines as the iSmartGate in that it connects directly to the button terminals on the garage door motor and pretends to be a physical wired opener button. In the same vein you’ll need to confirm if your particular motor is compatible with this approach using Meross’ compatibility table.
The device is a simple, no frills remote door button that supports only one garage door, and is reliant on the included wired magnetic sensor to determine if the door is open or closed. This sensor is used to tell the device if the door has been opened, and when it is closed again.
It uses a timer to account for the travel time of the door either way when watching in the Home app, which you need to be sure to configure for your particular door in the Meross app. With that one configuration step done, you’ll be reliably notified of changes to the door state. I’ve found these to be more timely than the myQ notifications when I’m away from home since there’s no extra step in the message path.
The door sensor is a simple magnetic reed switch, and needs to be placed where the wire can run back to the device. You get plenty of length, but I’ve found that it works perfectly fine mounting it to the chain guide for the motor instead of trying to run it all the way to the edge of the door itself. It only needs to move enough to separate the magnet from the sensor when the garage door opens.
Whether not having to worry about batteries is a pro or a con is a matter of personal choice, but it largely works well and offers the best value alternative for the cost sensitive that I’m more than happy to recommend. See our full Meross Garage Door Opener review for more details.
The Verdict
If you’re in the US and want to add Apple HomeKit support to your myQ garage door motor, you can certainly opt for the Chamberlain myQ Home Bridge garage door opener. But there are good reasons to be concerned about reliability and support, as well as the Chamberlain Group’s apparent desire to monetize people’s access to their own hardware. Of course, if you’re not US based then this device is not an option anyway.
Thankfully there are good alternative HomeKit enabled garage door openers. Two good off-the-shelf Wi-Fi options are the iSmartGate and Meross Garage Door Opener, or you can go DIY using a third party Homebridge install along with a standard myQ Smart Garage Hub if you still want to use other myQ features.
All of these solutions will let you open and close your garage door remotely via the Home app and Siri, provide standard HomeKit notifications for when the door is opened or closed, and allow use of the door in automation rules as well.


