Does MyQ work with Alexa?
When you buy through links in this article, I may earn an affiliate commission. Learn More.
Chamberlain has not been a friend to smart home enthusiasts and has engaged in some frustrating behavior in the past. There have been a number of cases where access has been blocked, dropped or pay walled. MyQ is no exception to this.
While varied access exists for some other platforms, including IFTTT and Google Home, Alexa has been left out in the cold. There remains no MyQ skill for Alexa. Some third-party skills have popped up from time to time, only to be shut down by Chamberlain.
Does MyQ work with Alexa?
The short answer is ‘Yes’. You can use MyQ with Alexa in spite of Chamberlain’s shenanigans. In order to do this, we need to lean on either third-party hardware, software, or both.
A number of good third-party smart garage door openers can trigger a Chamberlain door motor to open and close (and report the status to your smart home) but they are bypassing MyQ entirely to do this so it’s not really ‘working with MyQ’. Still, it’s a reliable work-around that can be achieved without a big expense so I’ll list a couple of good options down below.
The cheapest option, however, is free. That is to use a third-party smart home cloud platform to do the integration with MyQ and then link that to Alexa. Several commercial home automation systems can do this, like Vivint or Alarm.com, but we’re going to look at a free app-based solution that runs on a platform called Kloee.
If you’re wondering why we don’t use IFTTT - which is the same type of platform - when it has official Chamberlain support, it’s because Chamberlain only allows closing the door with IFTTT, not opening. That’s not very helpful.
Ways to use MyQ with Alexa
Here’s the solutions we’re going to look at, you can jump to the one you’re interested in by clicking on one of these three:

Why Doesn’t Chamberlain Support Alexa?
Chamberlain claims this is due to security (and perhaps liability) concerns around letting you open your garage by voice command. This is odd though, as both IFTTT and Google have been given access (even if behind some roadblocks) simply without that specific ability. Google even offers a second PIN code step to open the door when using other brands or openers, so this argument doesn’t really hold water.
It’s far easier to break into your garage with a piece of wire than a home automation breach. The more likely reality is that Chamberlain has taken the view to only provide smart home support where they can profit directly from it, rather than as a value add and selling point. This may hurt them in the long run, even though they make excellent door motors this move is likely giving their competition a leg up.
Using the Kloee platform
There are actually two smartphone apps that use Kloee underneath. These are called SimpleCommands and LiveKey. Both are very similar and will get you the same result. SimpleCommands is available for both iOS and Android, but LiveKey seems to be iOS only.
I’m going to use LiveKey for two reasons: It’s the page that you’re taken to when creating an account in SimpleCommands, and it’s updated much more frequently than the iOS version of SimpleCommands. They both use the same Alexa skill, so things will work regardless of which you choose.
Set up LiveKey
Once you have the app installed on your smartphone and have created an account, you’ll be greeted with a empty dashboard the first time you login in.
Click the Get Started button at the bottom.
Tap Add next to the MyQ logo.
Sign into your MyQ account. LiveKey should now pull your MyQ devices into the app and display them on the dashboard.
You can now use your MyQ device from the LiveKey app, but we need to do some more to get it working with Alexa.

Your first time running LiveKey
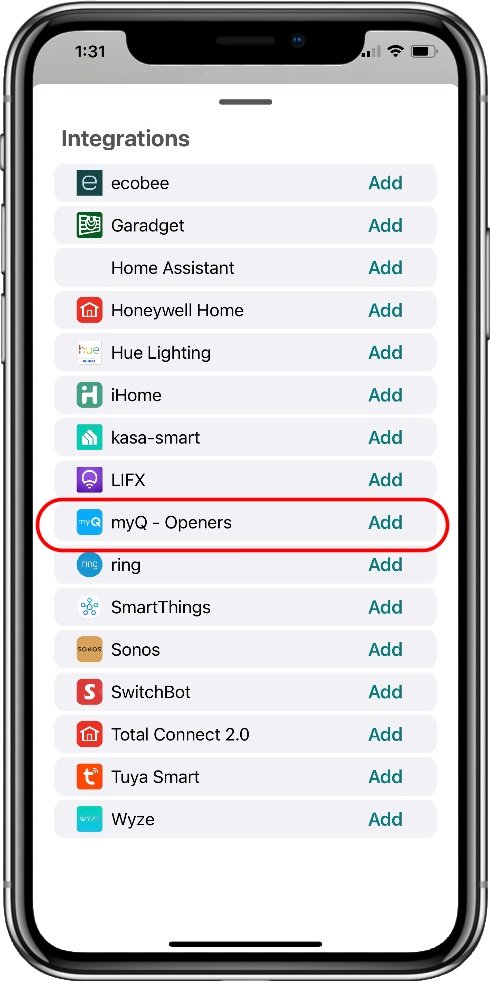
Select the integration you want

Link your MyQ account
Link kloee and Alexa
Open the Alexa app and go to More > Skills & Games.
Search for ‘kloee’ and select kloee for SC.
Tap Enable Skill to activate it.
Enter your LiveKey credentials to link the account to Alexa.
NOTE: Don’t discover devices just yet.Now go back to LiveKey
Tap on your garage door in the LiveKey list.
Tap Automations at the bottom.
Tap the Manage Automations button.
Tap Alexa Actions.
Tap the Enable Alexa Control button.
Now go back to Alexa and discover devices.
The three LiveKey commands will be discovered as Scenes and be listed under your Devices section. You can add these to a group if you wish for easier access.
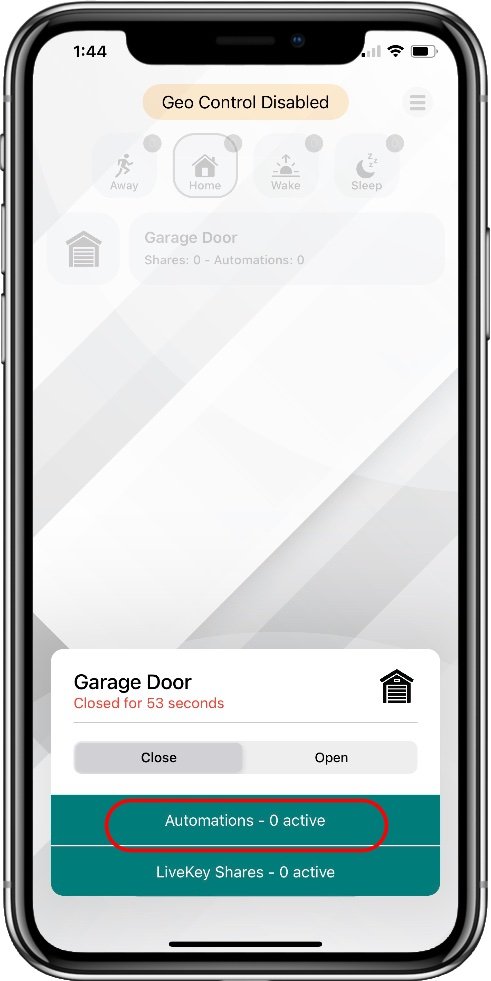
Tap your door, then Automations
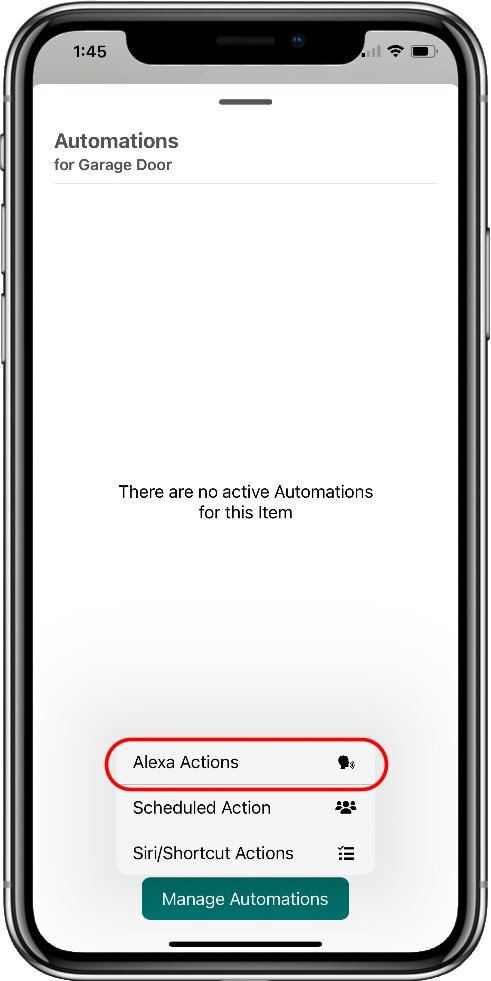
Access Alexa actions here

You need to Enable before Alexa can see them
Create Alexa routines for voice commands
The voice command syntax to use the scenes is a bit clunky. You need to say “Alexa, turn on [door name] open”. We can fix that by creating some routines. Using routines allows us to specify our own voice command preference.
Tap More at the bottom of the Alexa app.
Tap Routines.
Tap the + icon in the top right.
Enter a name for the routine, I used something like “Open garage door”.
Tap When this happens.
Select Voice.
Enter the command you want to use, in my case “Open the garage”.
Tap Add action.
Select Smart Home, then Scenes.
Choose the scene to run such as ‘Garage door open’.
Tap Save to finish the routine.
There we go, now you can use your chosen Alexa voice command to activate your MyQ garage door.
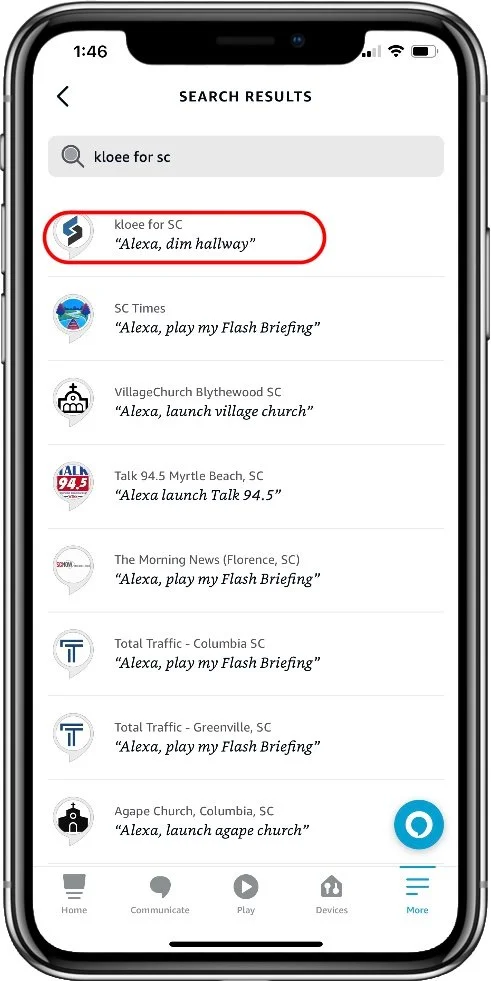
This is the Alexa skill we want
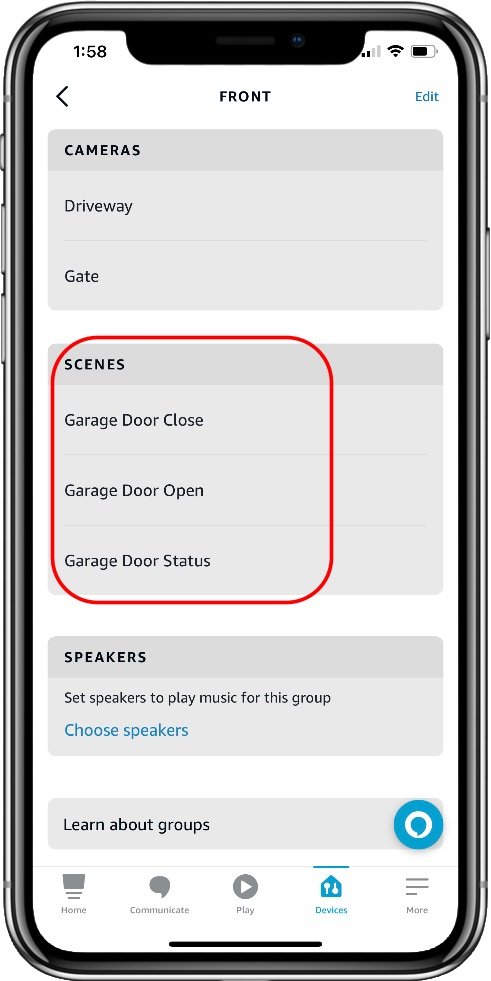
The 3 scenes look like this in Alexa

The Alexa routine for opening the door
If you do want to use IFTTT
IFTTT Can be used to close your MyQ connected garage door, but not open it. Chamberlain is not comfortable allowing voice commands to open the door, but as I note above there are ways around that such as enforcing a PIN when the command is invoked. This is how Alexa and Google Assistant handle door locks, so there’s no real reason for it to be blocked.
Nonetheless, Chamberlain has only provided a close action in there IFTTT service, so we can only use that. This also means you can’t use this method to get the status of the door either, so it’s pretty limited.
Note: Chamberlain has also region locked their integrations, so this may not be an option for you and you’ll be stopped in step 1 below. Also note that IFTTT is a paid subscription service, but you can create up to 3 applets for free, so you should be good to go for this one.
You’ll need to sign up for IFTTT access via Chamberlain’s site here https://www.myqservices.com/account/login . It’s free at the moment, but they make you do this so they can potentially charge a subscription for the privilege later.
You’ll also need to be signed up to IFTTT of course.
In IFTTT, create a new Applet using Alexa as the trigger (the ‘If’ part), use Say a Specific Phrase and enter something meaningful like ‘close the garage’.
As the ‘then’ action, choose the MyQ service and select the action Close Garage Door and specify the door from the list (this comes from step 1).
Give the Applet a name and save it.
Now you can say “Alexa, trigger <the phrase you put in the applet>”
If you don’t want to say the ‘trigger’ part, you can create an Alexa routine using the Voice action and shorten it to something like “Alexa, close the garage”. You can select IFTTT as an action which will show you a list of IFTTT Applets you’ve create using the Alexa service.
Use a third-party smart opener
There area a number of third party garage door controllers that plug into the physical wiring terminals on the motor and simulate a physical button press. This is the easiest work around, as you can simply choose a product that supports Alexa, plug it in, and go.
These devices are typically small units that you sit on top of the motor and plug into the same power outlet, from there you just connect the two wires to your motor terminals. Makers of these types of device usually have a comprehensive list of supported motor models, so be sure to check to ensure this option will work for your situation.
They key consideration before you choose one is the type of garage door opener you have. Older models will generally have wiring terminals on the side of the motor which are used for connected wired remote door controls. A simple physical button that will trigger the door to open or close.
Newer models, particular using Chamberlain’s Security+ 2.0 system may not permit a simple button arrangement to work, so we’ll have to get more creative there. You may still be fine, and the support for these varies a bit, so be sure to check your specific model in the solutions below.
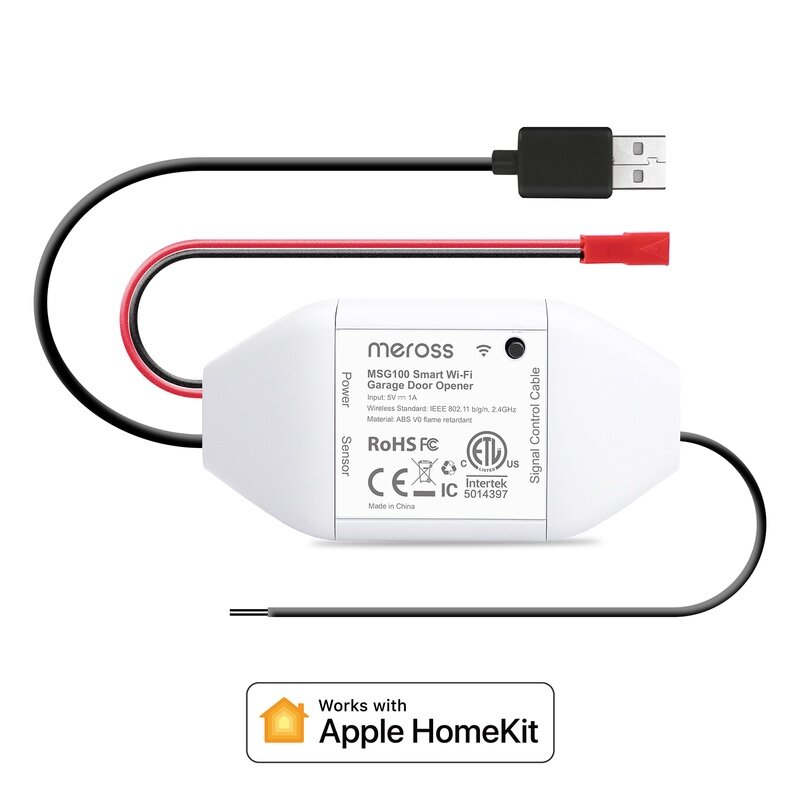
Meross Smart WiFi Opener
✔ Supports Alexa, HomeKit, Google, IFTTT, SmartThings
✔ Wi-Fi, no hub required
✔ Supports 200+ motor models
✔ Easy installation
✔ Long door sensor cable
✘ Uses wired door sensor
The best value option if you go this route is the Meross Smart WiFi garage opener. This not only supports Alexa, but Google Assistant, IFTTT, and SmartThings as well. Through the Meross app you get a few extras, like close reminders, auto close, history and additional notifications, and you can open and close the door with the simple commands “Alexa, unlock my garage” and “Alexa, lock my garage” using the Meross skill.
Take a look at our full review of the Meross opener.
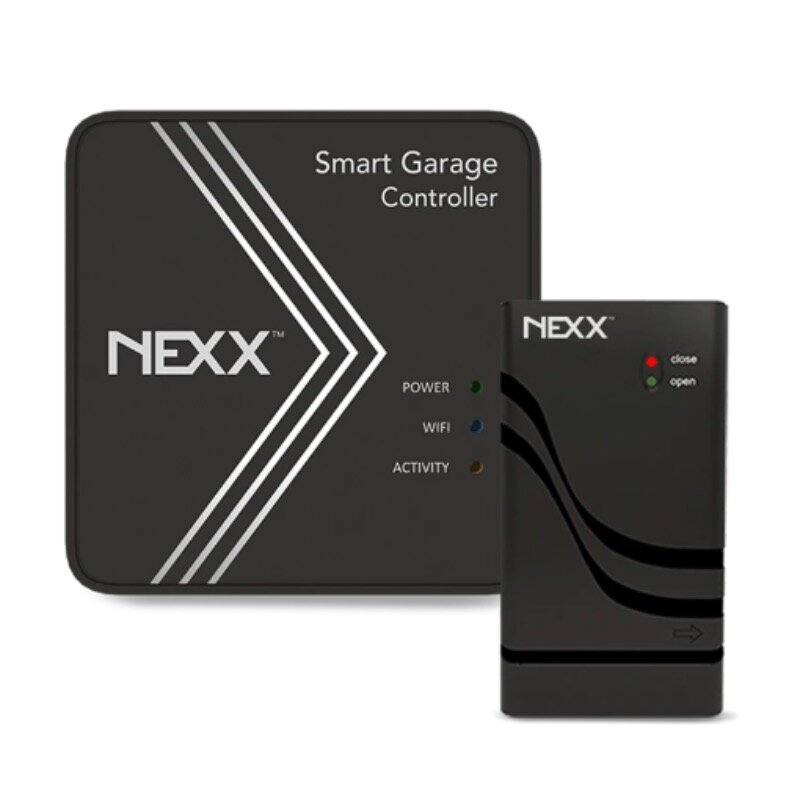
Nexx NXG-200
✔ Supports Alexa, Siri Shortcuts, Google, IFTTT, SmartThings
✔ Wi-Fi or Bluetooth, no hub required
✔ Supports 200+ motor models
✔ Easy installation
✔ Wired or wireless door sensor
✘ Higher price tag
Stepping up a price bracket, the Nexx NXG-200 is a popular option. It works the same way as the Meross (using the button terminals on the motor), but you also get a bunch of extra features. These include the option of a wireless door sensor (instead of wired), optional temperature and carbon monoxide sensor, multi-user control in the Nexx app (so you can share access and see specifically who opened the door and when) and support for both Apple and Android watches as well.
You’ll also get location-based control, which Nexx calls “Just Drive”. This means you can set the door to open when you approach, which is super nice and affords truly hands-free control.
Voice control with Alexa uses simple commands, just say “Alexa, open the garage”, or “Alexa, close the garage”.
Hacking a Chamberlain remote for Security+
In the event that you have a newer model motor that cannot be supported by the third-party controllers above, we have to get creative. By using an official Chamberlain Security+ 2.0 remote and an Alexa compatible smart relay we can create a wireless solution that sends the signal from the remote to the door just like normal.
To do this, we have to open the remote, and wire the relay to the two solder points used by the physical remote button. Then, when the relay is triggered by Alexa, it will briefly short the button terminals and make it look like the remote was pressed. This will cause the remote to send the secure command signal to the motor.
Required Parts:
Chamberlain Three Button Remote
Meross Smart Wi-Fi garage opener
2 thin wires (telephone or Cat5 will do)
Wiring the remote
Open the remote up to remove the circuit board. You’ll want to solder the two wires from the Meross opener to the button terminals to provide the short that will trigger the remote, any of the buttons 3 buttons will do. Once set up simply place the arrangement somewhere in range of the door motor where you can plug in the Meross device. The advantage here is that it’s a remote, so you’re not bound to placing it in the garage.

You could also do this with an Alexa powered relay like this one from MHCOZY. It’s cheaper, but takes a bit more setting up, and you’ll need to provide your own USB power supply (via the MicroSD port on the relay). After soldering the wires to the remote, connect the other end to the NO and COM terminals on the relay.
This one uses the eWeLink app and the eWeLink Smart Home Fan Alexa skill. You’ll need to configure it so that it auto switches off after 1 second (to simulate a button) rather than staying on. This is supported by what they call ‘inching mode’. As it’s a dumb switch you say “Alexa, Activate Garage Door” instead of ‘open/close’ wording. You can, of course, create custom routines to use that wording if you wish, but it won’t actually matter if you say open or close, both will simply cycle the door depending on what state it’s in, just like pressing the remote button.
My Recommendations
While Chamberlain may not be playing ball with Amazon, or their customers, owners of MyQ garage door motors can still get things working in Alexa.
The best option is to use your existing MyQ gear via a free software platform. The smartphones apps SimpleCommands and LiveKey are able to handle the inegration for you and provide a way to use Alexa voice commands to control your garage door for free.
If you don’t want to sign up to yet another smart home platfornm, you can buy an inexpensive third-party smart opener to work around the MyQ limitations. If your door motor is supported there are some very easy addon smart openers that will do that job for you. Even if you have a newer model that won’t work with those solutions, a little DIY action can get things working without much more effort and expense.
My recommendation is to go with the software solution, but if you go with some new hardware instead just be sure to check the device maker’s compatibility lists for your motor model and be aware that some models require an extra component to work, which both of my recommended device makers will ship to you on request.