
Add Siri Announcements To HomeKit Automations
As of iOS 18.2 a number of shortcut actions cause the shortcut to crash when run from a HomeKit automation. These actions include the Get content of URL action required by this guide to call a third party app. As such these methods currently do not work when called from inside the Home app.
Getting Siri to say something as part of an automation or scene seems like an obvious feature, but it’s something users of Apple HomeKit have been largely unable to do since the platform’s inception. When other platforms like Alexa make this so easy it doesn’t make a lot of sense, and it’s something I’ve seen come up time and time again in various HomeKit chat forums.
This is even more confounding when iOS16 added the ability to script Siri announcements through the Shortcuts app with the new Intercom action. Siri shortcuts are available in a cut down form directly in HomeKit automations, but for some reason this particular action has been excluded from that subset. There is, however, a way to execute full shortcuts from HomeKit.
The bad news is that we need to use a third party subscription-based tool and some extra hardware. The subscription is not expensive, and gives you access to a bunch of other cool HomeKit automation enhancements like custom notifications and the ability to integrate other automation tools. That cost overhead is going to be a show stopped for some, but this is the only way I’ve found to reliably do this for any arbitrary text announcement you want.
What We Need
- The Pushcut iOS app
- A spare iOS device capable of running iOS16 or above
- A Pushcut Pro server subscription ($1.99/mth or $40 once off purchase)
How Does This Work?

One of the very useful functions of Pushcut is that it allows you to execute any of your shortcuts in the background, without any interaction, and regardless of whether you are home or not. It can do this because the shortcut is run from the (unlocked) device hosting the server instance of the Pushcut app, so it’s always local to your home which preserves the privacy benefits of HomeKit.
Because we can run any shortcut, we can create one that simply uses the Intercom action to play whatever message we want. This action also allows you to specify which HomePods to play the announcement on, which gives us good flexibility for each message depending on its purpose.
This action is located under Categories > Scripting when searching for an action to add in the Shortcuts app but is frustratingly absent in the Home app when creating an automation. When added to a shortcut you can specify a text string for Siri to announce and select a target consisting of any combination of rooms, zones, or specific HomePods.
There are three main steps to getting this done: Set up the server | Create the shortcut | Call it from an automation
Setting Up a Pushcut Server
Pushcut works on a per-account basis, so you simply need to install the app on both your normal iPhone and your spare iOS device.
On your server device go to the Settings app.
Under Display & Brightness set Auto-Lock to never.
Open Pushcut.
Tap the Server icon at the bottom of the screen.
Tap the Start Server On This Device button.
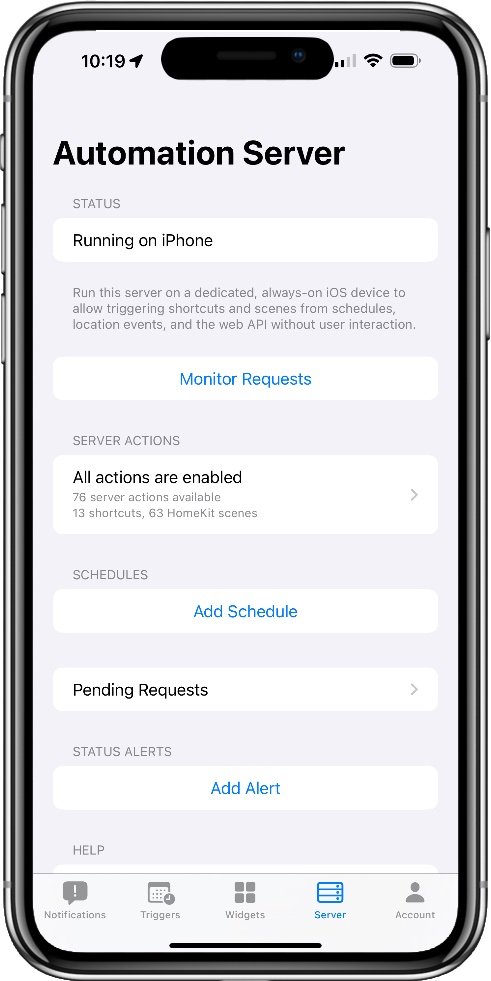
Providing your subscription has registered on both devices you should have a server up and running. Now we’ll need to create a shortcut for your announcement.
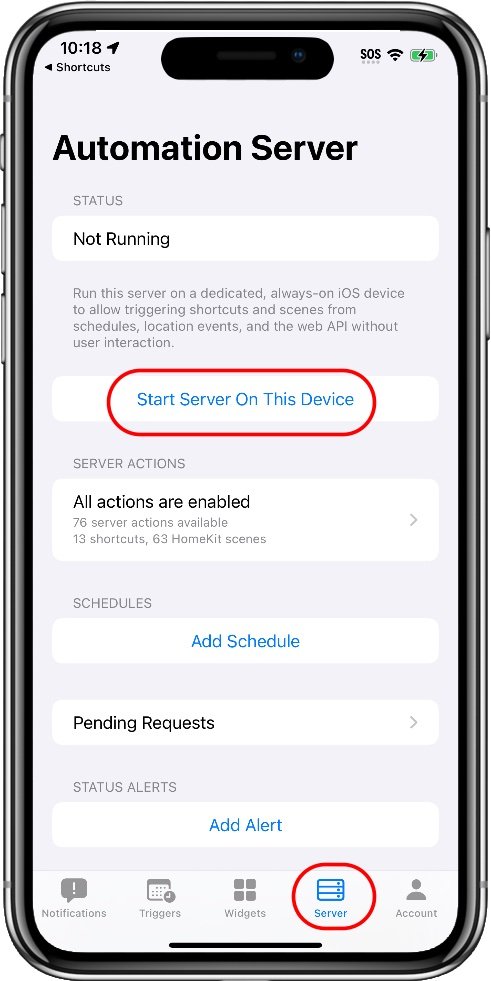
Start the server from the Server section

The server when it’s running
How the server screen looks from another device
Create An Announcement Shortcut
This is where we have Siri say what we want it to say. This can be any text string you like, so go nuts.
Open the Shortcuts app.
Tap the + in the top right to create a new shortcut.
Tap the Add Action button.
Search for ‘intercom’ in the search bar or find it under the Scripting category.
Tap the first field (showing Dinner Is Ready as an example) and add your announcement text.
Tap the second field to select where to play it.
Pull down the drop-down at the top of the screen and Rename the shortcut to something useful.
Tap Done in the top right to save.
I find it’s useful to include some validation checks in here as well, just to make sure we’re not playing the announcement when we shouldn’t be. This will depend on why it’s supposed to play, so this is up to you. You can also just include this check in the automation shortcut we’ll create next, but I find it useful to have it in here so the announcement has a self-policing sanity check.
The screenshots below show adding the Intercom function, and an example with a sanity check built in.
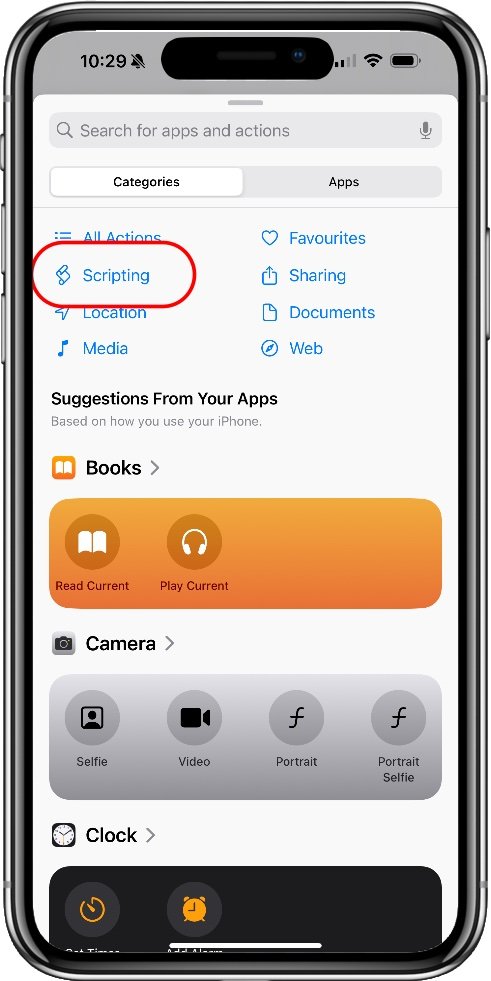
Find the Intercom action under Scripting

You probably want a different announcement

Sanity Check: Don’t say anything if the AC is already off
Trigger The Announcment From An Automation
Now we get to the important part: getting Siri to use the announcement when we need it. Before we can use it in an automation we need to get it set up in Pushcut.
On your server device (you’ll need to stop the server first), tap the Server Actions section. This is the box below the Start Server button.
Tap the import icon in the top right corner. The first time you do this Pushcut will attempt to download and install a shortcut call Export for Pushcut. You may have to allow untrusted shortcuts in the Settings app under Shortcuts for this to work. (Apple considers all downloaded shortcuts to be untrusted).
Your new shortcut should now be imported into the Pushcut list of server actions. Tap < Back at the top of the screen and restart your server.
Open Pushcut on your normal iPhone.
Tap Server at the bottom, then tap on the Server Actions section to open it.
Find your new announcement shortcut in the list and tap on it.
You’ll be shown a pop-up with the URL to call this server action. Tap Copy URL.
Tap Cancel to close the pop-up.
Now we have what we need to run the shortcut we can add it into our automation. I will assume you have an automation ready to use so I won’t go into creating an automation in full, but you can see details on that in the HomeKit Automation Guide. You’ll need to convert the automation to use a Shortcut instead of a scene by tapping Convert To Shortcut right down at the bottom of the accessory list when selecting Accessories and Scenes.
Build your automation shortcut to do what it needs to do.
In the appropriate place add the Get contents of URL action.
Paste the URL we copied from Pushcut for the announcement.
The examples screen below show an automation I use to check is the door has been left open and tell us that the AC will be turned off as a result. This is triggered by the door opening and then checks again 5 minutes later. It’s a simplistic check as it’s possible for the door to have been closed in the interim, but it works well enough 90% of the time.
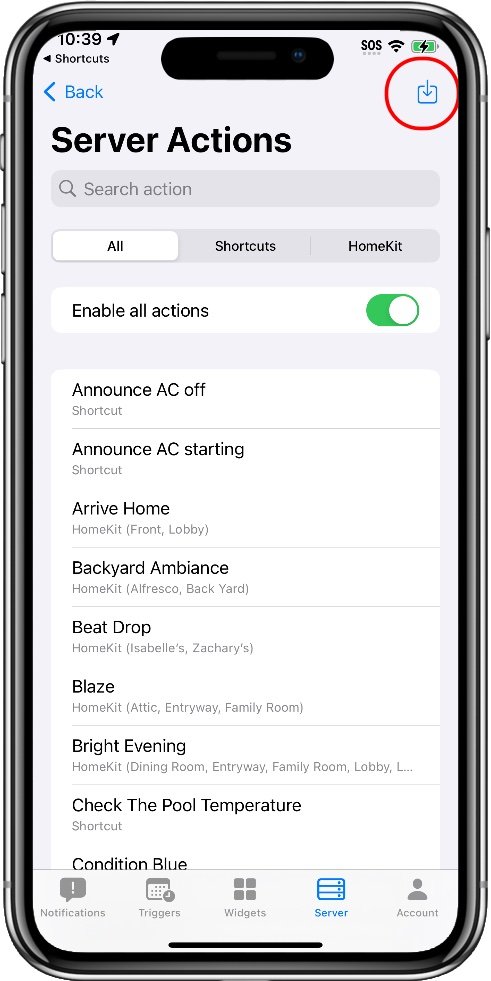
Import your shortcuts here
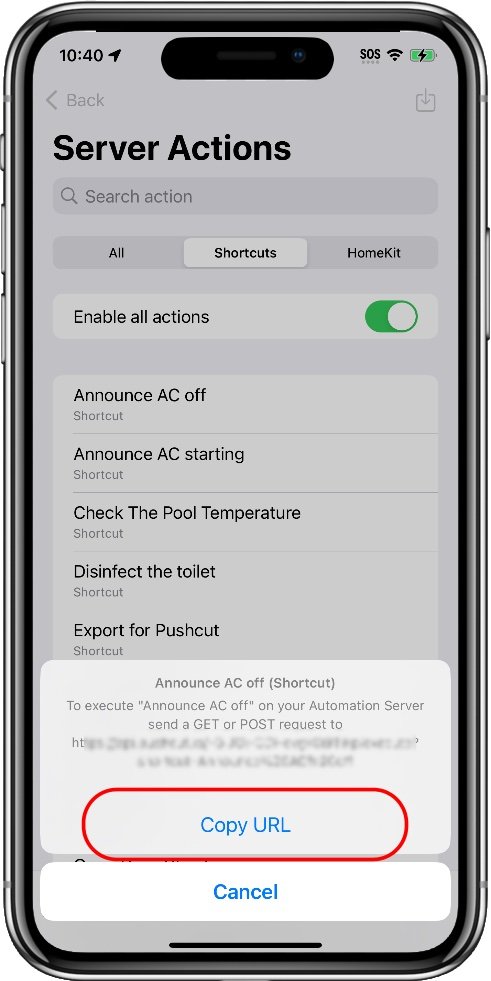
Copy the URL from your primary device
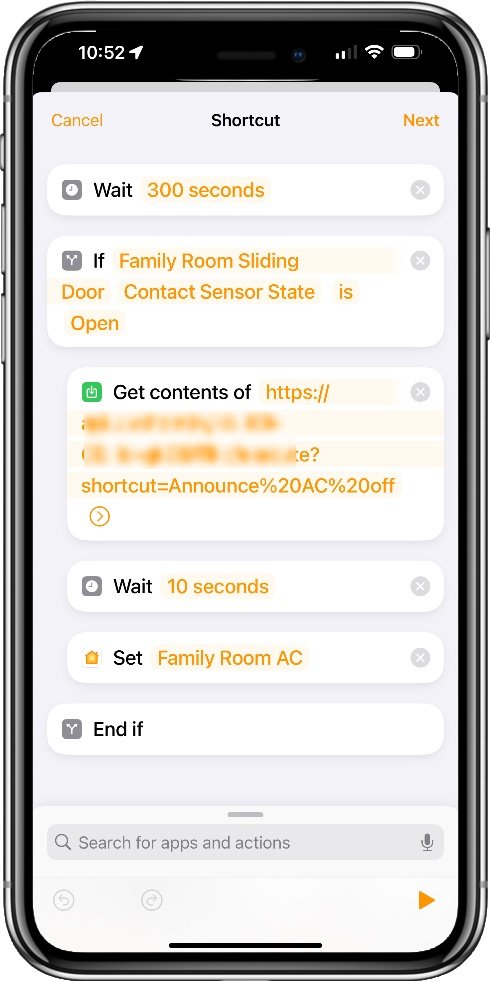
The completed automation in the Home app


