How To Trigger HomeKit Automations With Sensor Values
Apple’s HomeKit smart home platform has the ability to use many kinds of sensor values to trigger automation rules. The Home app allows the creation of triggers using the more common sensor types like door/window, motion, temperature, humidity, CO2, air quality, and light level sensors. Some more exotic sensors, like air particulates, won’t be presented as an option even if they are present in the accessory’s details screen.
This is purely a user interface problem, though. HomeKit itself supports triggering off any of these values, but to do this you’ll need to use a third-party app to access the data value you need. Let’s look at the official Home app first, then how to do sensor triggers in several of the best third-party options: Home+, Controller for HomeKit, and the Eve app.
Apple Home
Create a new automation using the + in the top right corner, and selecting Add Automation.
Under the Events section, select A Sensor Detects Something.
From the list of sensors the appears, find the Room you want, and the select the sensor to use.
Tap Next in the top right corner.
Select the sensor value to trigger with. This could be a binary value like Motion or No Motion, or a numeric value with a Rises Above and Drops Below qualifier. This will depend on the sensor you selected.
Tap Next in the top right corner.
Now you can select a scene, specific accessories, or create a Shortcut to run when this trigger is activated.
Tap Next in the top right corner once your actions are added.
Review the automation and tap Done in the top right.
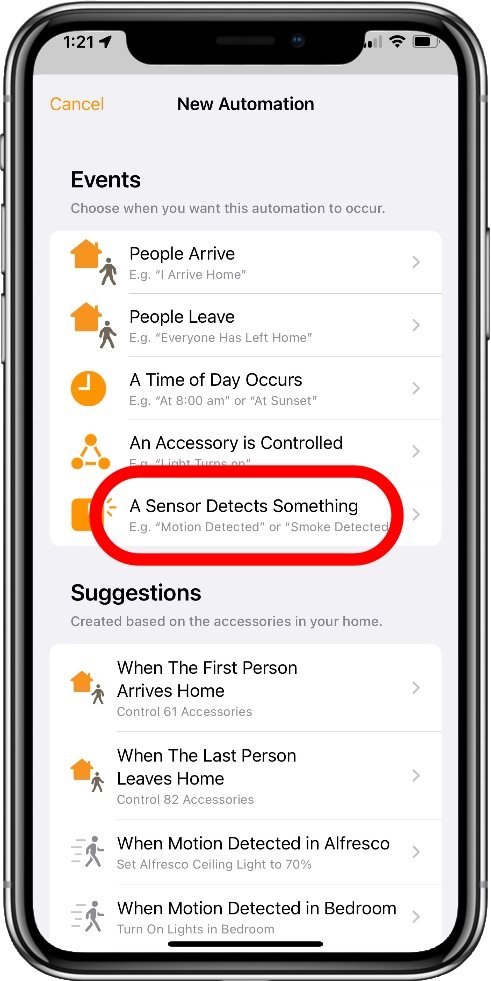
Select this option to use sensor values as a trigger
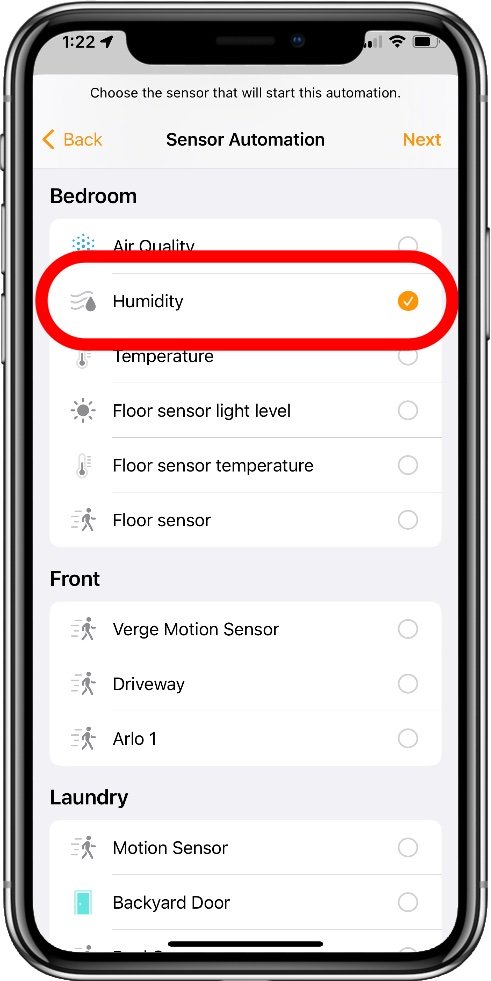
I’ve selected a Humidity sensor here

Many sensors will allow numeric thresholds like this
Home+
Create a new automation, and from the initial screen tap Create Event Trigger at the bottom.
Tap Add Event…
Tap Accessory State from the list.
Find the accessory to use as a sensor on the Choose Accessory page.
Tap the sensor to use, this will show all the characteristics available on that device.
Select the one to use, in this case Current Relative Humidity.
Now specify the operator and value by tapping on each highlighted area in the When This Happens box . A specific value will trigger when the sensor records that value only. This may be missed if the values change too quickly. To Avoid that use the Greater, Less, or Between operators. This will trigger when the value enters the range from above or below.
Use the Add Accessory and Add Scene buttons to add your actions for this autoamation.
Tap Save at the top, you’ll need to enter a name for the rule.
Double-check the event shows the correct Range, it can mess up sometimes and need to be selected again.
When happy, ensure the rule is Enabled.
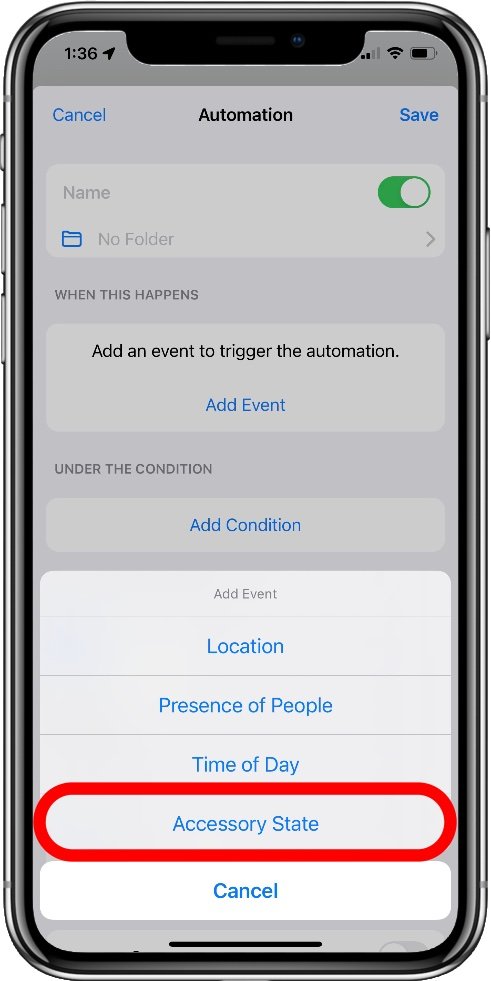
Select Accessory State under Add Event

Choose which sensor to use

Choose which comparison to use by tapping on it in the trigger description
Controller for HomeKit
From the Automations section, create a new automation.
Enter a name for the automation and tap Next.
Tap IF one of these events occur, this will take you to the rule editor.
Tap Accessory as the Start Event.
Select the Room the sensor is in.
Select the accessory to use from the accessory list, note this is the parent accessory that may contain multiple sensors.
You’ll need to select the specific characteristic to use on the next screen, in this case Current Relative Humidity.
Choose the comparison operator from the Start Automation list.
Select the threshold value at the bottom. You can choose to step this up and down, use the current value, enter it manually or choose from a list of values.
Tap Save at the top right.
You can now add any other conditions you want to use for this trigger, and add the scene actions you want under THEN execute these scenes.
Ensure the Activate Automation toggle is on at the bottom of the screen.
Tap Save when you’re done.
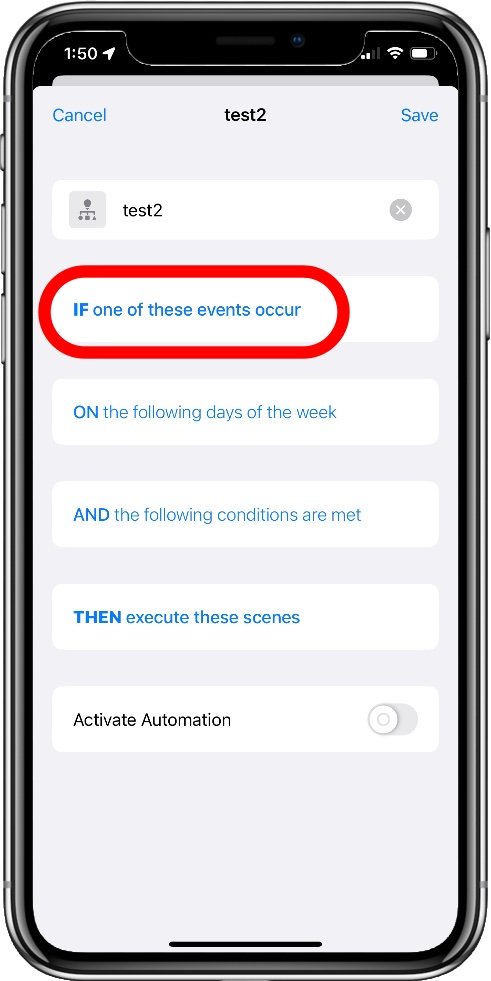
Triggers are under the IF section
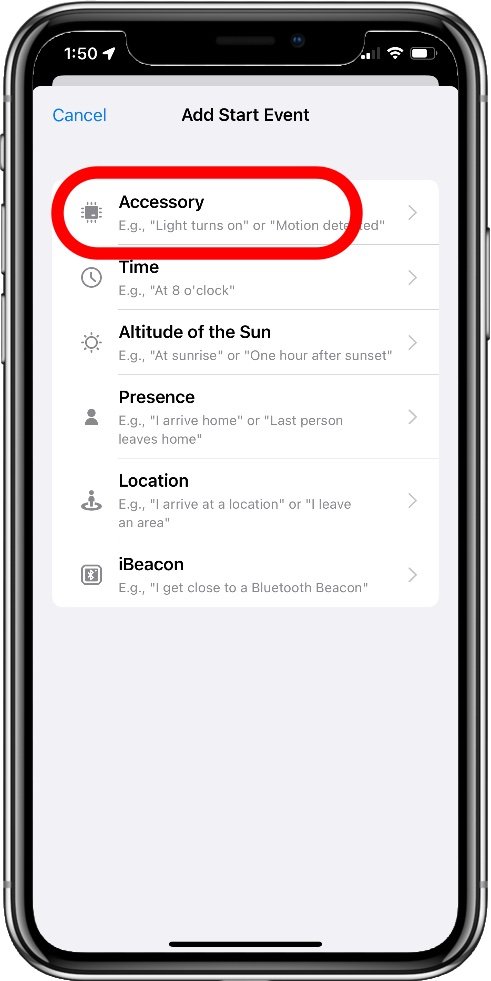
Sensors are under the Accessory type events

Choose an operation and value to use
Eve App
Under the Automation section, select Rules from the top of the screen, and then Add Rule at the bottom of the list.
Review the rule steps and tap Next.
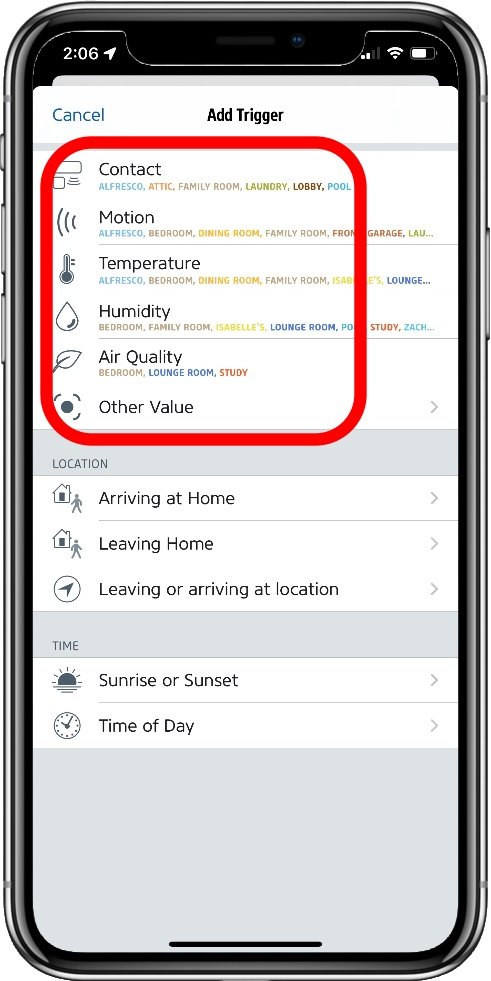
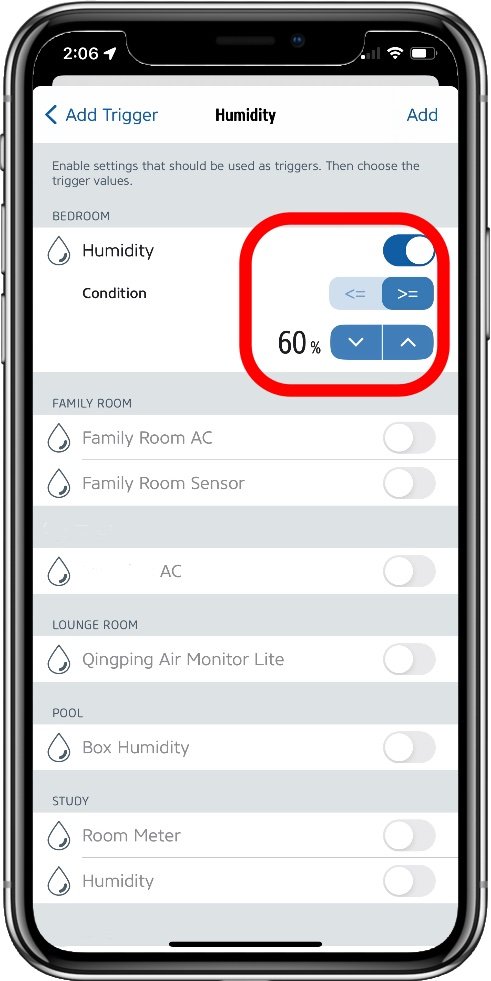
Tap Add Trigger.
You can select a common sensor type from the list, or use Other Value. These options just filter the accessories for easier selection.
Scroll through the list and select the room, then the sensor value you want to use.
Now simply select if you want to trigger when the value is above (>=) or below (<=) a specified threshold, and what that threshold is.
Tap Add at the top.
Tap Next at the top.
Tap Next on the Conditions screen.
Select the scenes you want to trigger with this rule and tap Next.
Enter a Rule Name.
Tap Done.
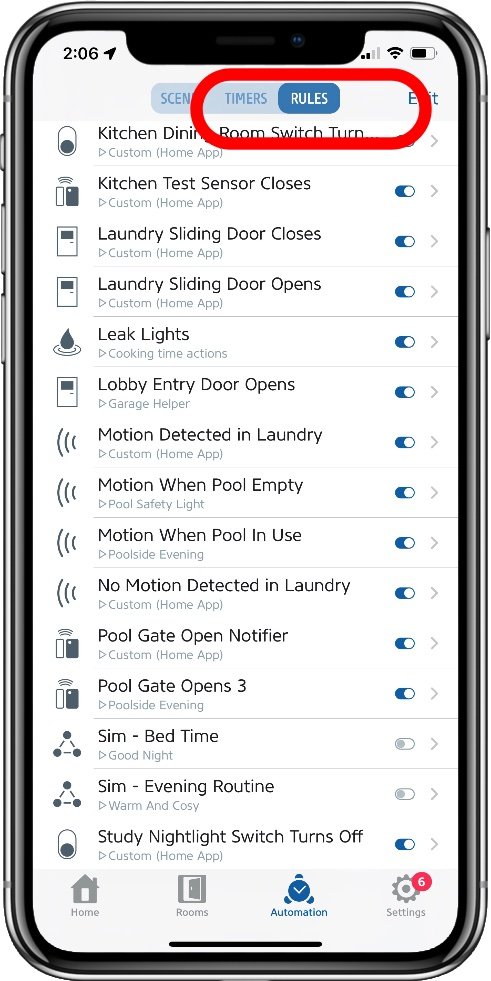
Find new automations under the Rules option
Use a common sensor type or choose Other Value
Select a sensor and set the threshold value desired
Using this process you can effectively trigger automation rules from any accessory value you like, not just sensor events that Apple’s own app exposes. This greatly increases the flexibility you have over your automation rules and can allow you to explore more intelligent state based home behavior rather than just event based actions.