
How to Set Up a NAS for Your Smart Home: A Step-by-Step Beginner's Guide
Want to keep all your smart home data in one place? A network-attached storage (NAS) device is the hub of your home, a storage device accessible to all authorized devices. And setting up a NAS is pretty easy, even if you’ve never used one before. Here you will learn how to build a NAS, pick the best one for your home, connect it to your smart home devices and secure your data with the right storage, backup and security practices.
What Is a NAS and Why Use It in a Smart Home?
A network-attached storage (NAS) device is a storage box that connects to your home network. Instead of plugging an external hard drive into one computer, you connect the NAS to your router. This lets everyone in your home access the same files from their computers, phones, tablets, or smart TVs.
Although NAS devices were originally designed for centralized file storage and backups, modern models can do much more. Depending on the hardware and operating system, a NAS for home can host applications, stream media, synchronize files between devices, run virtual machines or Docker containers, and even become the hub for smart home automation.
For a smart home, this means one device can handle several important tasks at once. You can use NAS storage for smart home projects to:
Store recordings from security cameras.
Keep automatic backups of computers, phones, and tablets.
Host Home Assistant for local smart home automation.
Stream movies, music, and photos to smart TVs with Plex or Jellyfin.
Share files with everyone in the household from one central location.
Instead of spreading your data across external drives and multiple cloud services, a NAS keeps everything organized in one place while giving you full control over your storage and privacy. Many models also support RAID, which can help protect your data if one drive fails. However, RAID is designed for availability, not backup, so you should still keep separate copies of important files.
How to Set Up a NAS For a Smart Home
Setting up a NAS may seem complicated at first, but most modern devices guide you through the process with a built-in setup wizard. Whether you choose a Synology, QNAP, Asustor, TerraMaster, or another brand, the basic steps remain largely the same. Follow the instructions below to configure your NAS for home and prepare it for file storage, backups, media streaming, and smart home automation.
Step 1: Install the Drives
Insert compatible hard drives or SSDs into the NAS. Open the drive bays, place each drive into its tray, and lock or secure it according to the manufacturer's instructions. Many home NAS devices offer tool-free installation, while others require a few screws.
Before you continue, make sure that:
Every drive is fully seated in its bay.
The NAS detects each installed drive during startup.
The drives have the same capacity if you plan to use RAID (recommended, though not required).
If you plan to use RAID, install every drive you want to include before the initial setup. Although many NAS models let you expand a storage pool later, the process often takes longer and may not be available for every RAID level or NAS model. Starting with all of your planned drives makes the initial configuration simpler and helps avoid lengthy rebuilds later.
Step 2: Connect the NAS to Your Network
Connect the NAS to your router or network switch with an Ethernet cable, then plug in the power adapter and turn the device on. Although some NAS models support Wi-Fi through adapters or built-in wireless hardware, a wired Ethernet connection offers much better speed, lower latency, and greater reliability for file transfers, backups, media streaming, and smart home automation.
Wait a few minutes for the NAS to finish its startup process. During this time, the device initializes the installed drives and starts its operating system. Many NAS devices use status LEDs to indicate when startup is complete, so check the user manual if you're unsure what the lights mean.
Before you continue, make sure:
The Ethernet cable connects securely to both the NAS and your router or switch.
The power and network LEDs indicate normal operation.
The NAS appears on the same local network as the computer or mobile device you'll use for setup.
Step 3: Complete the Initial Setup
From a computer or mobile device connected to the same network, open the manufacturer's setup page or discovery utility and follow the installation wizard. Most NAS manufacturers provide a simple web interface that guides you through the entire process. During the initial setup, you'll typically:
Install or update the NAS operating system.
Create an administrator account with a strong password.
Give your NAS a recognizable device name.
Configure basic network settings, such as the time zone and IP address (if needed).
Check for firmware updates and install them before you continue.
When the wizard finishes, the NAS should appear on your local network and be ready for storage configuration. Most setup wizards automatically detect the installed drives and verify that everything is working correctly before you continue.
Step 4: Create a Storage Pool and Choose a RAID Level
Create a storage pool, which combines one or more drives into a single storage space. If your NAS contains multiple drives, you'll also need to choose a RAID level. The best option depends on how many drives you have and the balance you want between storage capacity and data protection.
For most home users:
RAID 1 suits two-drive NAS devices and stores an identical copy of your data on each disk. Although you lose half of the available storage capacity, your files remain available if one drive fails.
RAID 5 suits NAS devices with three or more drives. It provides more usable storage while still protecting your data if one drive fails.
After you create the storage pool, the NAS may need some time to initialize or synchronize the drives. You can usually start using the device while this process runs, although performance may be lower until it finishes.
Keep in mind that RAID is not a backup. It protects your files from a drive failure, but it cannot restore data after accidental deletion, malware, ransomware, or physical damage to the NAS. Always keep a separate backup of important files. If your RAID array fails, RAID data recovery software may help recover your files before you make any changes to the array.
Step 5: Create Shared Folders and User Accounts
Create shared folders for the files and services you plan to store on the NAS. Common examples include documents, photos, videos, backups, surveillance recordings, and Home Assistant data. If multiple people will use the NAS, create separate user accounts instead of sharing the administrator account. You can then assign permissions for each folder so every user only has access to the files they need.
Step 6: Secure your NAS
Next, spend a few minutes on security. A few simple precautions can greatly reduce the risk of data loss or unauthorized access:
Use a strong administrator password.
Enable two-factor authentication (2FA) if your NAS supports it.
Install firmware and app updates regularly.
Use a VPN for remote access instead of exposing your NAS directly to the internet.
Monitor drive health with the built-in S.M.A.R.T. tools so you can replace a failing drive before it stops working.
Follow the 3-2-1 backup rule whenever possible. Even if you use RAID, it won't protect your files from accidental deletion, malware, theft, or fire.
If something goes wrong despite these precautions, NAS data recovery may still be possible. Common causes of data loss include accidental deletion, file system corruption, RAID issues, and hardware failure. If your NAS becomes inaccessible, stop using it immediately and avoid rebuilding or reinitializing the RAID until you've recovered your files, as these actions can make recovery much more difficult.
If you're unsure what to do next, ask for advice in reputable NAS or data recovery forums and online communities before taking further action. A few minutes of expert guidance can prevent mistakes that reduce your chances of a successful recovery.
Step 7: Install the Apps and Services You Need
Most NAS operating systems include an app store where you can install additional software with just a few clicks. You don't have to install everything immediately. Start with the services you plan to use right away, then add more applications as your smart home grows.
Step 8: Connect your smart home devices and services
Once your NAS is ready, connect the devices and services you plan to use. Depending on your smart home setup, you might connect:
Home Assistant to store automation data, backups, and add-ons.
IP cameras to save surveillance footage locally instead of paying for cloud storage.
Plex or Jellyfin to stream movies, TV shows, and music to smart TVs, phones, and tablets.
Computers and mobile devices to automatically back up photos, documents, and other important files.
Smart TVs and media players to access your media library across your home network.
Step 9: Test Your Setup
Make sure everything works as expected before you start relying on your NAS everyday. Copy a few files to the shared folders, access them from another device, and make sure any installed applications can connect successfully. If you have set up RAID, check that the storage pool displays a healthy status. Once these checks are done, your home NAS is ready to become your central hub for backups, media, and smart home devices.
Choose the Best NAS for Home
For most home users, the main difference between NAS devices is the number of drive bays. More bays mean more storage and greater flexibility for RAID and future expansion.
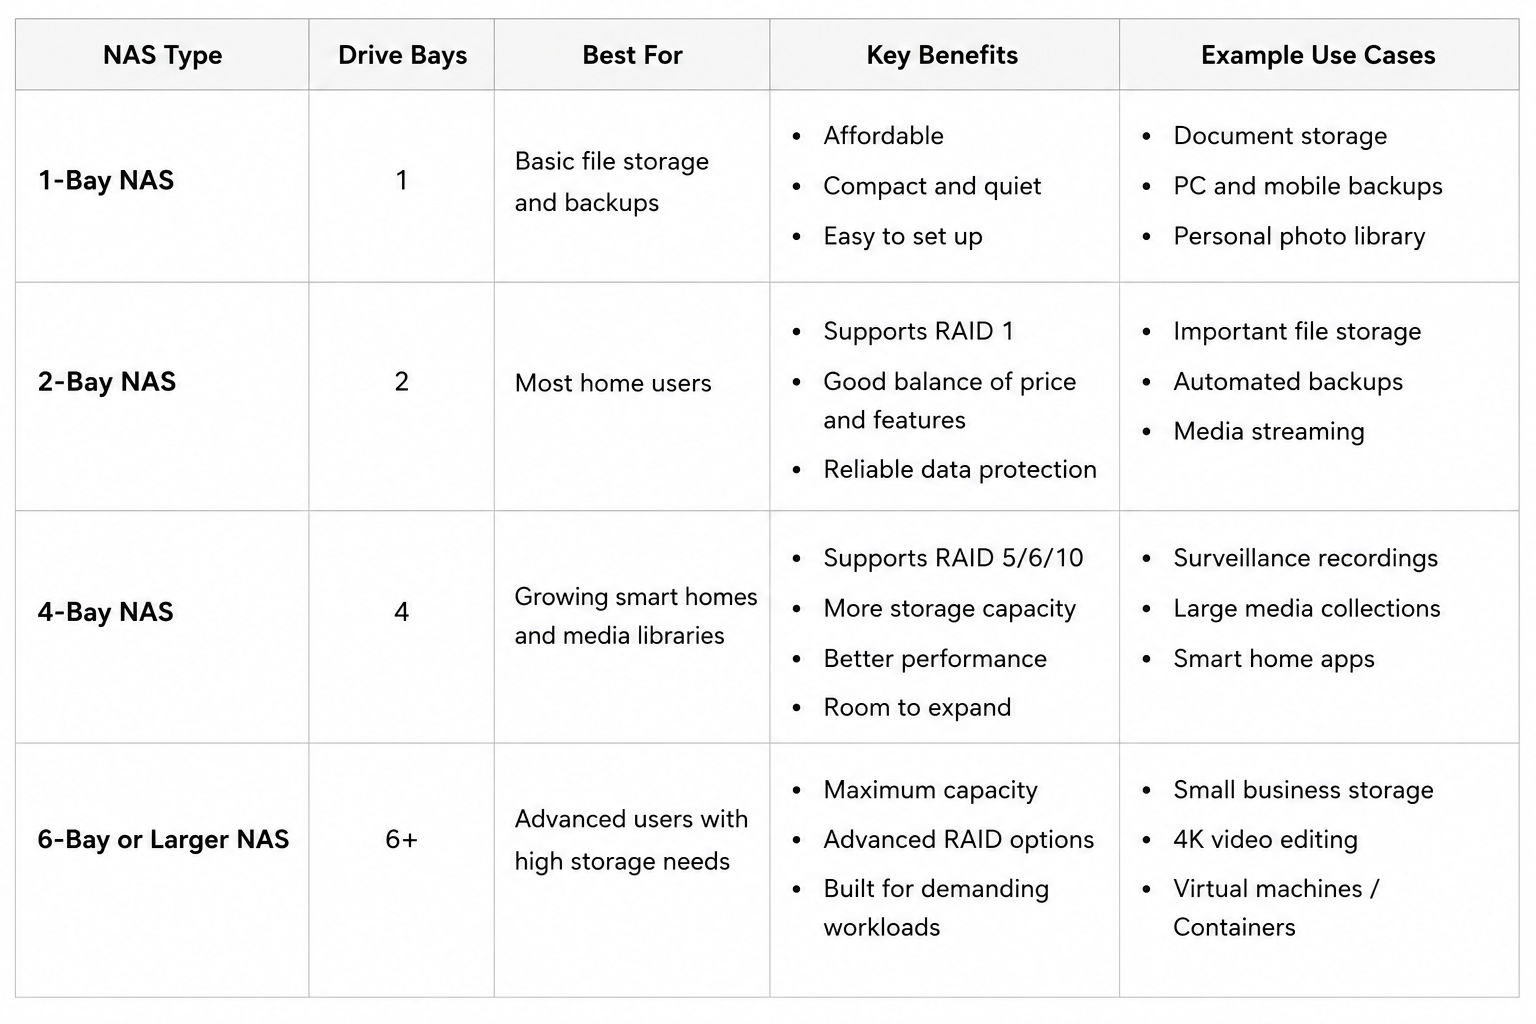
The most popular NAS brands are Synology, QNAP, Asustor, and TerraMaster. Synology is generally the easiest choice for beginners thanks to its intuitive software, while QNAP offers more advanced features and hardware options.
When you choose a NAS, consider how much storage you need, whether you plan to use RAID, and which applications you want to run. A 2-bay NAS with at least 8 GB of RAM offers a good balance of price, performance, and expandability, making it a solid choice for most beginners.
Closing Notes
A NAS can become much more than a place to store files. Once you complete the initial setup, it can serve as the central hub for backups, media streaming, security camera recordings, and smart home automation. Even a basic two-bay NAS provides enough storage and features for most households, while larger models leave room for future expansion.
Take your time during the setup process, choose the right RAID configuration for your needs, and don't overlook security and backups. A little planning at the beginning makes your NAS easier to manage and helps protect your data in the long run. With the right configuration, your NAS will provide reliable storage and smart home services for years to come.
FAQ
Can I use an old PC as a home NAS server?
Yes, an old desktop or mini-PC can make a great home NAS server if it has a Gigabit Ethernet port, enough drive bays, and sufficient hardware for your needs. As a general rule, 4 GB of RAM is enough for basic file storage and backups, while 8 GB is a better choice if you plan to stream media or run apps like Home Assistant.
You can install a free NAS operating system such as TrueNAS or OpenMediaVault to turn the PC into a fully functional NAS. Just keep in mind that older computers usually consume more power and take up more space than dedicated NAS devices, so they may cost more to run over time.
What's the best NAS setup for beginners?
For most beginners, a 2-bay or 4-bay NAS from Synology or QNAP is a great choice. These devices are easy to set up and include intuitive software for file sharing, automatic backups, media streaming, and smart home integration. A 2-bay model works well for personal use or small households, while a 4-bay model offers more storage capacity and greater flexibility if your needs grow. Before you buy, think about how much storage you need now and how much you might need in the future.
Do I need RAID for a home NAS?
Not necessarily. If you only need a central place to store files, you can use a single drive without RAID. However, RAID is a good idea if you want better protection against drive failure. For example, RAID 1 mirrors your data across two drives, so your files remain available if one drive fails.
Keep in mind that RAID is not a backup. It protects against hardware failure, but it won't save your files if you accidentally delete them, if malware encrypts them, or if the NAS is damaged. For important data, always keep a separate backup.
Can I run Home Assistant on a NAS?
Yes. Many modern NAS devices support Home Assistant through Docker or virtual machines. This lets you manage your smart home while also using the NAS for file storage, backups, media streaming, and other services. Before you install Home Assistant, check that your NAS model has enough CPU power and RAM to run it smoothly alongside your other applications.

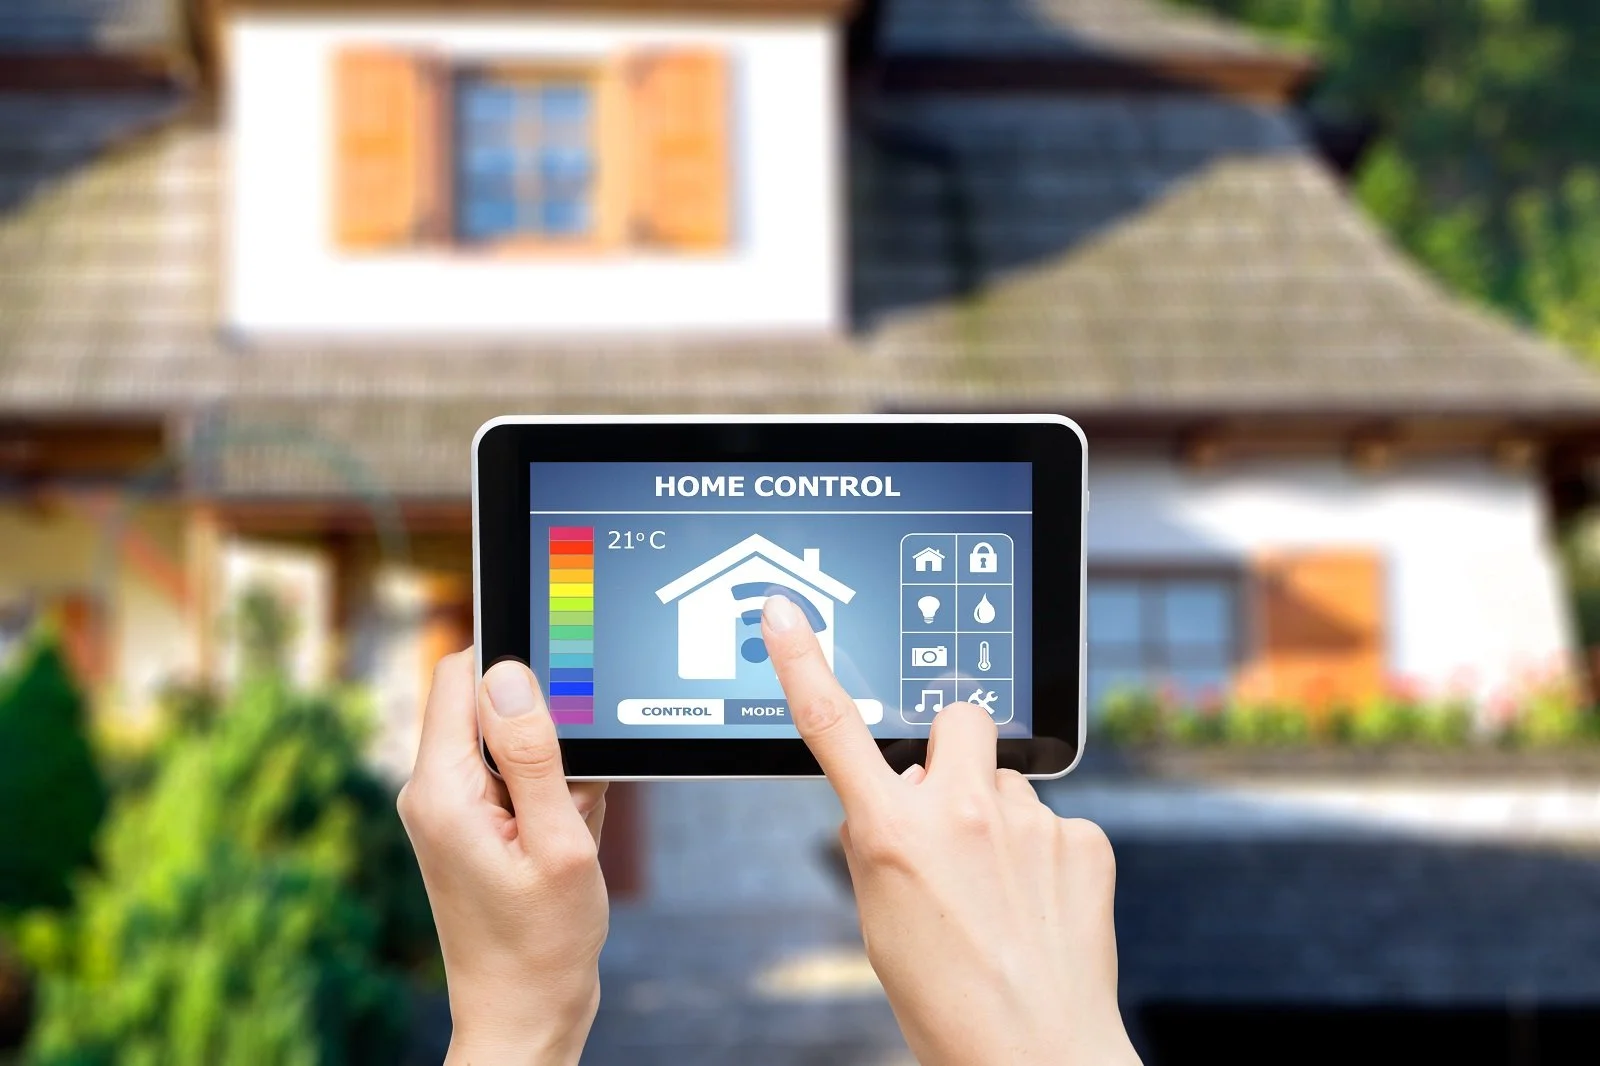


Our homes now run on many of the same building blocks as a modern office. Cloud services, connected cameras, networked locks, and dozens of always-on devices are now standard in a typical household, and the threats have followed them in.