Thinka Z-Wave Controller Review: Native Z-Wave Support For HomeKit
Z-Wave has been around for a while now and has the distinction of being the oldest smart device communication protocol that is still in widespread use. There are a lot of certified Z-Wave devices on the market, and some of these are fairly unique, either in capabilities or design.
There are plenty of smart home platforms that can add Z-Wave devices, and with the right controller you can even access them via Alexa and Google Assistant, but HomeKit users have been left out.
When Apple designed HomeKit, the choice of supported communication protocols was driven by what was readily available on Apple devices, those that would be used to control the smart home. That means we’ve been limited to Bluetooth and Wi-Fi, although third parties like Philips Hue and Aqara have added bridge devices that bring access to ZigBee as well.
Now European company Thinka has done the same for Z-Wave with their ‘Thinka for Z-Wave’ controller, finally opening up a broad selection of Z-Wave devices to HomeKit. While the Thinka controller also supports Alexa and Google Assistant, I’ll be focusing on HomeKit for this review simply because that’s the primary market for this device. Frankly there are better options for the other platforms already out there, and for less money.
Thinka for Z-Wave Controller Overview

Thinka for Z-Wave
Key Features
• Supports HomeKit, Alexa, and Google Assistant
• Z-Wave Plus 700 series
• S2 Security and SmartStart
• Simple App Management
• Supports most Z-Wave devices

✔ Latest Z-Wave standards
✔ High build quality

✘ Expensive
✘ User experience could be better
Like most hub devices, the Thinka for Z-Wave controller is a simple flat, square box that can be placed out of the way somewhere, although it does require wired Ethernet for connectivity, no Wi-Fi option here, so that will likely be a limiting factor for where you can put it.
The controller supports the newest 700 series Z-Wave Plus chips with SmartStart and S2 security, so you’ll be able to use anything on the market, and SmartStart makes it super easy to pair Z-Wave by just scanning a QR code. HomeKit allows up to 150 child devices to be added, although the controller itself can theoretically handle 300.
A power pack and Ethernet cable are provided in the box, along with the mounting bracket and some stick-on feet. You can choose to place it on a flat surface, or clip on the wall mount bracket are screw it in somewhere.
Power is provided visa a USB-C port, and the included power brick has interchangeable UK and European socket types. If you want to use it elsewhere you can simply use a 15W USB charger to cover the required load. In addition to power and data, the back of the bridge also has a USB port, although that’s not used for anything in normal usage, presumably it’s for service use.
Beyond that the device is clean and silent, with a single unobtrusive LED indicator and no buttons present. That can seem a little unusual, but the requirement to use Ethernet for the networking connection allows for a simpler set up experience.

Thinka for Z-Wave box contents
Installation and Setup
I found getting the Thinka for Z-Wave controller set up was fairly straight forward. Once it’s powered up and connected to the router I simply went to the website provided in the box, set up a password for my Bridge and I was good to add the first Z-Wave device.
The best way to do this is by using the Thinka companion app on your iPhone. Just tap the option to add a new device, and then, if the device supports SmartStart, scan the QR code and it will be paired immediately.

The basic Thinka companion app
Update message when syncing devices

Remote access permission for support
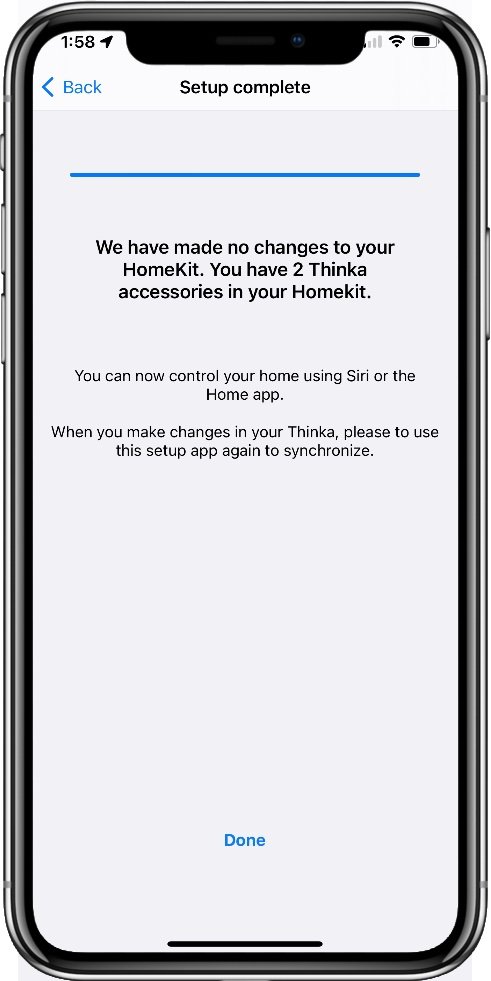
You’ll want to pair the bridge with HomeKit of course, and this didn’t go as well as I expected. The app tries to do this for you by asking you to select a home (from your HomeKit data) and initiated the pairing process, but it kept telling me I couldn’t use the home I selected (I only have one).
After some frustration I thought to look at the bottom of the bridge itself and, sure enough, there was the normal HomeKit QR code. Scanning this with the Home app got the job done immediately, although the app continued to tell me it wasn’t paired for some time. Why the instructions don’t just direct you to do this the normal way, I don’t know.
If you’ve added any Z-Wave devices prior to pairing with HomeKit, they all get added at the same time, with the Home app running through each to choose the usual name and room assignment. Thankfully this part all went very smoothly, and devices I’ve paired subsequently appear in HomeKit automatically.
How does It Stack Up?
Overall, the Thinka controller has been working very well for me, with easy device pairing and fast response times as you would expect from Z-wave. The interface with HomeKit seems to be equally good, with HomeKit commands and device status changes going between the two quickly and reliably. This is good, as it’s the whole reason for getting one of these devices, and especially so given one of my two key gripes.
Those gripes are cost, and user experience. On the cost side, the Thinka for Z-Wave is eye wateringly expensive, hence why I’m glad it actually works well.
Given that it’s a standard Z-Wave controller with only an Ethernet interface and HomeKit certification, it’s hard not to think the pricing is largely to do with their exclusivity in this niche. Yes, HomeKit certification adds a fair bit of overhead, but given the Homey Pro comes in at about the same price point and includes virtually every smart home protocol, and even its own voice assistant, you can see where I’m coming from. That’s not to mention the various non-HomeKit controllers that come in at less than half the price with ZigBee and Wi-Fi as well.
Z-Wave Device Management
Cost aside, the user experience is not as cohesive as it could be. I liked using a web portal to boot strap the setup process is perfectly fine and provides an easy way to perform that without having the end user mess around with things on the device. Beyond that I would expect the rest of the administrative functions to be in the app. At least the controls for devices you’ve added should be there, but that’s simply not the case. The app is only used to pair with HomeKit (theoretically), sync devices and rooms to HomeKit, pair new Z-Wave devices, and change your controller password.
To be fair, given that we’re using this primarily as a bridge device we don’t need much more than this on a day-to-day basis, which the app provides just fine, but there is a whole lot of Z-Wave and device management functionality relegated to the web interface which means you’ll probably be using both to some extent.
Z-Wave has always been a more technical protocol and can require some manual configuration in the case of some devices, so having that in a unified place would be a benefit. There is a lot of stuff in the web interface to explore which makes the app look particularly spartan.
For individual devices there is device diagnostic information, setting wake up intervals, device parameters, and network health data. The controller’s own firmware management and updates, restarts, and time zone is in there, along with the factory reset option. You also have some Z-Wave network options like optimizing the routing, manual provisioning list management, and the ability to add the controller as a secondary to an existing network.
That’s not an exhaustive list but hidden in there is one for selecting the Z-Wave frequency band to use. This is interesting because the marketing material only states the Europe region beginning at 868MHz. I haven’t been able to confirm whether the various other bands work as I’m limited to the Z-Wave devices I have, but the support documentation does state that you can choose whichever one you want.
It’s notable that even with the US band being available, they specifically state they do NOT ship to the United States at this time. I’m assuming there’s an regulatory import restriction in play here, and they have noted an intent to create a US model at some point.

Thinka web interface device list

Some example device settings in the web interface

Thinka web interface menu and bridge settings
Supported Device Types
Being a generic bridge device, you might be asking which device types are supported for use in HomeKit. This is a good question as not all Z-Wave commands sets are going to neatly map to HomeKit accessroy classes. Digging into Thinka’s support documentation reveals the following:
Beta Support
Push Buttons
Outlets
Adaptive Lighting
Garage Doors
Thermostats
Sensors
CO2
CO
Leak
Smoke
Confirmed Supported
Switches
On/Off
Scene Switches
Lights
Brightness
Color
Temperature
Blinds
Current Positions
Open/Close
Target Position
Sensors
Temperature
Humidity
Contact
Motion
Presence
Light
The Verdict
The Thinka for Z-wave controller provides the best way yet to get Z-Wave support for your HomeKit setup. Installation is fairly trivial, and the device performs well in terms of both command response time and updating HomeKit status data for things like sensors. You get full support for the latest Z-Wave technologies like S2 security and SmartStart, and the ability to pre-provision devices where the installed location is going to be difficult to get to later.
The split between a handy mobile app for basic functions and a web interface for pretty much everything else is a bit frustrating, and this could be done better. Ultimately, though, it’s not going to hinder your use of the device as the whole point is controlling Z-Wave accessories through HomeKit anyway, and at least we have all the technical details available to us if troubleshooting devices is required.
The lack of US shipping and the high price tag are the biggest downsides for me. If you’re primarily using Alexa or Google Assistant, you’ll be better off going with a cheaper option that supports more than just Z-Wave, but for HomeKit the other options are messy and equally expensive, so this is going to be your best option.
That said, given native HomeKit support for the Thread protocol and the upcoming Matter smart home standard you will be better off going with that tech for fast, low power, highly responsive smart devices. If you have existing Z-Wave devices, or there is something that you just have to have that only uses Z-Wave, then Thinka is the right choice.