6 Months with Rachio 3 and HomeKit
When you buy through links in this article, I may earn an affiliate commission. Learn More.
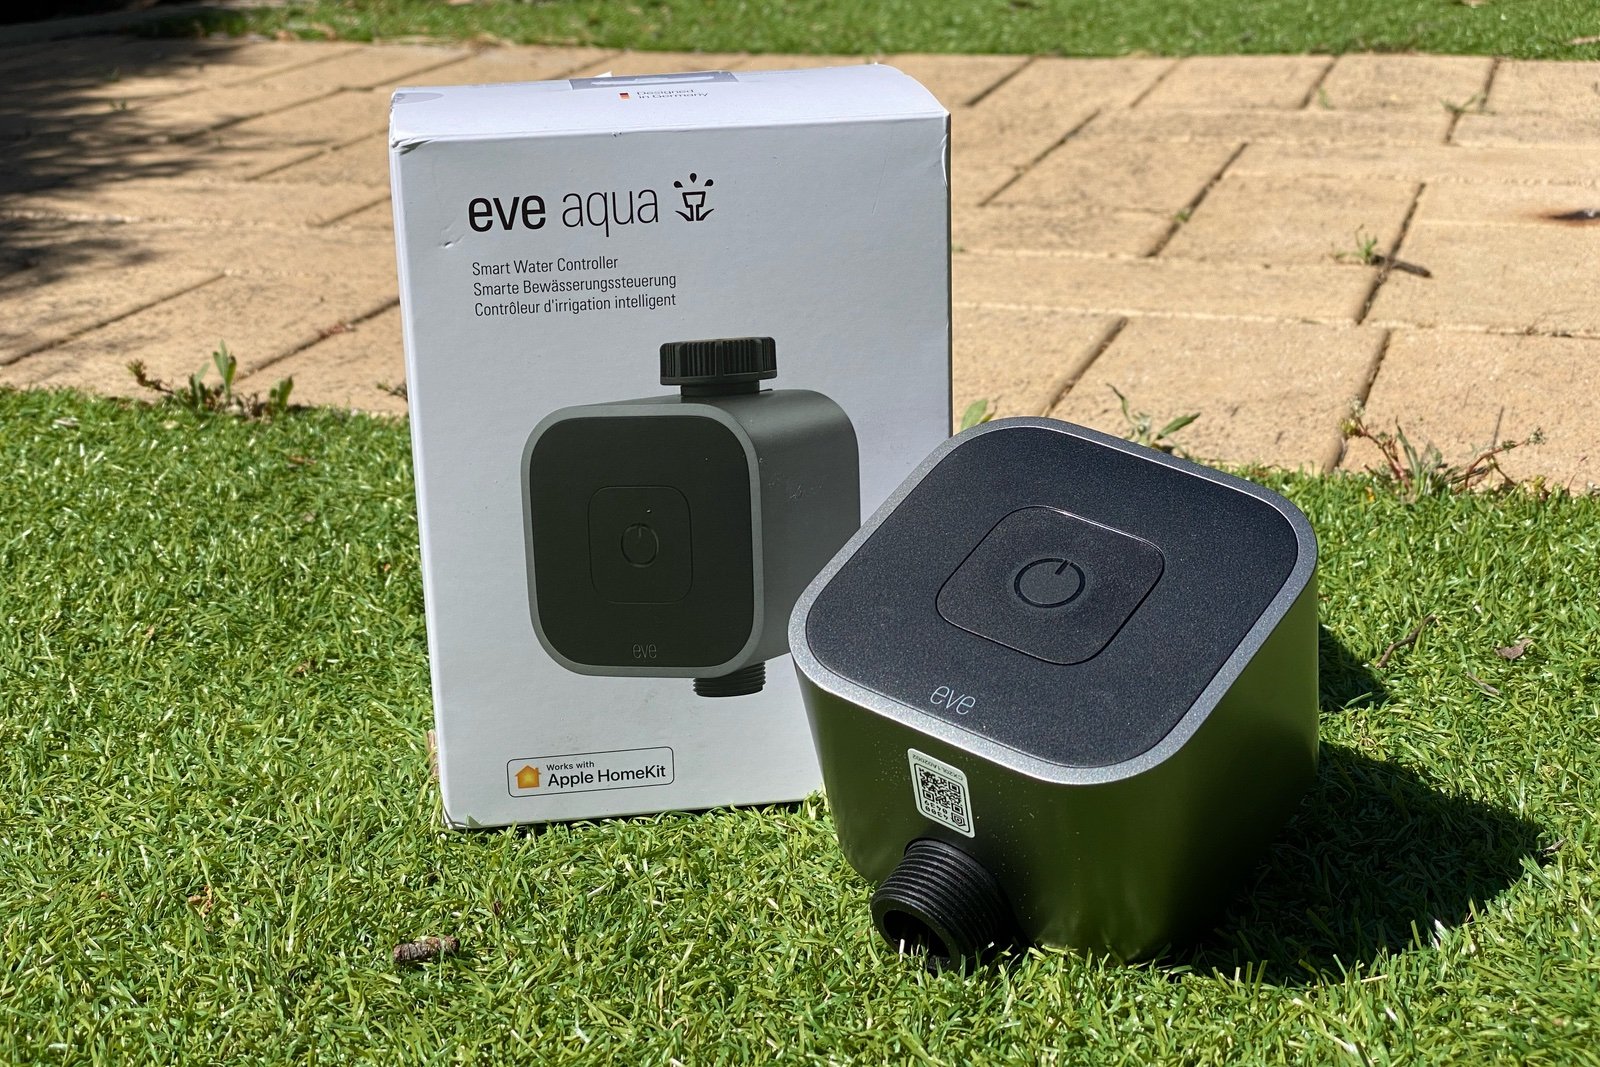
Smart irrigation controllers are starting to become more common place, with a range of device options on the market today. Typically these devices have their own app for control and configuration, and incorporate external weather sources to provide more intelligent autonomous operation. A few of these also support third party smart home and voice assistants. But at the time of writing, only 3 have added support for Apple’s HomeKit platform since the support for valve devices was added in iOS 11. Rachio was the second to offer support, after the HomeKit exclusive Eve Aqua tap controller, and the first true irrigation controller to do so.
Hardware
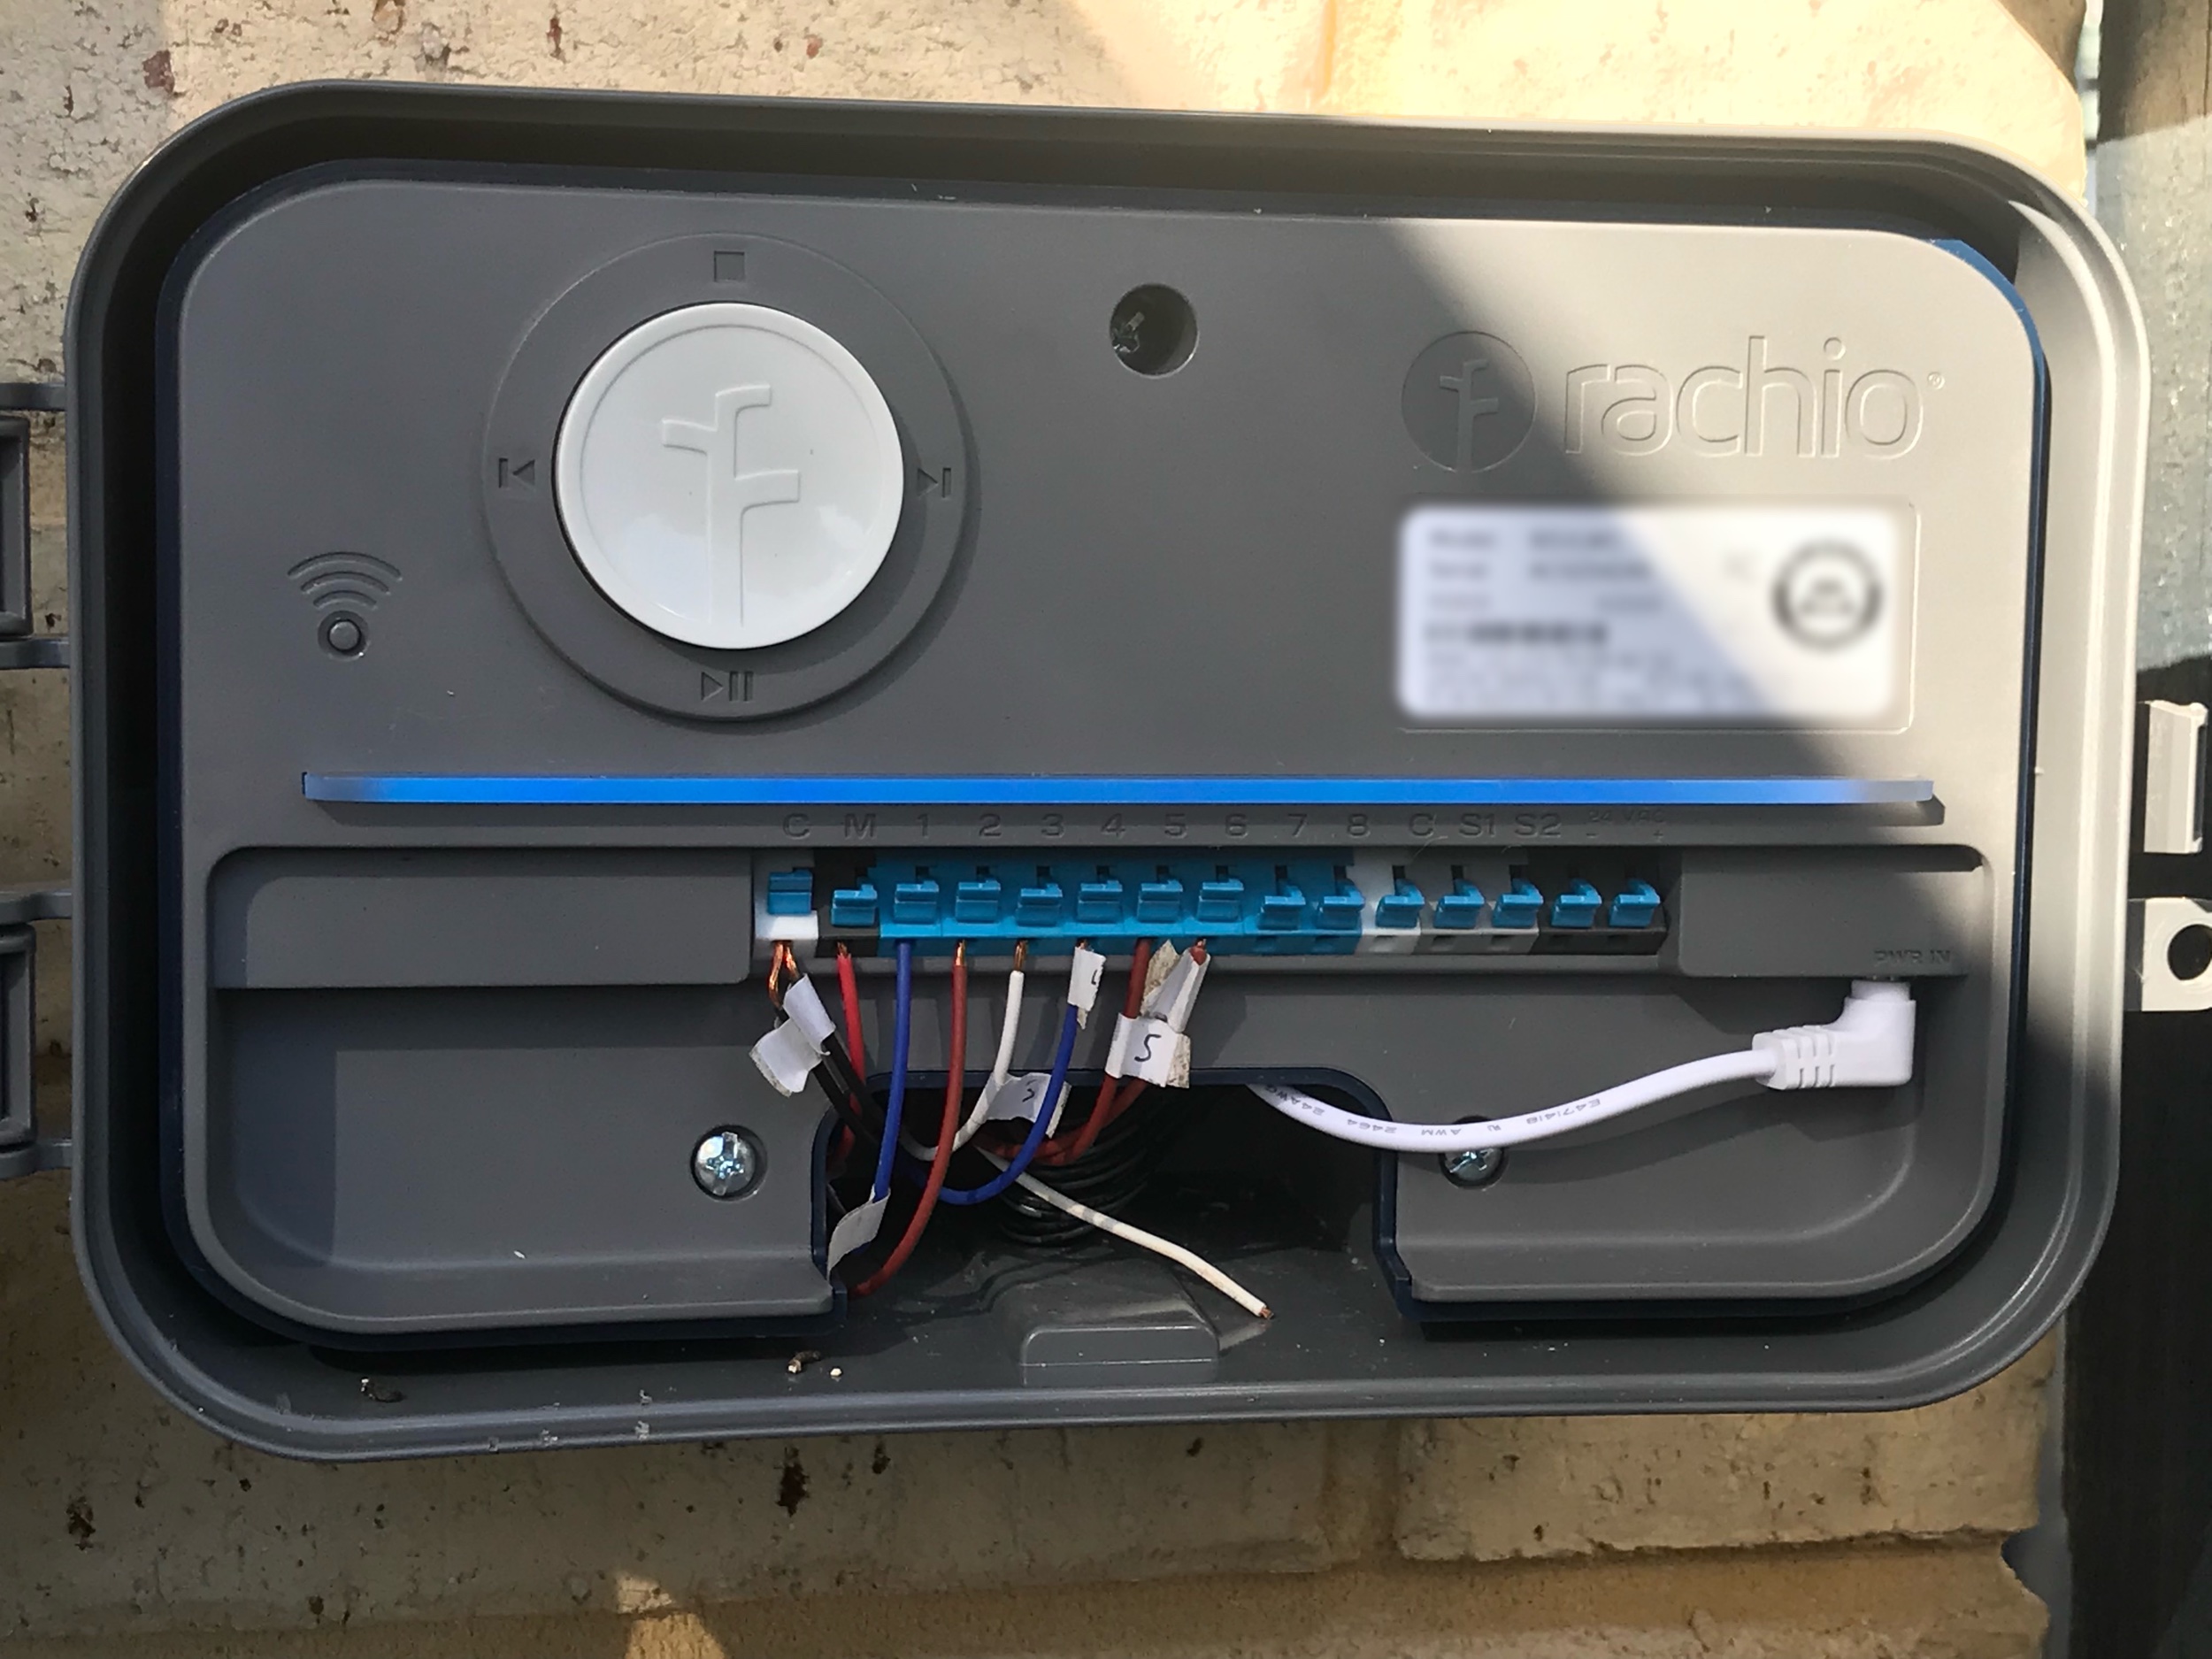
Before we look at the HomeKit experience specifically, it’s worth looking at the Rachio 3 itself. In short, this device is awesome. As one user commented in the forums, if Apple was to build an irrigation controller this is what it would look like. The physical device itself is slick and minimalistic, with a smooth white faceplate adorned only with a simple 4 way button and a light strip across the center which servers as a status indicator.
The faceplate is attached by magnets to the body of the device, which makes it secure but simple to open in order to access the wiring terminals. Everything you need to access is located on the front of the device, with a large cavity along the bottom to pass wiring through to the back and out to where it needs to go. There are simple spring clip terminals for each wire, with support for a master valve or pump relay (configurable) and two wired sensors (if you have such). The Rachio 3 also supports Rachio’s optional wireless flow meter, which allows the device to detect leaks in the system and warn you. The 24V AC power connector is located on the front as well, so there’s no awkward maneuvering needed during install or later adjustments. The whole design is elegant and well thought through, and comes with all the mounting hardware required as well.
The Rachio 3 is designed for internal use, so it’s not weather proof. That’s not an issue, though, as Rachio also sells a weather proof outdoor enclosure which includes a seperate enclosed compartment for the mains wiring feed (including a pre-installed power outlet) and room for the power supply that sits behind the device itself once installed in the enclosure.
The enclosure is a quite deep, both due to the spaced required to stow the power pack behind the controller, and a the standoff from the wall provided by some small feet. This does ensure you have plenty of space to store excess cable in the back, and the enclosure itself is solid and seals well. Mounting is a simple matter of drilling three wall plugs at the designated locations of the build in mounting holes and using the provided screws. The controller is then attached as normal using it’s own provided screws into the built in mounting points to match.
All of this makes set up a breeze, and in most cases Rachio says you can replace an existing irrigation controller yourself in less than 30 minutes. Using the very nicely designed Rachio app, it’s easy to set up the device on your WiFi network, and enter the basic details for the device. You’ll need a Rachio account as is typical of smart devices, which is used to manage access to the app, and thus the device configuration, and the weather service. There is support for account sharing, so you can provide controlled access to other family members as well if required.
Software
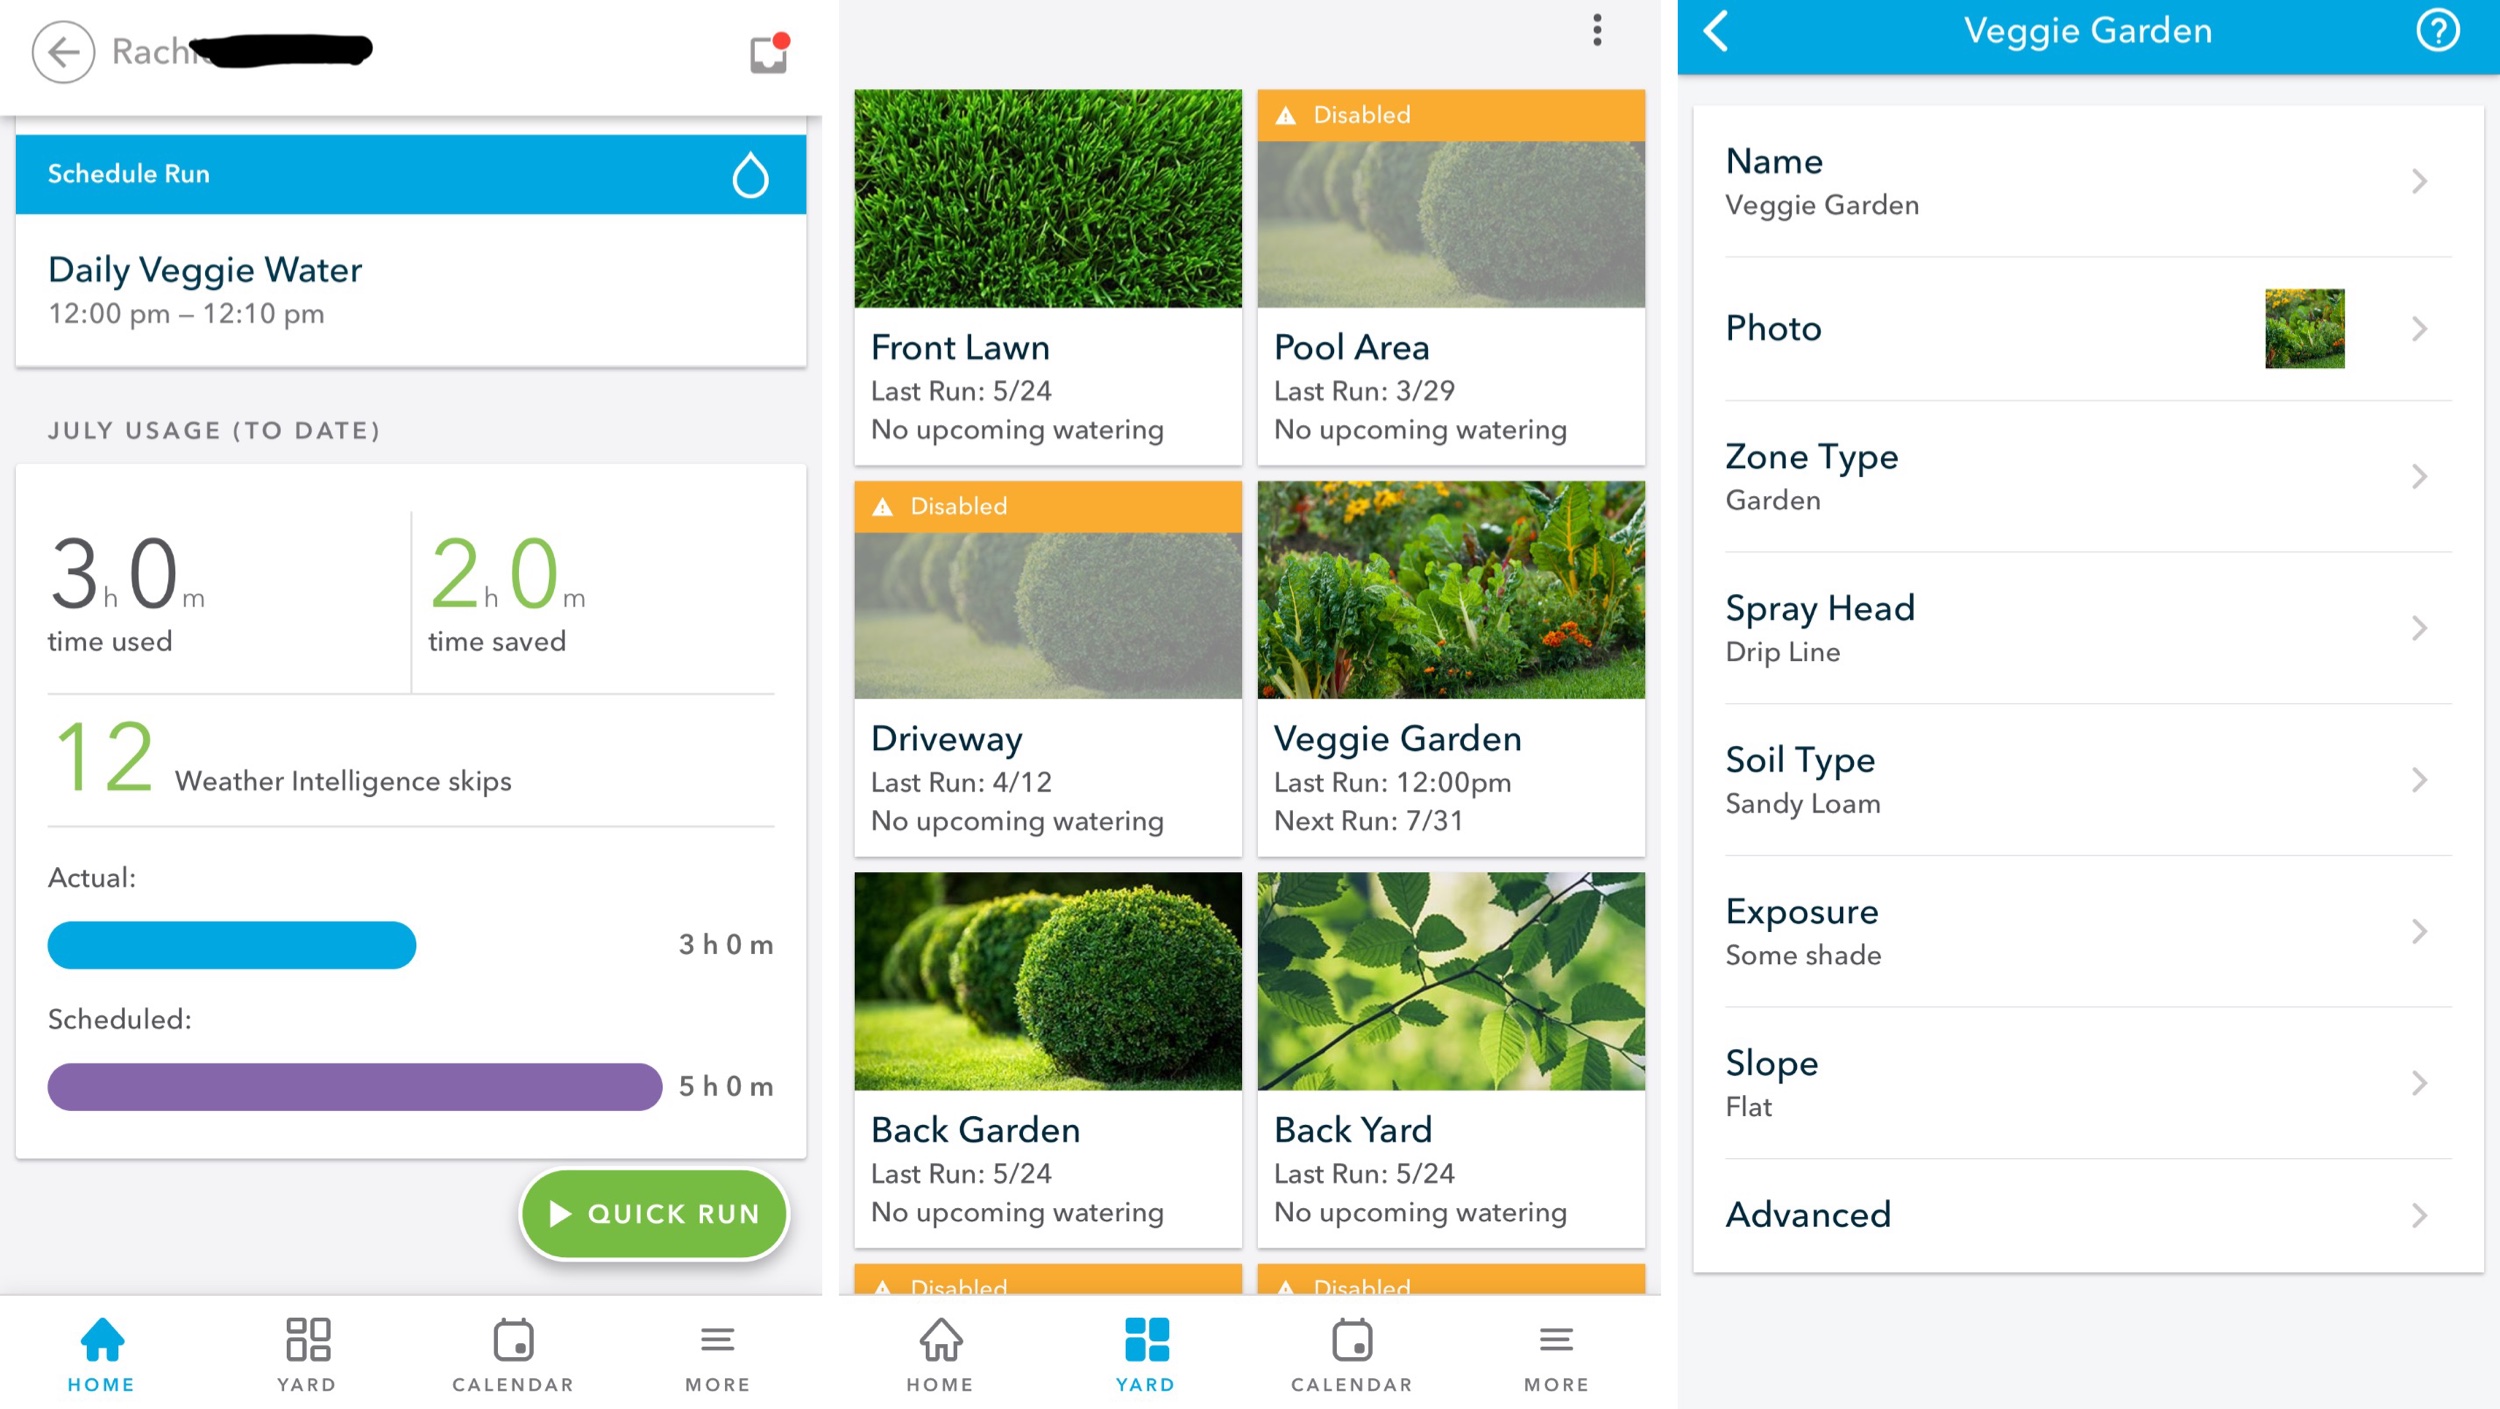
Now we’re in the app, we can started to realise the true potential of the Rachio 3. You start by creating the zones that you’ve wired up, which includes specifying a number of details about the kind of watering required. These details are used by the Rachio to determine various autonomous behaviours based on likely water retention, evaporation, plant type and so on. This is provided by telling the Rachio the general type of plants in each zone, the type of irrigation in use (such as the type of sprinkler head or drip line), the soil type, slope ands approximate amount of shade.
If you want to get really hands on, you can use the advanced setting, which allow you to specify surface area, root depth, available water, nozzle flow rate and then specify allowed depletion levels, crop coefficient and efficiency percentages. I wouldn’t worry too much about those though, the standard details are quite comprehensive and work very well. Using these details the Rachio will determine watering requires for each zone based on their Weather Intelligence Plus service. This service pulls data from Weather Underground, including the hundreds of thousands of personal weather stations included in that data set. This results in aggregated weather observations from your immediate surroundings to ensure accurate wind, temperature and rainfall data and trending.
If you have your own connected weather stations, you can add that to Weather Undergound as well with a free account, and add that data to the set. The Rachio weather settings do allow you to select a specific station to use, so you could just use your own, or one close by. Rachio recommends leaving it on the weather network. I did set up a connected weather station and successfully had it reporting in the app, but I’ve found that I did get more accurate predictive behaviour when using the weather network.
That predictive behaviour comes from combining the zone details and comprehensive weather data to employ dynamic watering schedules, and some additional features called Rain Skip, Wind Skip, and Freeze Skip. These three skip scheduled watering when rain, wind, or temperature are beyond set thresholds (which you can configure).
The level of dynamic control applied to the watering schedules depends on how much freedom you wasn’t to give the software. You can create any number of schedules with very flexible timing. You start by specifying if you want a fixed schedule or you want the zones adjusted monthly for seasonal changes, or fully dynamic based on weather and zone settings. Watering days can be specifically selected, odd/even, or whenever the Rachio determines is necessary.
Timing can also be automated by specifying to start or end before or after sunset/sunrise, or at specific times. The former will calculate the start times based on the calculated watering times for all the zones combined. Additionally there is a cycle and soak feature, which will optionally break up the watering times to allow the water to soak in properly and prevent run off. Once all that is done, the Rachio will calculate optimal watering times for each zone, and allow you to change them before saving the schedule.
Once scheduled you can vary the controller behaviour in a few ways. You can disable specific zones as required (if you are renovating, for example), or disable any one of the schedules manually. You can also set the device to standby entirely so it takes a break. Depending on your situation, this may be the best way to stop watering during winter.
The Rachio App - Home, Yard, and Zone Settings pages
This may not be necessary, though, as the Rachio 3 does an excellent job of determining watering requirements, and can reliably predict rainfall in advance to initiate Rain Skip on a given day. It will also skip watering if it determines that the soil moisture level will be sufficient until the next scheduled watering period. As a result, you’ll see significant water savings start to add up without any risk to your plants. These savings are reported on the app home screen for the month, showing schedule watering time versus actual, and the number of weather intelligence skips used.
I have to observe strict water restrictions, so I have found disabling the main schedule to be effective, allowing a smaller drip line zone used for vegetables to keep running on a seperate schedule. The Rain skip feature ensures even that doesn’t run unless necessary.
HomeKit Support
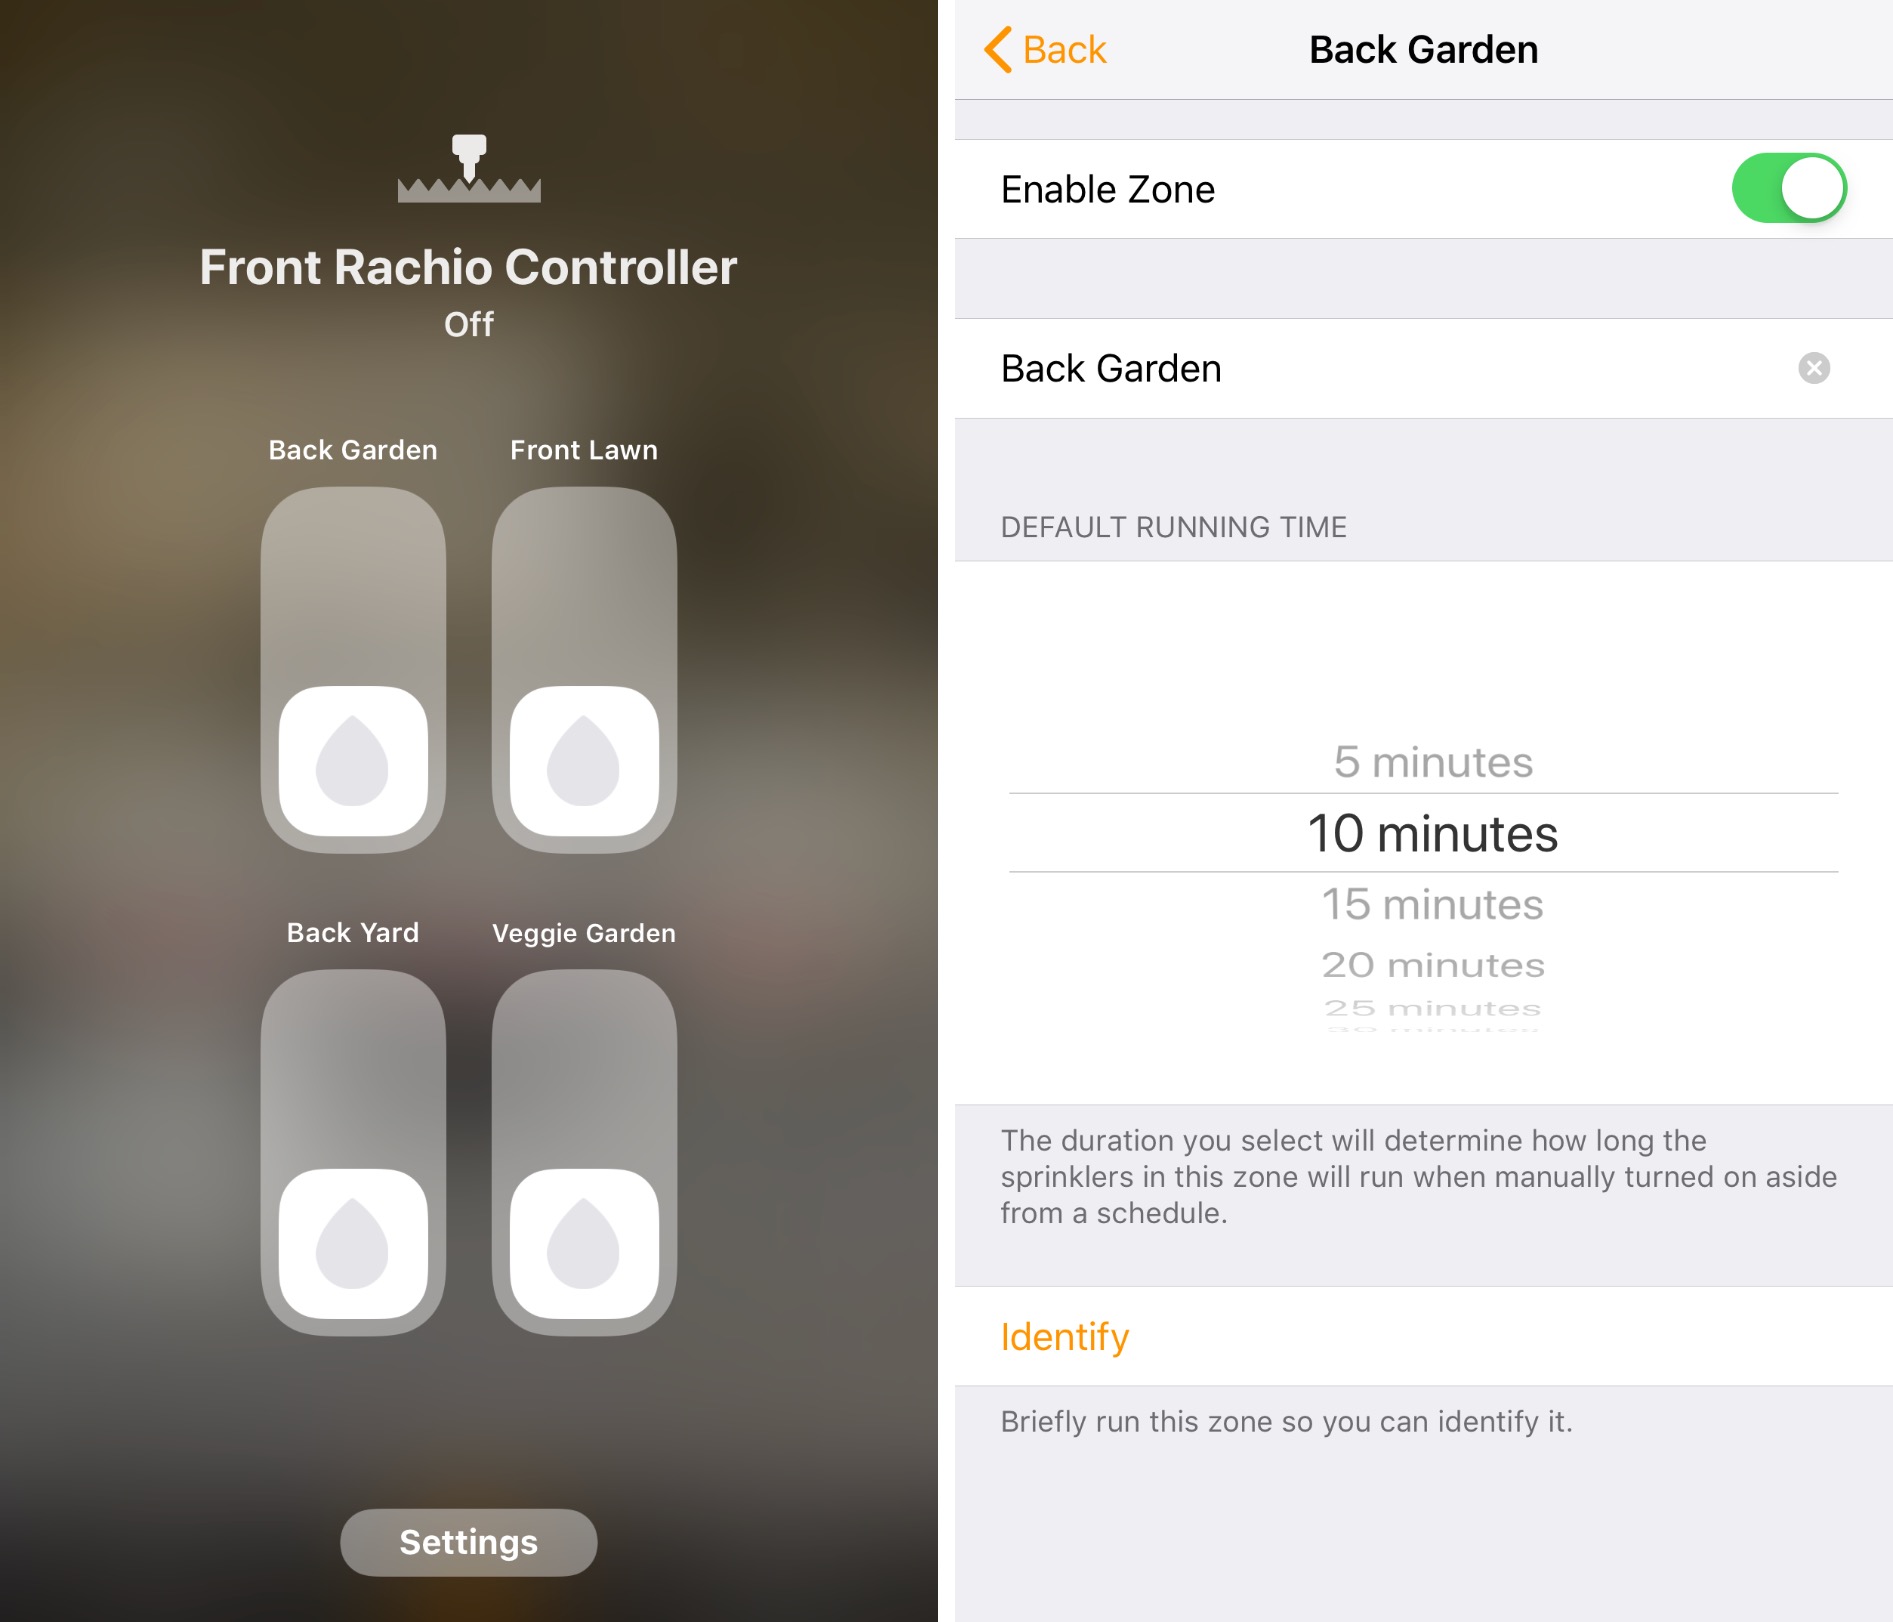
Apples implementation of sprinkler and valve support in HomeKit is a little lacklustre. You might expect it would treat a valve much the same way as any other on/off type device in that you could add it to scenes and schedule it’s behaviour through automations. In actual practice, valve type devices can’t be added to scenes or automations at all, and scheduling needs to be done through the device makers app and not through HomeKit. HomeKit is aware of a schedule being in effect and can show as much, but that’s it. Conversely, you can specify a default run time for a valve through HomeKit, which is used when you turn on a valve via Siri (assuming you don’t specify a duration in the command).
The presumed reason for this is that Apple wants the devices to manage their own scheduled operation and not be dependent on connection to HomeKit. This ensures that watering will happen regardless of connectivity issues and likely gives a more reliable user experience where it counts for this type of device.
As for what you get in the Home app, individual zones are not shown in the Home or Room views, but rather only when looking at the device control screen (long tap on the device icon). So with the Rachio, you’ll see all the enabled zones when you long tap on the controller. From there you can turn each one on or off like a normal switch, and from the Settings screen for the device, you can specify the default run time for each zone.
Rachio 3 as it appears in the Home app
Siri handles these pretty much as you’d expect. You can turn on a zone by name and optional specify a duration, and turn them off the same way. You’d say something like “Heat Siri, turn on the front lawn sprinklers for 20 minutes”.
This would be useful if you had zones you only needed to use on an ad-hoc basis, and thus weren’t included in a schedule. Theoretically you’d also use this to pick up extra watering if you needed to under specific conditions. In practice, you’ll likely never do this as the Rachio 3 does such a good job of managing the watering schedule and times required.
The controller uses WiFi to communicate with HomeKit, so it needs to be installed on your main WiFi network to able to communicate with your home hub and iPhone. Pairing was no issue, and in the time using the device so far, I’ve only had one issue that involved losing pairing after a black out. This may have been more related to the WiFi connection though, as I needed to reconfigure the WiFi network again on the Rachio to get it working.
Conclusion
The Rachio 3 is an amazing irrigation controller. Not only is it logically designed and simple to install, the app is well laid out, clean and very functional. The automation features offered by the controller have given me the most hands off, efficient watering control I’ve ever experienced. The HomeKit support works fine and reliably so, but it’s fairly limited by what Apple has provided.
This integration for valve controllers is really about adding Siri voice support more than anything else. I’m sure there’s use cases for that, but Rachio’s intelligent watering control is so good as to never really need any manual intervention for the vast majority of users.
The Rachio 3 is available now in 8 zone and 16 zone models, with the optional flow sensor and outdoor enclosure sold separately. You can pick them up directly from Rachio, or on Amazon.

