The Eve Cam is a top choice for HomeKit Secure Video: Review
When you buy through links in this article, I may earn an affiliate commission. Learn More.
Eve Systems provided the sample for this review.
HomeKit device maker Eve Systems continues to expand their lineup of devices exclusive to Apple’s smart home platform with the addition of their first security camera, the Eve Cam. I’ve found Eve products to be generally of high quality, so I had high hopes for one of the first iCloud recording cameras to hit the market. Eve products are pure HomeKit, so there’s no third party account signups needed. That’s a real plus for me.
Being focused on HomeKit Eve Systems does not run their own cloud services, instead relying on HomeKit’s secure integration with iCloud. As such, bringing a camera product to market was not really feasible while still being competitive with third party offerings as they couldn’t offer cloud recording. Apple’s introduction of HomeKit Secure Video changed that, and the Eve Cam was quick to follow.
Eve Cam
✔ HomeKit Secure Video
✔ 1080p camera
✔ Night vision, 2 LEDs
✔ Two-way talk
✔ Magnetic mounting
✔ No third party account required
✘ Indoor only

Up Front Considerations
Indoor or Outdoor
Many of these small smart cameras are indoor only, as is the Eve Cam. That’s fine as it can keep the cost down, but if you’re looking at outdoor installation you’ll need to confirm a model with weather proofing. Outdoor models are usually bulkier to accommodate the physical structure required for exposure to the elements, but there are occasionally indoor models that have water proofing as well.
HomeKit Support
Do you want a camera that supports HomeKit? First and foremost when choosing a HomeKit compatible camera is checking to see if it supports HomeKit Secure Video or not. Without that you’ll only get basic notifications and live streaming, not recording. Cameras with that limited support usually offer their own recording service, either with local storage or in a third party cloud, but that can only be accessed with their own app and may incur a subscription cost.
With HomeKit Secure Video, you get much better support, with rich notifications, object detection, and secure video recording to iCloud. However, this requires a couple of things on your end.
Prerequisites
Many smart security cameras just work on WiFi using their own cloud service, while some require a hub. For HomeKit Secure Video you need a home hub in order to handle the video processing securely in your own home, and you need a suitable iCloud storage plan.
Two of the plan tiers support camera storage, which is essentially an add-on to the plan rather than a separate cost. The camera recordings do not count against your storage limit, the plan level simply determines how many cameras you can run on your account. You’ll need a 200GB plan to enable 1 camera, or a 2TB plan to support up to 5.
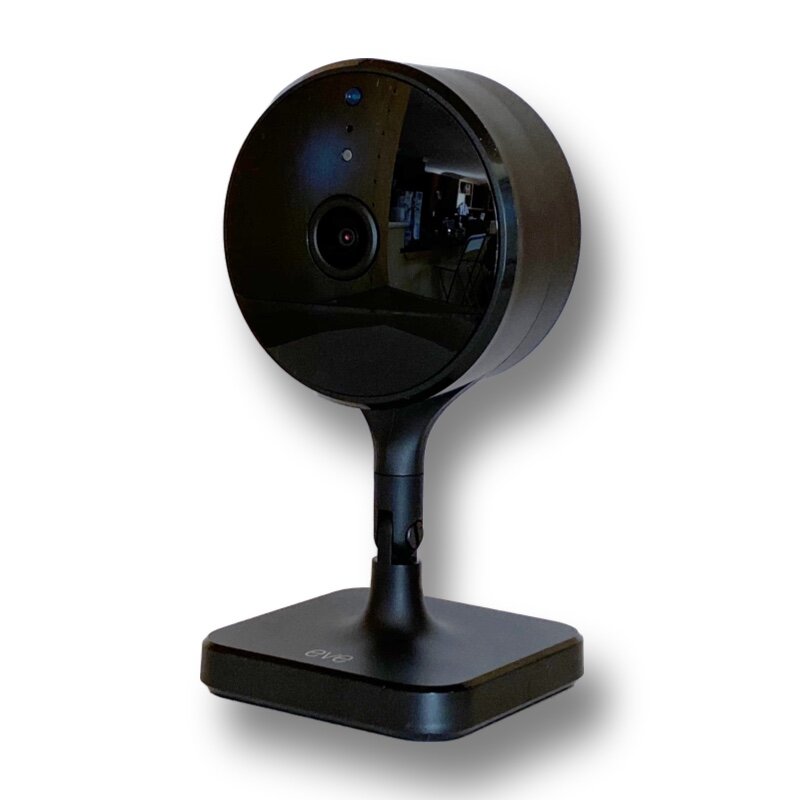
What is the Eve Cam?
Eve Cam is an indoor security camera utilizing HomeKit Secure Video technology to provide robust privacy and security while still allowing you to monitor the inside of your home. The camera provides all the usual features expected of a modern security camera, and leverages a HomeKit home hub to provide fast and accurate person and animal detection.
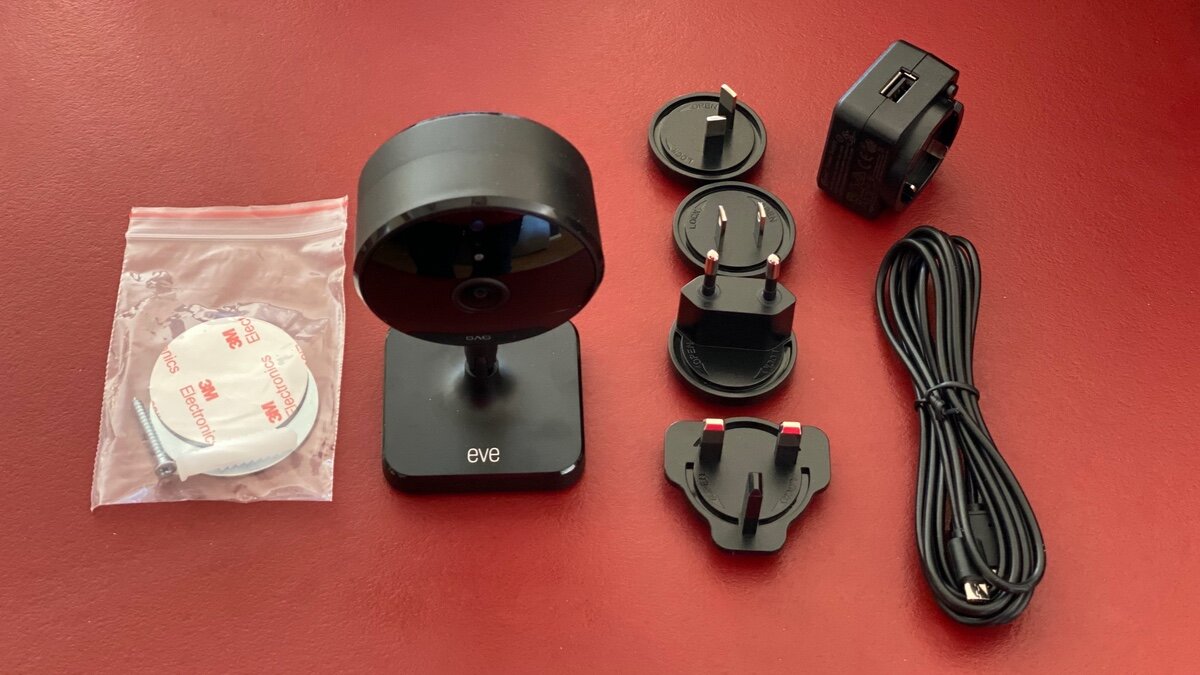
Eve Cam Box Contents
In the box you’ll get the camera, a standard USB power brick and 7ft (2m) micro USB cable, outlet fittings for the four major international standards, and a mounting kit.
The mounting kit is of interest as the base of the Eve Cam has a strong magnet included. This can be used to attach it securely to metal surfaces, including door frames, white goods, and potentially building surfaces.
To make this more useful the kit contains a metal plate, screw and wall plug. This plate can be screwed onto any surface to allow the camera to be magnetically mounted there in any rotation. Alternatively, the provided 3M adhesive pad can be used to attach the plate instead of the screw.
In most cases you’ll probably see the Eve Cam simply placed on a shelf or other flat surface. The angle of the camera can be adjusted up and down 180 degrees using a small screw on the stalk, while another screw can be used to allow 360 degree horizontal rotation as well if you have opted to mount it.
Installation and Setup
Setting up Eve Cam is fairly simple. The biggest challenge you’ll likely have is power. With a 7ft cable you’ll need to be fairly close to a suitable socket, which may well not be the best place for the camera. You could use a USB extension and it’ll likely work fine as the power draw is not anything special.
Once the camera is placed where you want it, plug in the micro USB cable into the port in the bottom of the camera body, just behind the stand. Let it power on until the blue light on the front starts blinking. That indicates it’s ready to connect.
You can simply scan the QR code on the base with the Apple Home app, or you can do the same in the Eve app. HomeKit will take care of adding it to your WiFi network automatically, and it should be up and running in about a minute.
Once it’s connected you’ll be stepped through the initial configuration options. Firstly you can specify recording settings for both Home and Away modes. These are automatic based on the presence of members of your home as setup in HomeKit. You’ll then be able to specify which of those members can view recorded videos. This setting applies to the whole Home, not just this camera. If a Home member doesn’t have View Recordings permissions, they can only watch the live stream.
Then you just need to configure the device name and room assignment as per any HomeKit accessory. Like other cameras HomeKit recognizes two accessories for the Eve Cam. The camera itself, and a separate motion sensor. By default these will be combined as one tile, but you can separate them if you want to have visibility of the motion sensor status. In either case, you can use the Eve Cam as a motion sensor to trigger automations and notifications.
Further to the HomeKit options, the Eve app also allows setting some some additional preferences. Like the Eve Motion, you can configure the motion sensor sensitivity and duration. The Duration value defines how long the sensor will remain in the Motion Detected state rather than just reverting right back to Clear once the motion has passed. This is actually very useful as you can use it to trigger automation rules like turning off lights a certain time after motion has stopped.
One other setting you can change in the Eve app is the camera orientation. To support installing the Eve Cam upside down from a ceiling or similar location, you can set the video to be flipped 180 degrees.

Initial Setup Options
Eve Cam Features
With Eve Systems being a dedicated HomeKit device maker, the Eve Cam only works with HomeKit. This might seem like a limitation, but for HomeKit users that value the ease of setup and privacy offered by the platform this is often seen as a bonus. With no ties to a third party service there is no need to create an account, no concerns about third party access to your data, and no need to use a third party app at all if you choose.
Eve does have their own app to provide some additional configuration options for features specific to their devices, but it’s a pure HomeKit client (so no additional login) that offers a nice alternative interface to Apple’s own, and access to deeper HomeKit automation features, so it’s worth having anyway.
The actual processing of the video stream, and the configuration of notifications, object detection, and accessing the recorded clips, is all handled by HomeKit and must be done with Apple’s Home app. See All About HomeKit Secure Video for details.
Full HD Video Camera
The camera in the Eve Cam is a 1080p sensor with infra-red night vision, this much is pretty standard. It also sports a 150 degree field of view, which offers a good field of view for monitoring a large room from the side or corner. The night vision feature is enabled by a pair of IR LEDs, one on either side of the camera lens. Eve says this should give a viewable distance of a little more than 16ft in the dark.
The Home app provides the option to disable the IR mode, which you might want to do if the soft glow of the IR LEDs is a cause for concern and you aren’t worried about recording in the dark.
Two-Way Talk
While viewing a live stream in the Home app, you have the option to turn on the microphone (that’s on the device you are viewing from). That will give you a ‘hot’ mic which will allow you to talk freely through the camera. Obviously the camera’s microphone will already be sending any audio back from what it’s seeing.
This is also a common feature of modern security cameras, and allows for ad-hoc communication with family members while you are not present, or potentially to interrupt intruders in the act.
Flexible Mounting
The base of the Eve Cam is magnetic, and quite strong at that. It will easily remain securely mounted to a metal surface, even a door frame, or hanging upside down. It’s using this magnet that you can wall or ceiling mount the camera by way of the included circular metal plate. This can be attached to a surface of your choice with either the included screw or adhesive pad, and the camera then magnetically attached to the plate.
The thin stalk joining the camera body to the base has a two way joint, secured by a pair of small screws. Using these you can rotate the camera in any direction necessary to suit your chosen placement. If you are just using the base to sit the camera on a flat surface, the horizontal rotation is not really a factor, but does give you some additional flexibility if you are magnetically mounting it and want to orient the base in line with the wall for aesthetic reasons.
Passive Infra-red Motion Sensor
The Eve Cam contains a dedicated IR motion sensor underneath the camera lens which is used for motion detection if you have the camera itself turned off, or to trigger recording when it’s on. This sensor is what is represented in HomeKit as a separate motion sensor accessory, and can be used independently for status monitoring, notifications and automation rules.
Status LED
HomeKit cameras are displayed in the Home app as still thumbnails with a small colored dot in the top right corner. This dot is either Blue, for streaming, or red, for recording. This represents the configuration of the camera as a quick indication to users of the app. The Status LED on the Eve Cam reflects this dot, blue or red depending on the recording setting in HomeKit and is intended to inform members of the household as to what the camera is doing.
This LED can be quite distracting at night, so you have the option in the Home app to turn it off.
Real World Usage
As with all the Eve devices I’ve tested, setup was seamless. Just scan and wait while HomeKit does it’s thing, and then you’re into the configuration options. It takes all of about 5 minutes from start to finish.
Generally speaking after testing a number of HomeKit cameras, performance is more a factor of HomeKit than the camera. All the devices I’ve tested perform similarly in terms of notifications and live stream performance. I’ve found when I’m on the local WiFi the video stream kicks in within two seconds, 90% of the time. Occasionally I’ve had it take longer, or not start at all. This issue seems to be a HomeKit glitch which is resolved by simply closing the camera view and trying again.
Over LTE your mileage is going to vary based on your internet connection. By way of comparison I tested multiple live streams in an area with low signal and an area with full signal. On low signal the stream takes around 5 seconds to start. Once it does,though, the delay is on the stream is less than a second, surprisingly short. With full signal the start time drops to about 2 seconds, which is quite impressive. There were no hitches or streaming issues in either case.
Now this is all on HomeKit, as local testing proves the camera responds quickly, but it’s worth noting for comparison with other camera solutions.
With Eve’s pre-buffering, you won’t miss any action. The motion sensor triggers recording pretty much instantly, but the clip includes about half a second of video before that so you’ll actually capture what caused the event, which is great. In my testing it’s consistently started the clip from either the point where someone enters the room, or slightly before so you can actually see them come in.
Notifications are equally prompt, and I’ve found HomeKit’s object detection to be very reliable correctly identifying people and animals (my small dog) 100% correctly and sending the notification within a second. Likewise with the thumbnail in the Home app which updates for all HomeKit cameras every 10 seconds by default. Sometimes the Home app won’t trigger the updates, buy viewing the live stream briefly will correct that. When it’s updating, the Eve Cam provides the actual live at that moment, so you can be sure that what the thumbnail is showing is actually current. This seems obvious, but I’ve tested some models that seem to have a delayed snapshot.
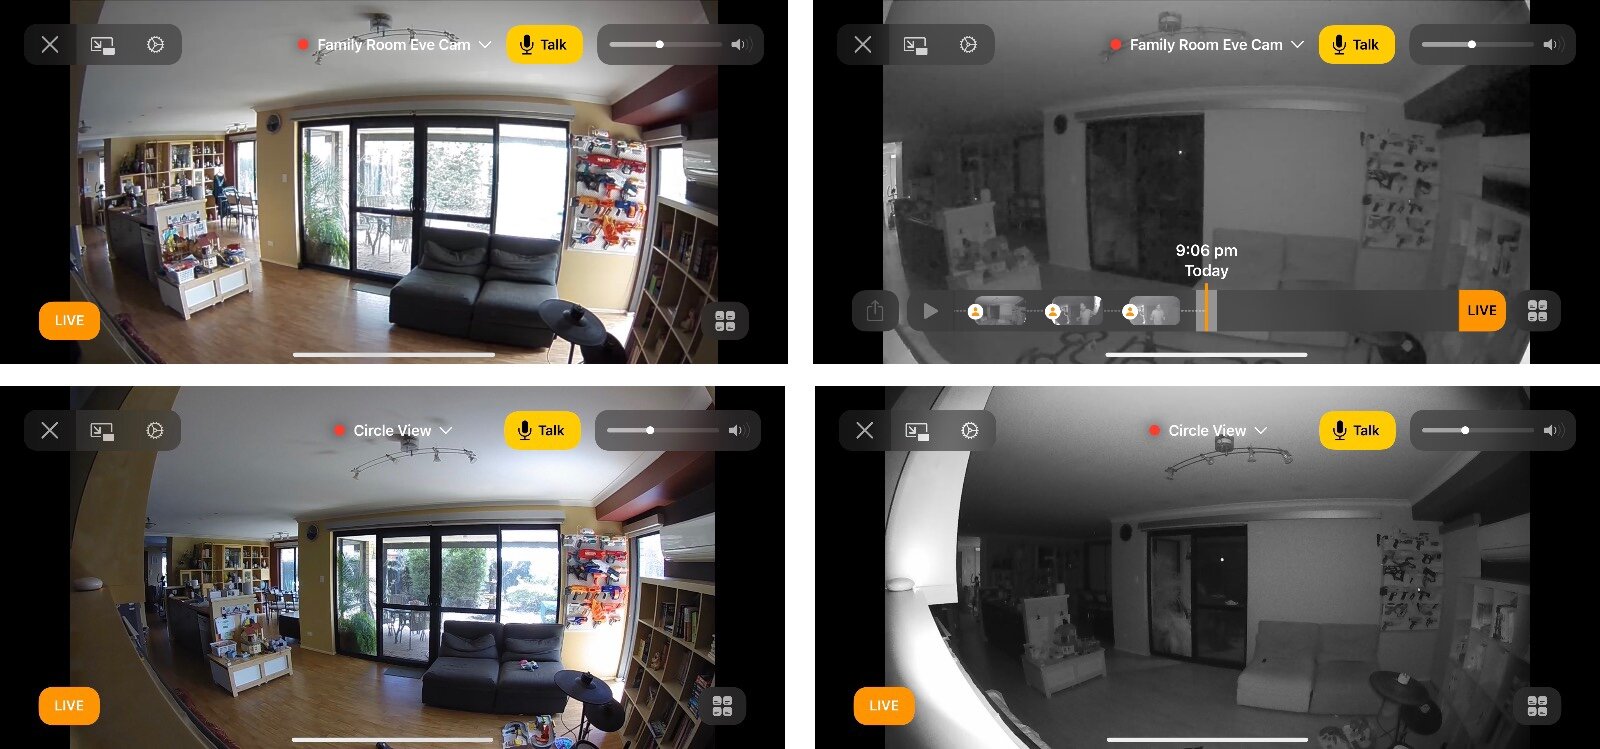
Eve Cam vs Circle View
Alternatives
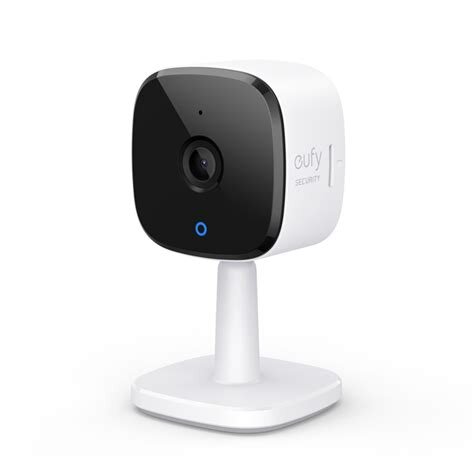
eufy 2K Indoor Camera
✔ HomeKit Secure Video
✔ 2K camera
✔ Night vision, 8 LEDs
✔ Two-way talk (eufy app only)
✔ Mounting hardware
✔ Local Micro SD storage option
✘ Indoor only
✘ Third party account required
The eufy 2K Indoor camera is part of eufy’s overall security suite, but can be used independently as it doesn’t require their Homebase product. While you are supposed to be able to add it directly in the Home app by scanning the QR code, I was unable to get it to work. Instead, you’ll need to sign up for the Eufy Security app which connects to it by Bluetooth to perform the WiFi connection, and then HomeKit will add it without issue.
While the camera is touted as 2K, and it is, this delivers little real value over 1080p when viewing the image on a smart phone, and HomeKit only allows a 1080p video feed anyway if you’re using it for that. I’ve also noted that it seems to suffer from some dithering in the image which indicates the color reproduction isn’t as good as the Eve Cam. You do get 8 IR LEDs for night vision though, which delivers a considerable improvement to the brightness of the IR image, even over Eve’s respectable performance.
Eufy offers it’s own (paid) cloud storage option as an alternative to HomeKit Secure Video, or you can simply insert a Micro SD card and store all the recordings locally. The card isn’t included, but you don’t need one to get the camera up and running and can add it later if desired.
The camera itself attaches to the stand via a ball joint, so it’s easy to swivel around, 360 degrees horizontally or 90 degrees vertically. This allows for ceiling or wall mounting using the included screws and snap on mounting base. The joint is easy to move though, which may cause frustration if it’s in a place where it can be bumped out of position.
The price is a bargain for what you’ll get, but I’ve had some issues in HomeKit with the thumbnail snapshots being delayed. The Home app refreshes on schedule, but the image is from 30-60 seconds ago. It seems to be related to motion triggers, and doesn’t update it’s internal snapshot on request. Still, that’s the only issue I’ve encountered, with streaming and notifications performing as well as any other camera.
Logitech Circle View
✔ HomeKit Secure Video
✔ 1080p camera
✔ Night vision, 2 LEDs
✔ Two-way talk
✔ Mounting hardware
✔ Weatherproof, Outdoor rated
Logitech’s latest HomeKit camera offering, the Circle View, provides a versatile alternative which sports a number of advantages over the competition. First among these is weather resistance, with the camera having an IP64 ingress protection rating. This means it’s rated to withstand splashes from any direction, but not directed jets of water, so it should be fine for rain. The catch is, oddly, that the included power adapter is only indoor rated, so usable outdoor placement is not a given.
The Circle View is a pure HomeKit camera, so there is no requirement for another app or login, just scan the code in the Home app and go. Full HomeKit Secure Video support is provided, and is the intended usage for recording video events, which come from a wider 180 degree lens than the other options in this list. Night vision is on par with the Eve Cam, with 2 IR LEDs included and a rated night vision range of 15 ft.
Logitech has put a focus on extra privacy features, with the ability to easily tilt the camera forward to quickly prevent it seeing something, to the inclusion of a dedicated camera ‘off’ button on the rear which cuts off both video and audio recording.
All up your looking at a high quality direct competitor to the Eve Cam, with some useful added features but at a slightly higher price point and less international availability.
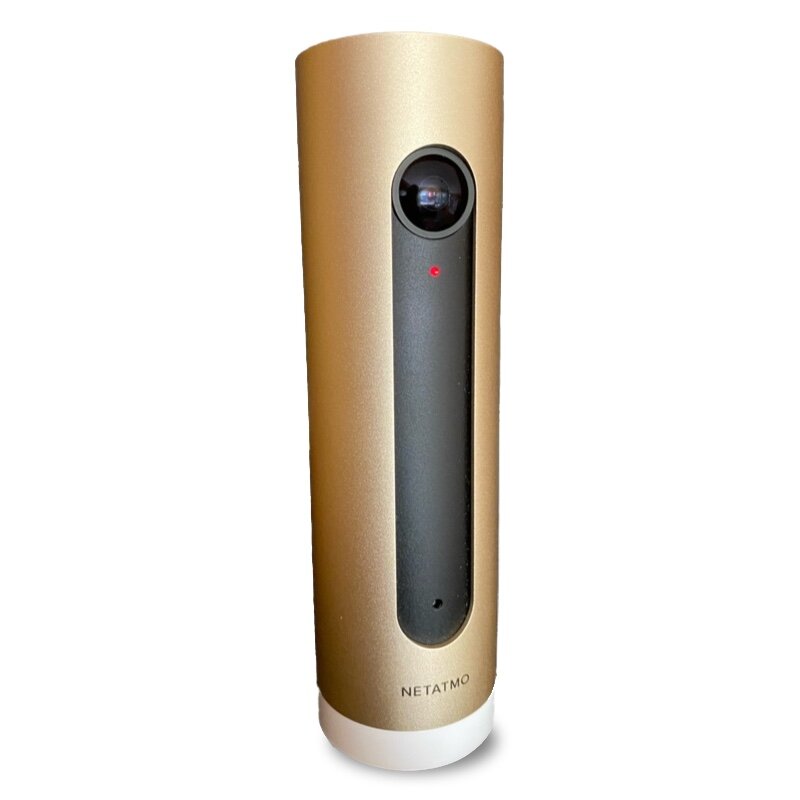
Netatmo Smart Indoor
✔ HomeKit Secure Video and Google Home
✔ 1080p camera
✔ Night vision, 1 LED
✔ Facial Recognition
✔ Local Storage
✘ Indoor only
✘ No mounting options
The Netatmo Smart Indoor Camera (formerly the Netatmo Welcome) offers a unique take on the indoor camera by incorporating on-device facial recognition, not just person detection. The device is very much focused on being an integrated part of Netatmo’s home security solution, and is designed to identify household members as they arrive home, with the assumption that it will be placed facing the front entrance.
Note that the facial recognition feature in the camera is only for use with Netatmo’s app, and will not affect HomeKit usage. If you’re looking to use HomeKit secure video, you get facial recognition via your home hub anyway, so it’s not a compelling purchase factor in that case.
Netatmo also has a strong privacy focus, and as such doesn’t offer their own cloud storage solution. You can use either the included MicroSD card on it’s own, a cloud generic storage option like FTP or DropBox, or HomeKit Secure Video. Performance in the latter has been very good, on par with the Eve Cam, although the camera quality seems to be lacking, both in night vision performance, and dynamic range.
As part of Netatmo’s integrated system, you will need their Security app and an account to set up the camera at all. If you’re going all in on their security products, this offers a wealth of configuration options, but if you’re using it for HomeKit you’ll probably never open the app again, so it’s a bit of a nuisance having to sign up.
The Verdict
In my experience Eve Systems have consistently delivered quality HomeKit products that perform well and go the distance. The Eve Cam looks to be no exception, with super easy setup, good quality video, decent night vision, and versatile mounting options. For HomeKit purists that don’t want to have to sign up to third party accounts just to install the device, this is a good choice.
For a bit more money, you could opt for the Logitech Circle View with it’s additional hardware privacy features and outdoor water resistance. That outdoor rating comes with a caveat of course, in that it only comes with an indoor rated USB power adapter, so placement may still be a challenge.
The Eufy 2K Indoor cam is compelling for price alone, and offers excellent night vision with it’s 8 IR LEDs providing far better illumination, but the HomeKit experience hasn’t been as good. I’ve had issue with snapshots in the Home app being delayed by up to a minute where the other products have been real time. If that’s not a concern for you, and you don’t mind the app setup process, then it’s good value.