Netatmo Smart Indoor Camera: Review
When you buy through links in this article, I may earn an affiliate commission. Learn More.
Netatmo provided the sample for this review.
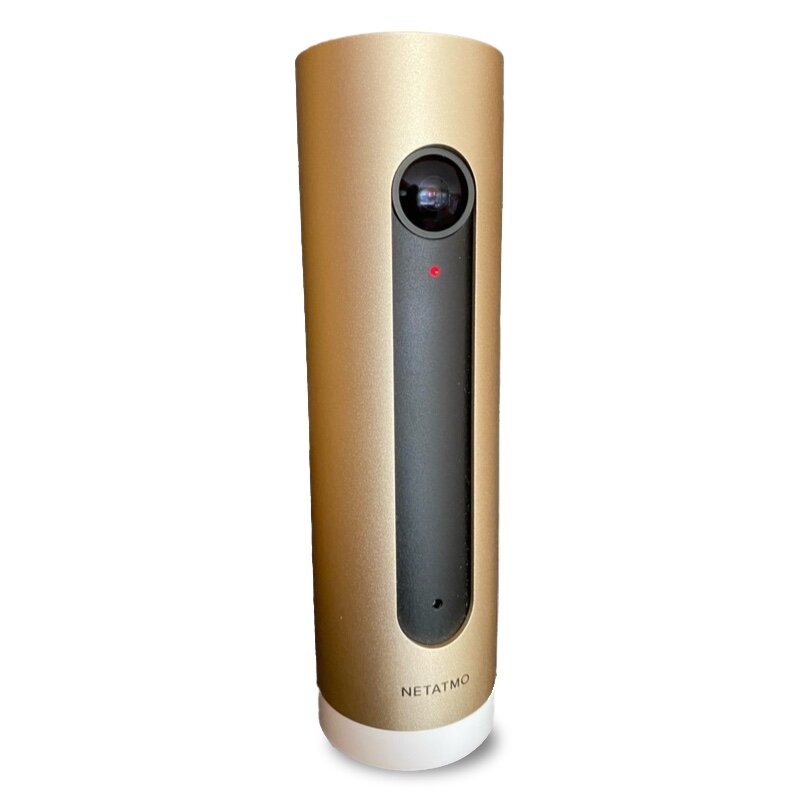
European company Netatmo has had a line of smart products for a number of years, and has been expanding that range to provide a whole-home integrated monitoring solution. A key part of that system is the Netatmo Smart Indoor Camera (formerly the Netatmo Welcome).
The Smart Indoor Camera offers a privacy focused approach to indoor monitoring and an extra twist over many competitors: facial recognition.
While facial recognition is rightly controversial in a public sense, the Smart Indoor Camera handles it locally on the device, and doesn’t use cloud storage by default. This allows it to add a interesting level of functionality to the security system, and there’s quite a bit to unpack for this one.
Up Front Considerations
When looking to add security cameras to areas where privacy is important, such as indoors, it’s important to consider how that camera is going to be accessed, and where any recordings will be stored.
Many cameras use a cloud service provided by the device maker, but the security of these services is uncertain. They are generally closed systems, with only vague privacy policies or security statements by the company to provide any assurance.
An easy fix for this concern is to use local storage, but that has it’s downsides as well. Netatmo has opted to offer a mix of both with the choice up to the customer.
What’s in the box?
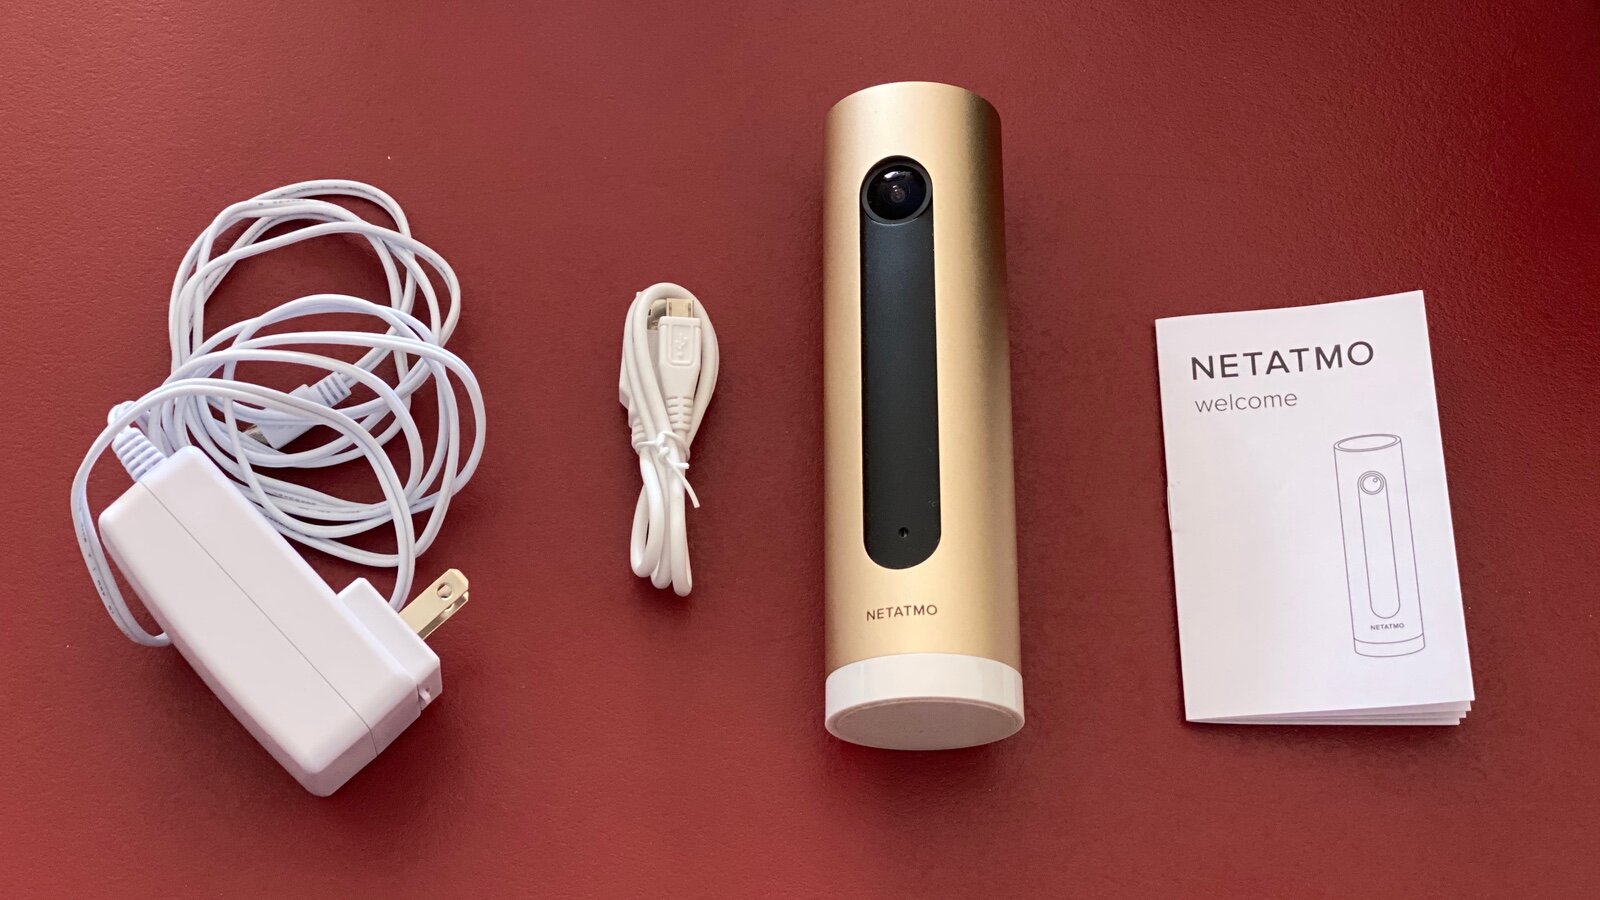
Netatmo Smart Indoor Camera box contents
The Smart Indoor Camera is fairly bare bones in terms of accessories. Apart from the device itself is just a USB power brick, a (fairly short) micro USB cable, and the quick start guide.
Notably there is no mounting hardware of any kind as you would often see with other cameras. This one is designed solely to be free standing, and it’s simple cylindrical design has no attachment points for any kind of hardware.
You may note the ‘welcome’ branding as the image has on the documentation. This is the old name for this device, and the hardware is identical. In the app the Welcome changes to the Smart Indoor Camera with a firmware update.
The camera itself is quite solid, with it’s metal body only broken by a plastic top and base. Part of this is likely to allow for Wifi signal to penetrate, while the base, at least, is to prevent scratch damage to whatever surface you place it on, and also because the device runs quite hot as it uses the metal body as a heatsink.
While WiFi is likely the most common means of connectivity, the Smart Indoor Camera also has an Ethernet port, so case be hardwired to your local network if you wish. This is data only, not PoE, so you’ll still need to use the Micro USB cable for power.
Installation
Setting up the Smart Indoor Camera was straight forward. You’ll need to decide on a flat surface to place the device where it gets both adequate coverage of the room you want to monitor (it’s designed to watch the entrance to the home, but you can have as many as you like) and access to a power socket.
Once powered up you’ll have a flashing light on the front of the device. You then go to the URL in the quick start guide, which will get you to install the Netatmo Security app. You’ll need to create an account with Netatmo to login. The app will then discover the camera and connect it to your network.
The default settings will be fine to get started, you can adjust these later as required. It’s not critical up front as it only pertains to things like optional cloud storage and notification settings. You’ll want to adjust these over time anyway as you get a handle on what it reports and what you want to know about.
Netatmo Security settings
Smart Indoor Camera Features
HD Camera
The camera is a fairly standard 1080p sensor with night vision. The lens offers a 130 degree field of view without any fisheye distortion. This offers good coverage of a larger room when place near a corner, but would miss the near edges if placed more along the side.
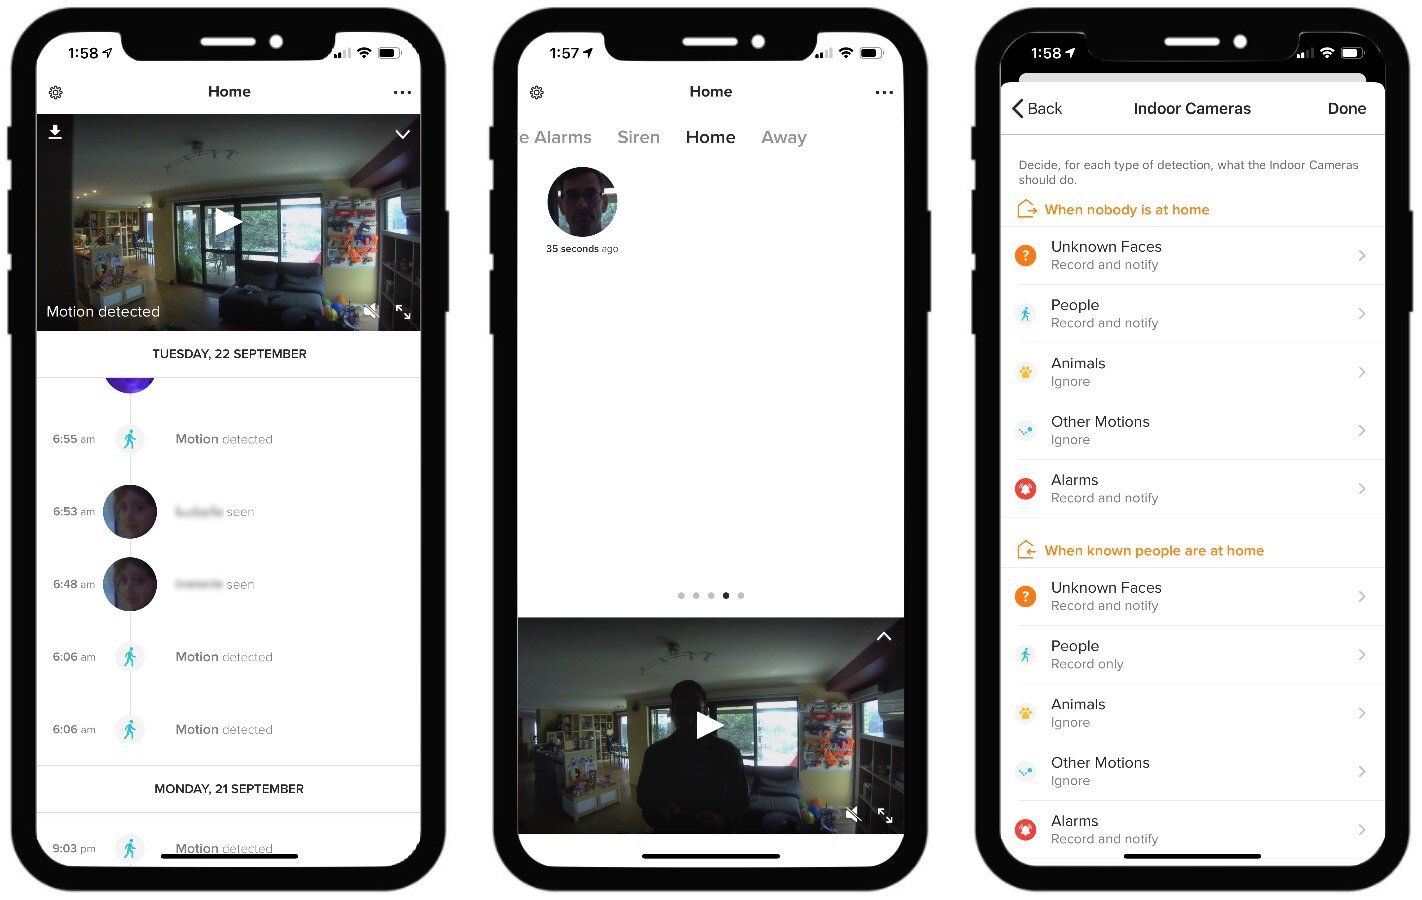
In the security app any motion detection events will show on a timeline with either the type of motion, or a face if one was identified (known or not), with a thumbnail of the captured video at the top. Scrolling to the top of the timeline allows you to watch the live feed as well. This is fairly intuitive, but you’ll only see events up to the limit of your memory card’s storage before it starts to overwrite older ones. You can always add a larger one of course.
Streaming Indicator
Under the camera lens is a small LED light. This is used to indicate the status of the device during setup, and lights up red when the device is being streamed video.
In practice if you have a cloud service configured, you’ll never see it turned off, even when all the event recording settings have been set to ignore. Only if the camera is disabled via the app does this indicate it’s not active, or you can opt to turn off the indicator alone.
Facial Recognition
The signature feature, the Smart Indoor Camera will do on device facial recognition in order to improve notification accuracy and to feed into Netatmo’s Security app as an alternative way of determining if anyone is home.
It will start identifying faces immediately, and you mark your own face as you so it knows it’s owner. You can then identify additional faces by creating new profiles for each as they are noted by the camera in the activity feed. Each time an unknown face is captured, you can identify them and assign them to an existing profile as appropriate. Each time you do this is improves detection accuracy for that person.
You can them specify notification options for recognized faces and unknown ones separately, both for at home and away modes in the Security app, which helps to manage security system state, and reduce unwanted notifications.
Local Storage
The camera has a MicroSD slot in the rear, and comes with an 8GB card. This local storage is used by default for any video recordings, and these can be accessed via the Security app from out of the home as well.
In addition to the card storage, you can optionally connect the camera to Drop Box, an FTP server of your choice, or Apple’s HomeKit Secure Video feature in HomeKit. Netatmo doesn’t offer their own cloud storage, and there are no subscriptions required to use the device out of the box.
Alarm Recognition
As an extension of the on-device processing, the Smart Indoor Camera can also detect alarms and notify you of those events. It does this by both video and audio recognition, and can help to alert you to dumb alarms you may have, such as smoke alarms or stand-alone window alarms when you’re away from home.
Real World Usage
Camera and Recognition
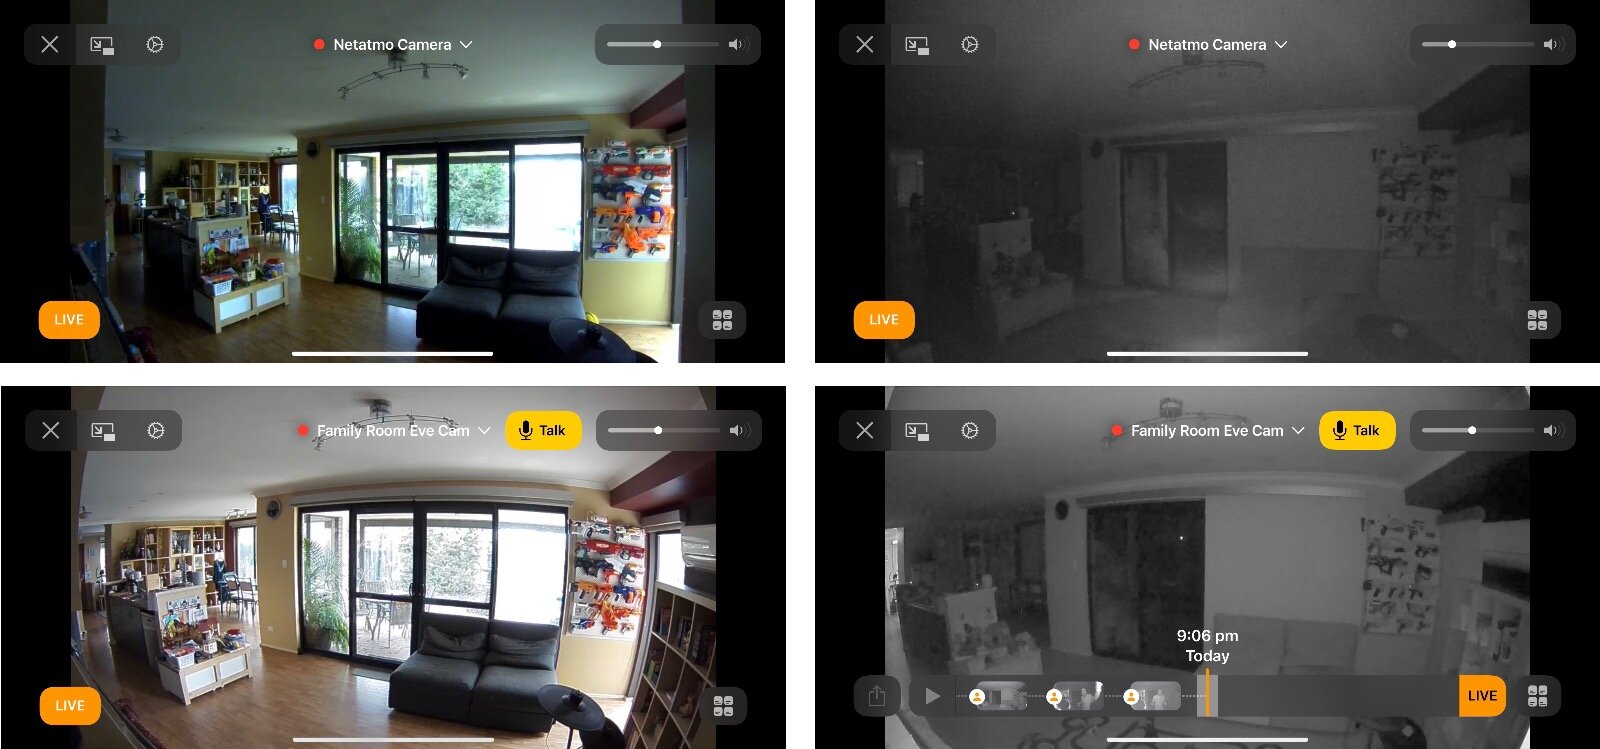
Given the price of the Smart Indoor Camera, the quality of the camera image itself has been a bit underwhelming. It’s adequate for the job, but it has a fairly low dynamic range, so it suffers from high contrast blow out from light sources, and under exposure if it’s pointed at a window. It also only has a single IR LED for night time illumination, which limits the night vision a fair bit.
Having said that the facial recognition initially impressed me. Even with low light situations, it’s been surprisingly accurate in identifying family members from apparently fuzzy blobs. Recognition works reasonably well out to about 3m (10ft) from the camera, beyond that the face is too small in the frame to be useful. Netatmo actually advises during set up to avoid this kind of placement as it negatively effects face identification, but it’s noteworthy that other cameras I’ve placed next to it haven’t had any issues with the light levels.
Netatmo Smart Indoor vs Eve Cam in HomeKit
If you’re worried about the processing of those faces being done on Netatmo’s servers you need not be. I’ve blocked the camera from the internet on my local network, and it has continued to perform normally and provide access to recorded videos while I’m on the same network. Obviously outside the home it was unreachable, but that’s good to confirm it is actually processing locally.
You’re not totally cloud free through. Some of the app’s settings, like Camera Settings, are stored on Netatmo’s end in order for people that have been granted access to your home to see them. This would be other household members and regular guests. They will need to have access in order to affect the Home and Away state of the security system.
Home being determined solely by the camera’s facial recognition (unless you manually flag someone as ‘home’). The app will ask for location access on your smartphone but it is only used to determine if someone has left, not arrived. That is left entirely to the camera to recognize people as they come in. This raises the important point of intended usage. Netatmo has designed this camera to be pointed at the entrance to the home for this purpose. While you can have others, you will need one in that position if you’re going to use it as part of the wider Security system.
This all seems like an expensive and unreliable gimmick, as while the facial recognition is pretty good, it’s not 100% reliable. Not using geopresence to flag some as home seems odd given that’s how basically every other smart device maker does it, because it works.
Notification Testing
Netatmo Security events and notifications
You get a lot of options around notifications and recording events. Type of motion can be selected for both Home and Away modes, and this applies to all devices of the same type.
Unknown faces, people, animals, alarms, and other motion can be individually configured for either Ignore, Record, or Record and Notify. On top of this, you get further controls for each person profile. At that level you can specify the time period for welcome notifications when that person is recognized, and whether that person will be recorded always, on arrival only, or not at all.
This sounds like it provides a great deal of control over how much notification spam you get, but the issue I’ve had is that 4 hour time out. There doesn’t appear to be any clear indication in the Security app as to what state the system is in, it only shows which faces where identified in each mode and how long ago.
You can manually tell it everyone has left which forces Away mode, but not that other way around, it needs to recognise a face for that. As I have it set to notify me when people are detected (as opposed to unknown faces), if often times out and starts blasting me with motion notifications because family members are moving around the periphery of the cameras view where it doesn’t see their faces.
HomeKit Secure Video
Netatmo was one of the first camera makers to add support for Apple’s new privacy focused cloud recording feature. It’s a good fit for their privacy focused model, and offers good integration into HomeKit. Live view and notification response times have been comparable to other HSV cameras, with snapshots and live view starting promptly and reliably.
Getting it set up was not as smooth as it could be. Firstly, you have to dig into the camera settings to find the HomeKit option. Adding it then requires you to write down the pairing code and enter it manually in the Home app. If you’re used to adding native HomeKit devices this can seem a bit clumsy.
Nonetheless, once done it sets up without issues, and you get three accessories; a camera, motion sensor, and occupancy sensor. The last one seems a bit redundant, but is a representation of the Home/Away state of the security system as it shows when recognized person is present, rather than just a basic motion event.
The occupancy sensor stays active continuously while a household member is considered present by the camera. This could add some interesting options for automation triggers over a basic motion sensor.
As for the video features, these are standard for all HomeKit Secure Video cameras, with local processing of person, animal, and vehicle motion events, encrypted cloud storage in iCloud, and HomeKit notification options based on HomeKit’s home and away states.
These features are comparable, bar the facial recognition aspect, to the Security app, and it would be nice to be able to use it as a pure HomeKit camera. Unfortunately, you must create a Netatmo account in order to access the app and set the camera up in the first place.
Alternatives
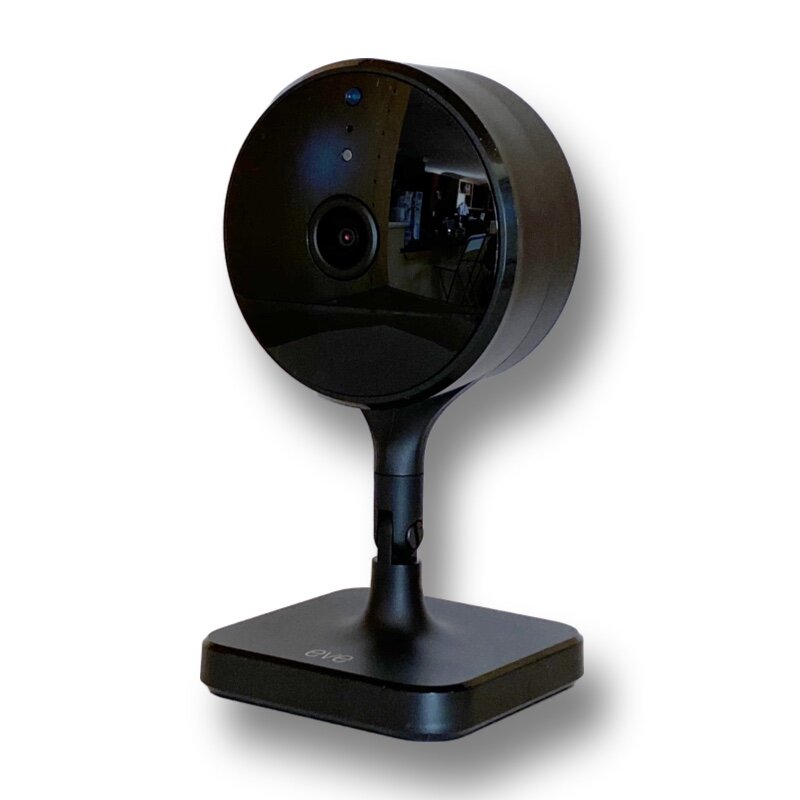
If you’re specifically looking for an indoor camera supporting HomeKit Secure Video, then the Eve Cam from Eve Systems is a good option. With flexible magnetic mounting, two-way talk, a good quality camera feed and no need for yet another app login, you’ll be up and running in HomeKit in minutes.
Testing this side-by-side with the Netatmo device, this camera has delivered notably higher quality images, with both brighter, more balanced images in daylight, and clearer night vision with less bloom from light sources. HomeKit takes care of the video processing and storage, and I’ve been impressed with it’s accuracy at person, animal and vehicle detection. You will need to have a home hub and a large enough iCloud storage plan, though.
Eve only builds devices for HomeKit, so while they do have their own app to manage some value added device options, they don’t have their own servers, cloud service, or subscriptions, and therefore don’t need you to sign up to anything. The Eve app is a fully functional HomeKit client which is worth having anyway as it opens up access to some advanced automation capabilities Apple’s own app doesn’t expose, but simply uses your existing HomeKit access control.
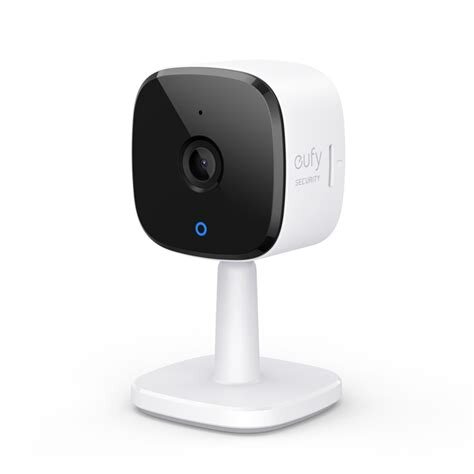
Like the Netatmo approach, the eufy 2K Indoor Cam is part of a comprehensive smart security app which you’ll need to sign up for before you can add this to HomeKit. While you are supposed to be able to add it directly in the Home app by scanning the QR code, I was unable to get it to work. Instead, the Eufy Security app connects to it by Bluetooth to perform the WiFi connection, and then HomeKit will add it without issue.
While the camera is touted as 2K, and it is, this delivers little real value over 1080p when viewing the image on a smart phone, and HomeKit only allows a 1080 video feed anyway if you’re using it for that. I’ve also noted that it seems to suffer from some dithering in the image which idicates the color reproduction isn’t as good as some others, like the Eve Cam.
Eufy offers it’s own (paid) cloud storage option as an alternative to HomeKit Secure Video, or you can simply insert a Micro SD card and store all the recordings locally. The card isn’t included, but you don’t need one to get the camera up and running and can add it later if desired.
The camera itself attaches to the stand via a ball joint, so it’s easy to swivel around, 360 degrees horizontally or 90 degrees vertically. This allows for ceiling or wall mounting using the included screws and snap on mounting base. The joint is easy to move though, which may cause frustration if it’s in a place where it can be bumped out of position.
Overall, it’s a very capable device for an amazingly low price, easily the most cost effective choice on the market right now.
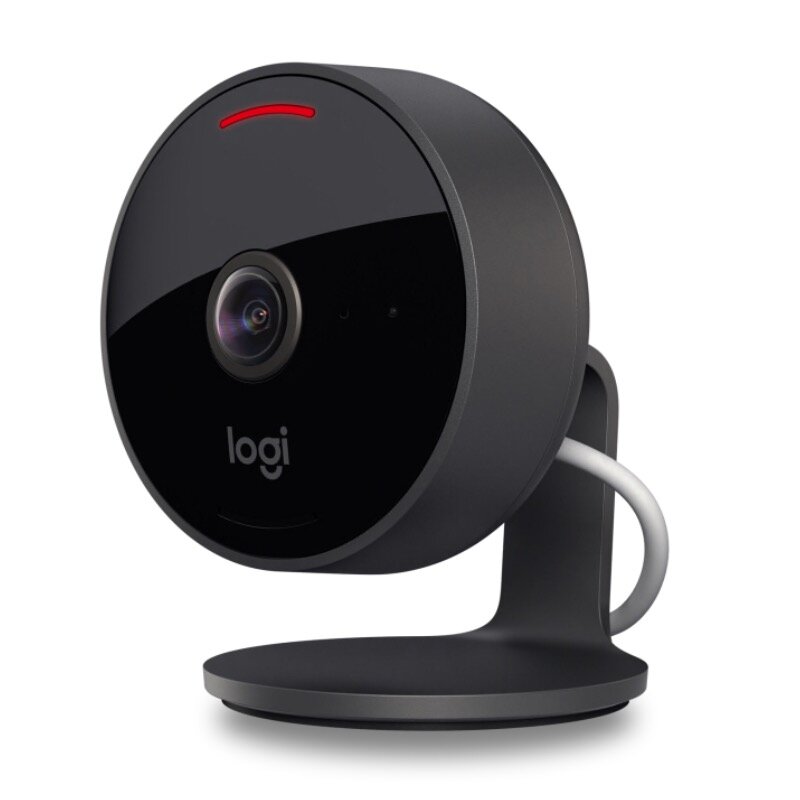
Logitech’s latest HomeKit camera offering, the Circle View, provides a versatile alternative which sports a number of advantages over the competition. First among these is weather resistance, with the camera having an IP64 ingress protection rating. This means it’s rated to withstand splashes from any direction, but not directed jets of water, so it should be fine for rain. The catch is, oddly, that the included power adapter is only indoor rated, so usable outdoor placement is not a given.
The Circle View is a pure HomeKit camera, so there is no requirement for another app or login, just scan the code in the Home app and go. Full HomeKit Secure Video support is provided, and is the intended usage for recording video events, which come from a wider 180 degree lens than the other options in this list. Night vision is on par with the Eve Cam, with 2 IR LEDs included and a rated night vision range of 15 ft.
The Circle View derives all of it’s software features from HomeKit Secure Video which provides for person, animal, and vehicle detection, granular notification control, facial recognition, and customizable motion zones, so you’ll get equivalent features to the Netatmo app. Logitech has put a focus on extra privacy features, with the ability to easily tilt the camera forward to quickly prevent it seeing something, to the inclusion of a dedicated camera ‘off’ button on the rear which cuts off both video and audio recording.
All up your looking at a high quality direct competitor to the Eve Cam, with some useful added features but at a slightly higher price point and less international availability. If you’re not interested in HomeKit Secure Video, though, then this is not the option for you.
The Verdict
Netatmo’s security offering is a fairly holistic solution in itself, with options to add various sensors, a siren and smoke detectors, as well as outdoor floodlight versions of this camera. If you’re going all in on an investment in the Netatmo system, then the Smart Indoor Camera provides a useful and important part of the overall solution, and would be a worthy inclusion to a security setup that prioritizes privacy where some competitors don’t.
The focus on privacy is good, with local storage and no questionable cloud service, and the inclusion of on-device facial recognition is novel, but comes at a cost. I’ve also found the camera quality to be lacking compared to other indoor camera offerings with HomeKit support, so you’d be hard pressed to justify this one if you’re looking for that feature.

