How To Create A Toggle Switch In Apple HomeKit
Being able to toggle something on and off using a single button press (like an Eve Button for example) seems like an obvious and desirable thing to do in a smart home, but Apple’s own Home app makes it appear impossible to achieve, instead only allowing one action or scene per button action.
The reason for this is that the Home app hides button press events as configuration items under the button accessory’s settings view. The reality is that they are trigger events like any other automation and can be tied to an action in the same way.
For that automation to work as a toggle, it needs to include a conditional check to determine if the action should turn something on or off, and these conditions are also obfuscated in the Home app. But there are two ways around this.
Use Siri Shortcuts to build a toggle automation
You can now use a limited subset of Siri Shortcuts actions right in the Home app when creating an automation, and that includes scripting actions that we can use to build the conditional behavior we need for toggling something.
While not obvious at first glance, it’s actually quite easy to access this feature. Let’s create a toggle button using a Hue Tap switch to turn a fan on or off.
Access the Rule settings for a button
First we go to the accessory we want to program a button for, and long press on it to open the menu.
Tap Accessory Details to open the settings.
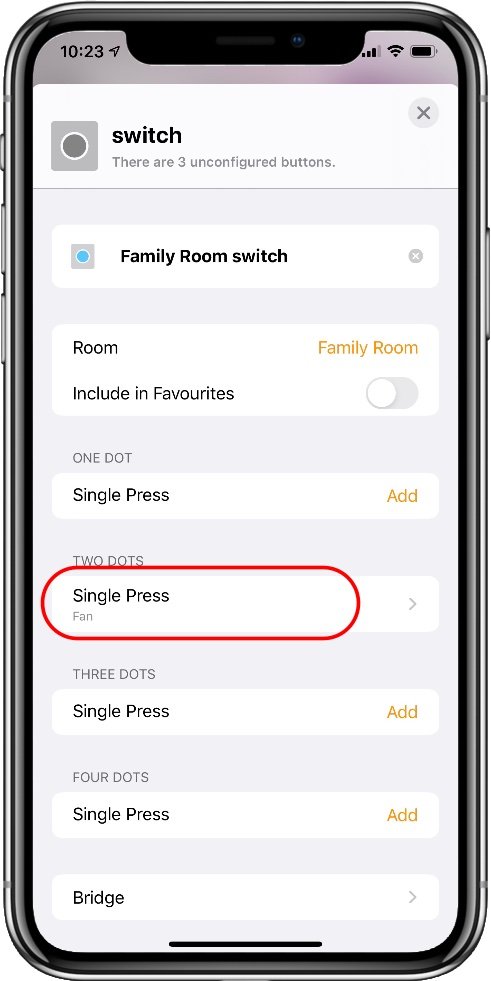
An accessory with programmable buttons actions will show the available actions here, tap the one we want to program, in this case “TWO DOTS, Single press”.
Configure the button action as a Shortcut
Tap Add or Remove Accessories and Scenes.
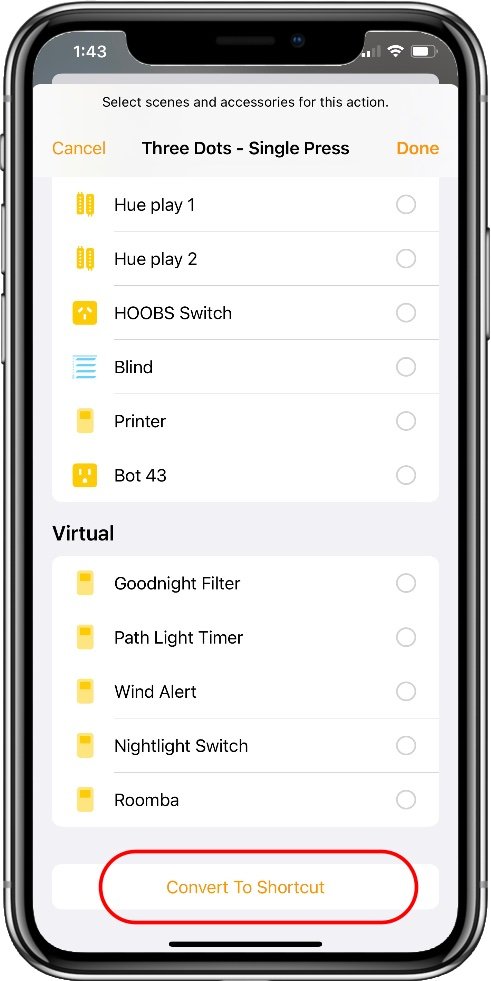
On the scene selection screen, scroll all the way to the bottom, and tap Convert to Shortcut.
We’ll get the normal shortcut editor view, and here we can build the simply script to toggle the Fan.
Program the toggle shortcut
Delete the default Home action for now.
We’ll use a single scripting action, IF, and two Control Home actions to send the commands to the Fan.
Tap Add Action, Scripting, Select If.
The If action has two fields, Input and Condition. Tap Input.
You’ll get a prompt for what to use for the input, tap Select a Home Accessory.
Choose the accessory you want to control from your list, and tap Done.
The Condition field will be prefilled for you now, check it is “Is On”. You may need to adjust this depending on the type of accessory you’r controlling.
Now we have a conditional check, we just need to enter the action to take in each case, so tap the + to add one.
Close the Scripting actions list, then select Control Home from the suggestions.
You can now specify the action to take as you normally would by tapping on the Scenes and Accessories field, so we select the Fan again and tap Next.
For the Is On state, we want to turn it off, so set that and tap Done.
Now tap and drag the command up under the If condition (between that and the Otherwise step).
Now repeat the last part to add another command to turn the Fan on, and drag it under Otherwise.
Now we have our conditional toggle, tap Next, and then Done.
You can do this with basically any accessory that can be queried for its state, such as on/off, up/down, etc. You can also use that to drive more complex changes by tying each Home Control instruction to a Scene for each state instead of a single accessory action.
Find the button you want to use
The Shortcut option is all the way at the bottom of the list
A simple toggle shortcut looks like this
Use conditions to build a toggle automation
Another method to achieve a toggle action in HomeKit is to use conditional automations directly. You can’t do this in the Home app, so you’ll need to use a third party alternative, like Home+, or the Eve app.
Home+ gives more access to accessory characteristics, and allows you to add accessory actions more easily as it creates new scenes automatically as required. Eve needs the scenes to be set up manually, but is also free.
While HomeKit does allow quite extensive conditional filters in automations, it doesn’t allow for conditional actions within them. To get around this we simply need to create two automations with opposite filters tied to the same button. This is effectively the same if, then, else behavior as in the shortcut method.
We’ll do this example in Eve app.
First open the app and go to the Automations section, then tap Rules at the top.
Scroll to the bottom and tap Add Rule, then Next to skip the overview.
Tap Add Trigger, then Other Value as we’re not using a sensor in this case.
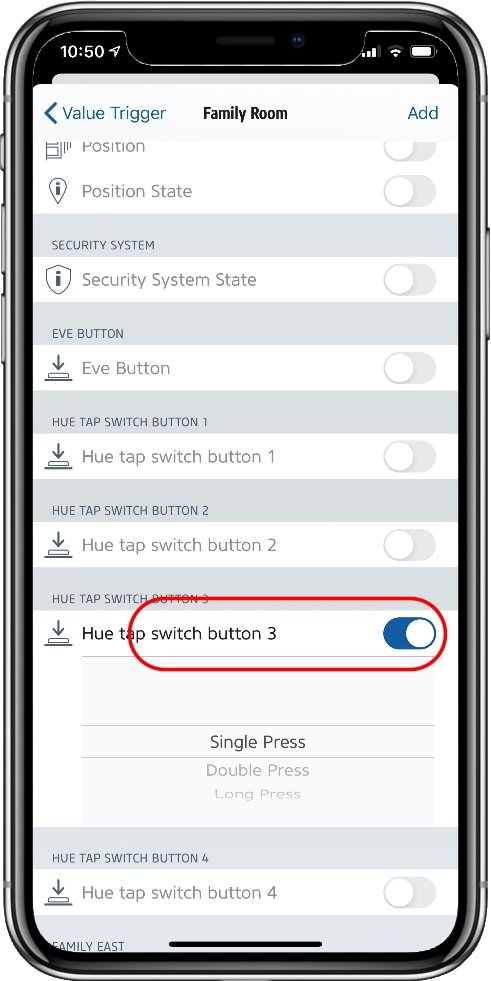
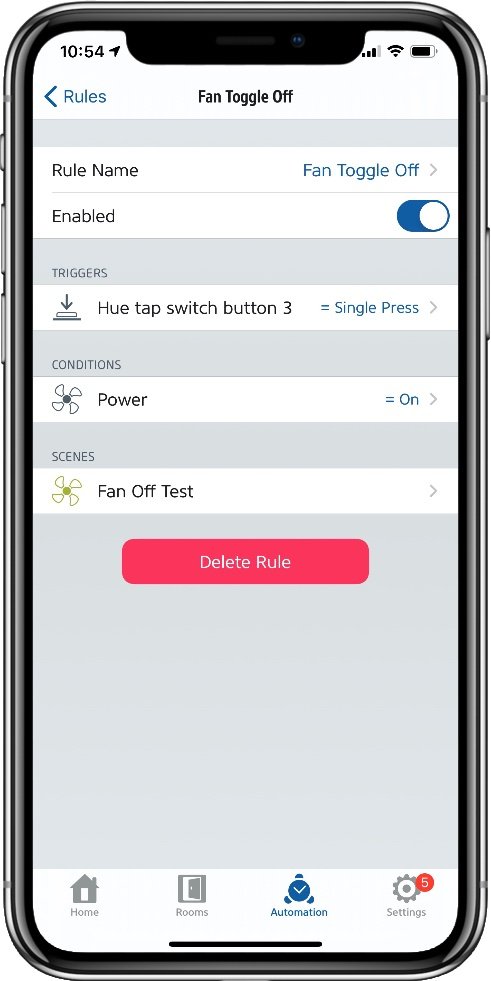
Choose the room your switch is in, scroll to the appropriate accessory and turn on the button action to use. In this case Hue tap switch button 3.
Tap Add.
Tap Next to go to the conditions page.
Tap Add Value Condition.
Again, select the room and accessory to get the test from.
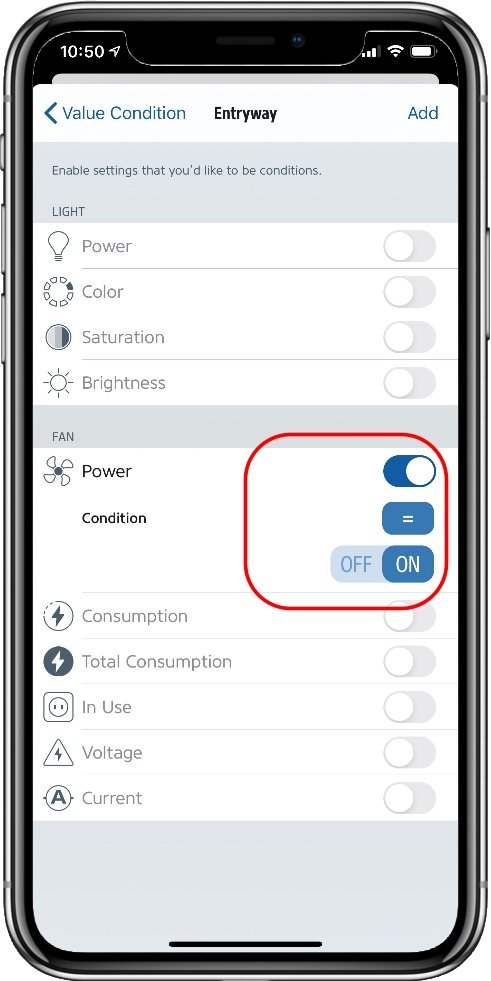
Toggle on the value we want to check, Power, and set the condition to On.
Tap Next.
Choose the scene to turn the fan off, or create one using Add Scene at the bottom.
Tap Next.
Name the rule as you wish.
Now we need to repeat this in full to create the opposite rule, with the condition check for Off and a scene to turn the Fan On.
Now when the button is pressed, both rules will trigger, but only one will run depending on the condition.
Select the trigger action (our button)
Define the trigger conditions (on or off)
The complete rule for a ‘turn off’ action
Summary
Using the not-so-obvious conditional features of HomeKit can allow for much more intuitive and efficient use of your scene remotes and switches. By combining related on/off actions on one toggle switch we mitigate the need to waste programmable buttons on each action.
This behavior is also more intuitive to most people, after all we are used to having single on/off buttons on appliances, and even light switches are essentially a single toggle switch.
With this kind of functionality you can now combine more scenes and actions into a single remote accessory, remembering that each button also has double and long press actions you can use in the same way. Accessing these additional triggers may require the third party app approach as some devices don’t expose those extended actions in the Home app, the Hue Tap being one example.

