How To Use Z-Wave With Apple HomeKit
When you buy through links in this article, I may earn an affiliate commission. Learn More.
Z-Wave is an older technology for smart homes, but in many ways, it makes a good fit for using with Apple’s HomeKit platform. Both are focused on local control, privacy and device security, after all. Z-Wave also brings a resilient self-managed mesh architecture and lower radio frequencies for communication that can help cut through interference.
Does Z-Wave work with HomeKit? Not directly. The problem is that Apple designed HomeKit to be accessible to all of their users, and thus it only officially supports communication technologies that are available on Apple’s devices. Namely Wi-Fi, Bluetooth, and more recently Thread via the Apple TV and HomePod. To use Z-Wave with HomeKit we’ll need a bridge device of some kind, much like many popular smart home brands like Philips Hue, Lutron, and Ikea.
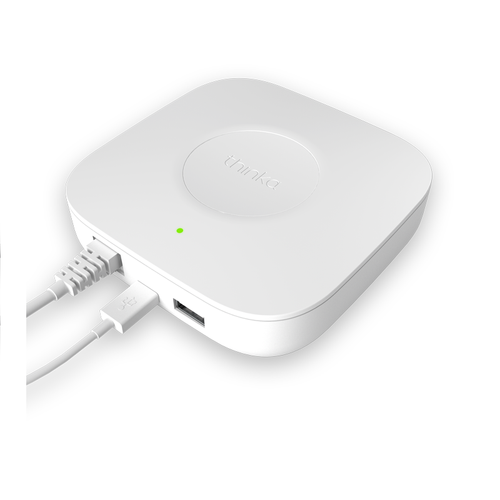
This is actually not a stretch since Z-Wave requires a controller device to ‘own’ and manage the Z-Wave network. We can simply use this controller to provide the bridge functionality as well, with the right hardware. The best, most pure HomeKit solution is the Thinka for Z-Wave Bridge. This is the only officially certified HomeKit accessory for supporting Z-Wave. It’s a high-quality device with a clean interface that gives you the simplest and most direct means of using Z-Wave devices in your HomeKit Home.
The Thinka is, however, an expensive option, so see my other recommendations below for some good alternatives on price, capability, and device compatibility.
Best Native Option
Thinka for Z-Wave
A high-quality, certified HomeKit accessory for adding Z-Wave devices into Apple Home. This option provides a clean, simple way to connect Z-Wave devices without having to get down in the weeds of Z-Wave configuration.
My Other Recommendations
Quick Links
Thinka provides, without a doubt, the easiest and most pure HomeKit solution. Being a certified device does carry a hefty premium, however, and this makes it one of the more expensive ways to go. The other options on the table are actually part of their own smart home platform, so they all involve a bunch of extra setup and the need to run two systems in parallel to some extent.
There can be advantages to this, of course, not the least being the ability to add a whole bunch of other non-HomeKit devices to your setup in addition to Z-Wave. More powerful automation capabilities than Apple provides is another good reason that people opt for one of these alternatives.
For those looking for lowest cost of entry, the Hubitat Elevation provides native HomeKit support and a powerful automation platform that is a popular choice with those looking to go further than pure HomeKit capabilities. This option also gives access to the latest Z-Wave 800 series chipset, which might also be appealing for some.
For the real HomeKit power user, getting into Home Assistant is the typical endgame. A hugely popular open-source home automation platform, Home Assistant even provides their own hardware, although you can run it on a wide variety of single-board computers like the Raspberry Pi or Intel NUC. Going with Home Assistant opens up pretty much everything in the smart home world, although may require some additional hardware accessories to provide connectivity, as is the case with Z-Wave.
For a similar price to the Thinka, you could go with the Athom Homey Pro. Homey is a powerful and very sleek home automation platform with a massive range of officially supported devices and great community support. The beautiful Flow automation engine, powerful analytics, and gorgeous smart phone interface may well have you switching over from HomeKit while still being able to use Siri for your voice control.
Why does Z-Wave need a hub?
Z-Wave is actually a communication protocol specifically designed for local control of small Internet-of-Things (IoT) devices. It’s been around for a long time with varying levels of uptake in different regions. Being a dedicated protocol, it manages all of its own communications over its own mesh network.
This mesh network is managed and secured by a Z-Wave controller, to which all the Z-Wave devices are paired in order to be ‘included’ on the network. Those devices with permanent power, such as light bulbs, wall switches, and power outlets, can also act as Z-Wave repeaters forming part of the mesh and allowing messages to be relayed to other devices that may not have a direct path to the controller.
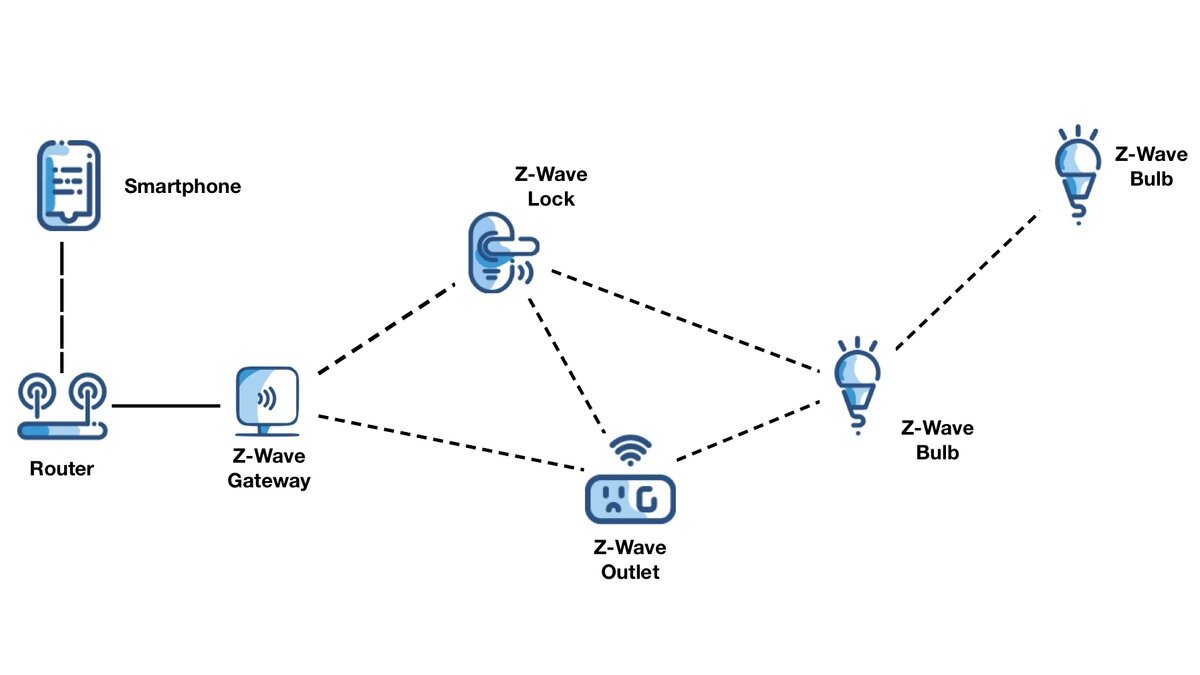
A simple Z-Wave network
Z-Wave also uses a different radio band than most smart home devices. By using a lower frequency ISM band Z-Wave is able to transmit further, through more obstructions, and is less susceptible to radio interference than protocols like Wi-Fi and Bluetooth. This has held back it’s uptake, however, as the specific frequencies in the ISM band vary by region around the world.
Because of these aspects of Z-Wave, the controller will act as a gateway (kind of a translator) connecting the Z-Wave network with your router, thereby allowing control of your devices. Any HomePods serving as Home Hubs, as well as your personal Apple devices, live exclusively on your Wi-Fi network. In order to see and control Z-Wave devices in HomeKit this gateway function is therefore an essential component.

Find out more about Z-Wave
Our enthusiast’s guide will take you through the history and features of this protocol in more depth.
The Easiest Z-Wave Option

Thinka for Z-Wave
Key Features
• Certified HomeKit bridge accessory
• Z-Wave Plus 700 series
• S2 Security and SmartStart
• Easy set up and pairing
• Simple management app
• Supports most Z-Wave devices
• Supports all Z-Wave regions
Pros
✔ Certified HomeKit bridge✔ No fuss device management
✔ Power user tools are still available
Cons
✘ Expensive for whaty it is✘ Fragmented user experience
✘ Limited app features
If you just want to get right into adding Z-Wave devices to HomeKit and don’t care about any other automation capabilities, then the Thinka for Z-Wave controller is the way to go.
The bridge itself is very simple. There’s no buttons or controls to worry about, just plug it in to your Ethernet network and get started. You will need a free port for that, there’s no Wi-Fi support. You’ll need to go to the URL provided in the box to access a basic web portal for the initial set up. You can then pair it with HomeKit using the standard QR code printed on the bottom of the unit.
You’re now good to go. Adding Z-Wave devices is trivial using SmartStart. Install the Thinka companion app on your iPhone, select Add a device and, providing your Z-Wave device supports SmartStart, scan the QR code to add it to the Z-Wave network just like a HomeKit accessory.
Thinka is designed purely as a HomeKit bridge, so the app has very little in it other than some basic sync and support tools, everything is done in the Apple Home app. You do have the option of going back to the web interface for more detailed configuration of your Z-Wave devices, and the Z-Wave network if you really need to, so more advanced users won’t be missing out.
It’s a niche device from a smaller European brand, so it’s pretty pricey, but because it is an officially certified HomeKit accessory it offers the most straight forward way to get Z-Wave working in HomeKit.
A Cheaper Z-Wave Alternative
Hubitat Elevation
Key Features
• Pending HomeKit certification
• Z-Wave Plus 800 series
• S2 Security and SmartStart
• Includes ZigBee 3.0
• Comprehensive rule scripting
• Supports most Z-Wave devices
• Models for all Z-Wave regions
Pros
✔ Supports both Z-Wave and ZigBee✔ Powerful rules engine
✔ Great community support
Cons
✘ Extra overhead of manageing two platforms✘ More complex to manage
✘ Integration only goes one way
The Hubitat Elevation is a powerful smart home hub that provides integration with a wide range of devices and includes radios for Z-Wave as well as ZigBee and Lutron radio systems. Designed as a complete smart home automation system, it offers a lot more than the Thinka, but it’s also more of learning curve. This particularly true with their Rule Machine extension, which gives you powerful automation rule capabilities but gets into scripting, so it’s not for the beginner.
The Hubitat architecture is based around the idea of Apps. Basically, these are plug ins that add functionality to the system. Apps can be provided by Hubitat or by the user community, which is very active and a great resource for getting help with more advanced topics. HomeKit support is currently provided by an official Hubitat App.
Within the HomeKit app you can select which Hubitat connected devices you wish to share with HomeKit. Hubitat is pursuing Apple certification, so there are some limitations on which devices will be eligible based on Apple’s own requirements. This doesn’t impact Z-Wave too heavily, but security related items like locks and garage doors are not supported via a bridge like this.
It’s also important to note that this integration is one way. You can share Hubitat devices with HomeKit, but not vice-versa. This won’t be a problem if your intention is simply to add Z-Wave to HomeKit, but does limit the value of investing in a hub like this. If you intend to use any of the other Hubitat features or integrations then you’ll effectively be running two seperate smart home systems (with some crossover), which is not ideal.
Conversely, if you plan to use Hubitat as your primary automation system but prefer to use Siri as your voice assistant to control it, then this may be an acceptable solution. You’ll also have the option to use Google Assistant and Alexa, which are both fully certified.
The Power User Option

Home Assistant
Key Features
• Open-source platform
• Powerful integration capabilities
• Install on any hardware
• Very active HomeKit community
• Comprehensive rule scripting
Pros
✔ Open platform means wide conpatibility✔ Powerful integration features and configuration
✔ Great HomeKit-specific community
Cons
✘ Very hands-on installation✘ Complex configuration options
✘ Not for the beginner
For HomeKit power users, the Home Assistant open-source automation platform is a popular choice. It’s a powerful software-based solution for home automation that supports pretty much anything you can throw at it but requires additional hardware to provide the communications radios for various things, including Z-Wave.
Similar to Homebridge, but with many more features, Home Assistant is the go-to solution for HomeKit users looking to level up the automation of their smart home as HomeKit does have some significant limitations in its automation capabilities. Home Assistant gets past that and allows for the integration of many other devices and services that HomeKit doesn’t support with Siri and the Apple Home app.
You can install Home Assistant on a wide variety of hardware, but a nice compact solution is to use their custom designed Raspberry Pi 4 module, the Home Assistant Yellow. You can also use a regular Raspberry Pi 4 if you have one. Unfortunately, these are in short supply otherwise and the prices are way above where they should be. I’ve found the best offer that’s suitable for Home Assistant here. To add Z-Wave you’ll need to add a supported USB Z-Wave dongle, such as the Aeotec Z-Stick Series 7. Remember to check the frequencies supported by the Z-Stick are suitable for your region.
With that installed, you can start adding plugins for other brands and interfaces, including HomeKit. This is similar to the Apps used by Hubitat, but is a bit more hands-on in terms of configuration. This is definitely not the solution to go for if you want to keep things simple, but it does give you absolute control over your set up and provides a great deal of flexibility for future changes in tech and devices.
A Premium Smart Home Hub with Z-Wave
Athom Home Pro
Key Features
• Z-Wave Plus 700 series
• Very active developer and community support
• Easy access to powerful automation logic
• Also has ZigBee, Wi-Fi, Bluetooth, 433MHz, IR
• Support for over 50,000 devices
• Local control where possible (e.g. Z-Wave)
• Deep analytics with local storage
Pros
✔ Extensive device support✔ Powerful user interface
✔ Deep analytics and data backup
Cons
✘ Expensive, but you get a lot✘ HomeKit support not official (yet)
✘ Maybe more than you neeed
If you are looking to expand your smart home into a lot more products and features than just Z-Wave, then the Athom Homey Pro is worth a look.
This latest version of the Homey smart hub ups the specs to Z-Wave 700, ZigBee 3.0, and Bluetooth LE 5.0, with plans to add Thread and Matter support later this year via a firmware update. The Homey app is very slick, with a huge library of add-ons to support just about anything you could imagine adding to your smart home.
HomeKit integration is not official at this point, but can be enabled through one of these add-ons. There are actually a few created by the community that you can use. Athom does, however, also have a cheekly hint on their product page that they are working on official integration.
Of course, any long term HomeKit user knows not to place any credence in promises of support. It’s fallen through too many times to count at this point. But the unofficial integration is there in this case, regardless.
While that integration will give you control of devices in the Home app, and with Siri, you might well find yourself using Homey more going forward. With extendable satellite units, the powerful and easy-to-use Flow automation system, comprehensive data analytics using locally stored data, and full scripting capability, it’s a very compelling smart home solution for beginners and power users alike.
I don’t want to oversell it, but there’s a lot to like here for about the same price as the Thinka for Z-Wave controller.
For Professional Installers
Australian company Skaro has a bridge offering that allows for HomeKit integration of select Z-Wave controllers, specifically the popular Fibaro Home Center devices out of Europe.
The Skaro Automation Bridge was available as a consumer product until recently. Skaro has now pivoted to a purely professional focus and only supplies the automation bridge through smart home installers. That said, you can of course find it for sale online. I’ve found it at the following places:
The consumer variant is still supported, but no longer in production. The online stores I’ve seen it sold are all showing Out of Stock now, so you’ll be out of luck on that model.
The Pro version is a pricey option - as you’d expect something targetted at the pro installer industry. It’s not an option I’d go for unless you specifically want to leverage an existing later-model Fibaro Home Center as those a pricey too. You’re not likely to want to replace it anytime soon.
Important Z-Wave Considerations
Z-Wave Frequency Regions
While developed and run by a US company, Z-Wave has gained the most popularity in the European market where there are a number of major brands making Z-Wave devices, and a robust home automation industry using them. As such it’s important to keep in mind the regional frequency limitations of the protocol. Most countries fall into one of 4 main groups, with a few outliers:
North and Central America, and the Caribbean use 908.4 - 916 Mhz.
Europe and China, Singapore, and South Africa use 868.4 - 869.85 Mhz.
Oceania, South America, and Hong Kong use 919.8 - 921.4 Mhz.
India, Russia, Thailand, Japan, Israel, Taiwan and South Korea have individually unique frequencies between 865.2 and 926 MHz.
You’ll need to be sure your Z-Wave hub (aka controller) and the devices you want to use are on the same band or they won’t be able to communicate.
Z-Wave Device Compatibility
While HomeKit will support most device types that you’ll come across, keep in mind that you may be limited to basic functionality. HomeKit can’t support features that it doesn’t recognize. These are called characteristics in HomeKit and define what data an accessory can provide, or what actions it can take. Some Z-Wave devices may have extended functionality that simply won’t work.
Device Control and Automation
Many of the Z-Wave integration methods we’ll cover here will be part of a complete home automation system of their own. You’ll need to consider how you want to structure your smart home. If you’re using HomeKit it makes sense that you’d want to centralize control of your smart devices there so that you can see and manage everything in the Apple Home app, and thus via Siri voice control from any of your Apple devices.
You may want to shift your automations to the other platform, though, in the event that it supports more complexity than HomeKit can provide. It’s certainly an option to do everything in HomeKit and just use the Z-Wave controller as a bridge, and this may influence which option you go with, and how much you’re willing to spend on it.
Summary
Adding Z-Wave into HomeKit has been something out of reach for HomeKit enthusiasts for some time. But suddenly, we have a number of viable options depending on your technical skill level, budget, and objectives.
By far the easiest and simplest option is to get the dedicated HomeKit Z-Wave controller from Thinka. It’s pricey, but it does exactly what we want in this case. No fuss, no complications. Your Z-Wave devices will simply be added to HomeKit and you can control and configure them like any other accessory.
If you don’t mind getting a bit more involved and want to cut the hardware cost in half, you can opt for the Hubitat Elevation. They’re going for official Apple certification, but they’re not there yet, so it’s a ‘Beta’ feature, and you’ll get some other nice features and capabilities for the trouble.
Finally, if you consider yourself a tech-savvy power user and want to open up the most options for your HomeKit set up, you can opt for the Home Assistant open-source solution. You can install this on pretty much anything, so if you have suitable hardware on-hand your up-front cost will be limited to the Z-Wave dongle, and you’ll unlock the ability to craft pretty much any automation you need.