How To Configure Eufy HomeKit Secure Video Settings
When you buy through links in this article, I may earn an affiliate commission. Learn More.
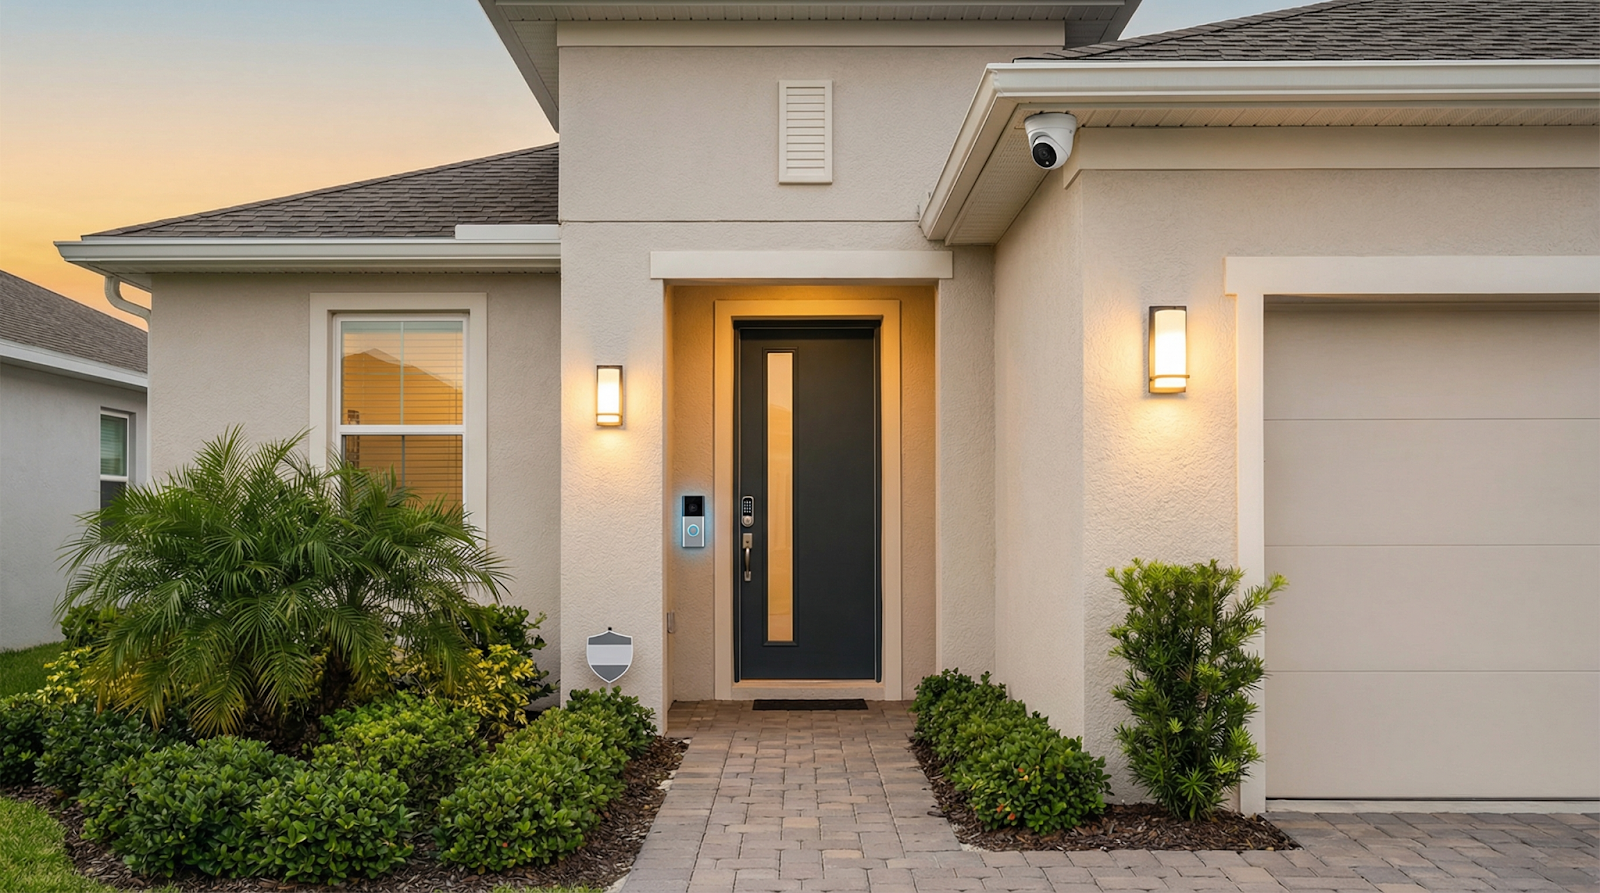
If you’re a HomeKit user, then getting security cameras that can use the HomeKit Secure Video cloud storage system to keep your recordings safe is understandable. For this reason, the use of eufyCam security cameras is a common choice as these are the only battery-powered outdoor cameras that support the system at present.
Having gone with these smart home devices with the hopes of using them exclusively in HomeKit I can attest to the difficulty in finding the optimal settings in both HomeKit and the Eufy Security app’s camera settings to give the best results. Some Eufy settings impact HomeKit Secure Video and some don’t, and it’s not always clear which is which, and what effect they have.
After a lot of experimentation, I’ve put together a list of what each setting does, at least the ones that matter, and some recommendations on how best to configure your Eufy cameras for HomeKit. This applies primarily to the eufyCam models that run through the Eufy HomBase2 as this is the only one that supports Homekit Secure Video.
Eufy has some indoor models that support this feature as well, but they run directly over Wi-Fi on your local network and work just fine out of the box in my experience. I haven’t needed to mess with any settings in the Eufy app to get good results with these.
Which eufy Cameras work with HomeKit?
Only select outdoor Eufy camera models have HomeKit support at all, specifically those than run through the HomeBase2 base station. This doesn’t mean anything using Eufy HomeBase2 will work. Some of the popular Eufy Video Doorbells also use this base station but don’t support HomeKit (Eufy has said ‘maybe’ but I’m not holding out any hope on that one).
Specific camera models are:
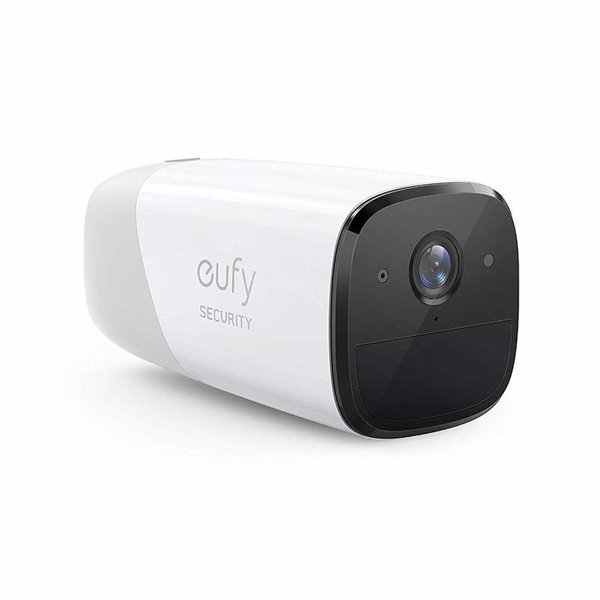
eufyCam 2 Pro
eufyCam 2C Pro (full review)
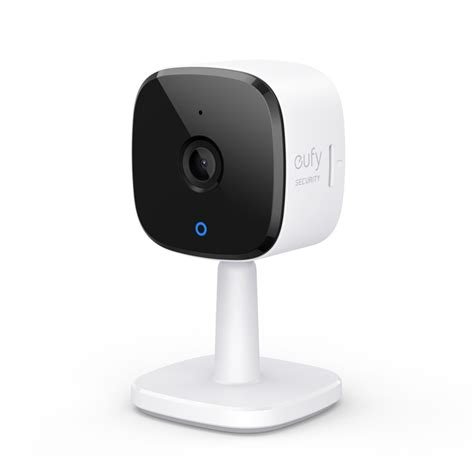
Some of the indoor models also have HomeKit support with full HomeKit Secure Video, as they don’t use a base station at all and just connect via normal Wi-Fi. These include:
Solo IndoorCam P24 (you can’t use the pan/tilt with HomeKit though)
Can Other Eufy Cameras Work With HomeKit?
Eufy has an advanced setting on their cameras that allows you to use them with Network Attached Storage devices (NAS) as an alternative for local recording. This uses the RTSP protocol, and we can leverage this with the open source tool Scrypted to integrate any Eufy outdoor cameras with this feature into HomeKit, along with full HomeKit Secure Video support.
This is definitely a power user option, and you’ll need to have some understanding of IP cameras to get it set up. You can turn this feature on for an individual camera in the Eufy Security app by going to the camera’s setting page. From there:
Tap General.
Tap Storage.
Tap NAS(RTSP).
Confirm you want to enable this by tapping Yes at the bottom.
Tap Next.
You’ll be advised to configure a staic IP address for your Homebase2 to ensure the receiver can always find it. Tap Have Set to continue.
The next screen talks about setting up a package for Synology NAs devices specifically, we can ignore this. Tap Have Installed.
Tap Enable.
You’ll now be given the necessary connection details to use for the RTSP setup in Scrypted.
Tap Have Configured.
Test the connection and tap Done.
The settings and performance for the camera and HomeKit will still apply as with officially supported models. The interactions will be largely the same, so read on for details on these below.
Why So Few Battery-Powered Cameras for HomeKit?
It appears that Apple requires a permanent power supply for camera devices to get official HomeKit support certification. This applies to video doorbells as well. This is likely because of the extra demands that HomeKit Secure Video puts on the cameras in terms of communication and encryption requirements. In order to deliver an acceptable user experience battery power is not allowed.
Eufy gets around this by certifying the HomeBase2 as a bridge device and using a proprietary radio link between that and the cameras. The eufyCams do not join your Wi-Fi network at all and need to be in range of the HomeBase2 to work.
The extra load on the HomeBase2 also means you’re limited to 4 cameras if you use it with HomeKit instead of the usual 8 the Eufy Homebase supports. If you want more than that you’ll need a second base station.
Pairing the eufyCam With HomeKit
The first thing to do is to get your eufyCams paired with HomeKit. With the newer HomeBase2 model you can actually do this without the Eufy Security app. Plug the Eufy HomeBase2 into your local network with the provided Ethernet cable, and power it up. Once the light is flashing blue simply add a new accessory in the Home app as normal and scan the HomeKit QR code on the bottom of the HomeBase2.
Once the HomBase2 is paired, you can go ahead and pair each camera to it as per the instructions (holding the SYNC button on the camera, and then do the same on the HomeBase2). You’ll get a voice prompt from the HomeBase2 that pairing was successful and the camera will appear in the Home app automatically.
Once your cameras are added, you’ll probably want to move the HomeBase2 to a better location for your cameras to talk to. You can switch it from Ethernet to Wi-Fi, but you can only do that in the Eufy Security app, which means you’ll need to sign up for an account anyway. You’ll also need to use this app to adjust the camera settings we’ll be discussing.
You won’t need to add the devices to the Eufy app as it will automatically detect them through HomeKit and show them with a HomeKit logo in the corner.
Disabling Recording and Notification in the Eufy App
Once the devices are added to the Eufy Security app they will default to recording video clips to the HomeBase2 and sending push notifications. This would be the expected default settings if you weren’t using HomeKit Secure Video, but if you only want to store your videos in iCloud then we need to turn those things off.
You can’t do this in the camera settings of the Eufy HomeBase2 as you’ll disable anything going to HomeKit as well. Instead, we have to go to the Security option on the bottom menu.
Note: You’ll still have remote access to the Live view in the Eufy Security app, even if you set the camera to ‘off’ in HomeKit, so keep in mind who has access to that if you’ve shared the cameras (or your password, god no!) with anyone.
Tap the HomeBase2 in the list that you want to turn off.
You’ll be presented with the various security modes that can be configured. If we’re not using Eufy as a security system, we can just edit the default Home mode by tapping on it’s gear icon.
For each paired camera you can now un-check the Record Video and Push Notification options, then tap Save.
Setting Recommendations
At this point we’ll jump right into my recommendations, but I’ve also gone into detail on each setting in both the home app and the Eufy Security app in the following sections.
Set up the Eufy Security app
Start with the Eufy Security app. While we can leave most settings as default and turned on, we want to disable recording to the HomeBase2 and the related notifications using the Security section as detailed above. Doing it this way means you can still receive other notifications from the Eufy app as needed.
If you’re only recording in HomeKit’s cloud storage leave the Activity Zone in the Eufy app blank, as in don’t create any. If you want to record in Eufy’s cloud storage or on the Homebase as well, then you may need something here.
The main setting to adjust will be the Motion Detection sensitivity. You can start with the default of 5, but may want to increase it if you’re missing events. if you start to see overly long record times on your video clips (several minutes of nothing important), you’ll need to dial this back.
Under Video Settings > Night vision set up whether you want to use the spotlight or not. You won’t have access to this in HomeKit, so you might want it to be automated unless you want the camera to be more discrete.
With that done you can move to the camera settings in the Home app.
Set up the Apple Home app
When choosing between recording everything or just identified objects we have a dilemma. If we choose the latter, we are relying on HomeKit Secure Video identifying something in order to record and receive notifications. If one of the selected types is not recognized, we get nothing.
Normally, HomeKit is pretty good at this. My various internal cameras and my external Logitech Circle View units correctly identify objects something like 98% of the time. This should be the case with the eufyCams too, but a HomeBase2 glitch can cause problems. If you’re getting most recorded events showing as general motion, you can try restarting the HomeBase2.
Ideally set the Record Options to only record object types you’re interested in. You can then set Notifications to Only When a Clip is Recorded unless you want to limit what object types notifications are sent about. You can set Notifications to any motion for testing to see if the HomeKit is failing to record some things.
If you elect to record everything to ensure you don’t miss any events that HomeKit doesn’t identify as an object type, then you’ll need to expect a lot of false positives. You can choose to limit notifications to specific object types, in which case you’ll still have a recording of whatever happened, even if it didn’t yell you about it at the time. Obviously this is less ideal, but no object detection system is 100% reliable.
I have a Logitech camera set up next to a eufyCam looking at my driveway. With the Logitech this would be a problem as that generates a TON of false positives, so it really relies on the object detection to keep things usable. The eufyCam benefits from some up front AI filtering on the HomeBase2 which seems to eliminate a lot of that of that useless noise, but you’ll still get some.
Once a real motion event triggers recording HomeKit can record for too long if there is residual motion in the scene (like leaves and long grass). This is where you’ll need to play with the camera sensitivity as HomeKit doesn’t have anything for this.
Finally, you can set up an Activity Zone to focus on where you want notifications from. This can help if you have a particularly mobile shrub or something you need to exclude, but I’ve found it not particularly important. That will depend on camera location, though.
You might find HomeKit sends notifications for things outside the zone, but only records things inside the zone. This appears to be a HomeKit bug. You might resolve it by restarting your Home Hub, but I find the easiest workaround is to limit notifications to when a clip is recorded.
eufyCam Camera Settings In Detail
The settings that we need to look at are under each camera, and are accessed by tapping the ellipsis (three dots) in the bottom right of the thumbnail in the Eufy Security Devices screen (the main screen of the app).
There are eight sections we need to look at, with seven of them having sub-menus. While we don’t need to change many of them, I’ll cover them all to be clear about what affects HomeKit and what doesn’t.

1 - Camera on/off (toggle switch in the top right)
Leave this on, turning it off disables the camera in HomeKit.
2 - Motion Detection
Motion Detection toggle
Leave this on, turning it off prevents the motion sensors from triggering any motion events in HomeKit.
Activity Zone
Activity Zones set up in here don’t affect HomeKit, only recording events to the HomeBase2. I leave it blank.
Detection Sensitivity
This determines how much motion will trigger a detection event. This does impact HomeKit. Setting it too low will miss events, setting it too high will cause HomeKit to capture false positives. This also can cause events to record for too long if there is blowing leaves or shadows in the capture area after being triggered by something like a person or vehicle.
Detection Type
Leave this on All Motions, otherwise you’ll only get events determines by the HomeBase2 to be humans and nothing else. This detection can perform poorly at night, so I don’t use it. Eufy also says if this is turned on HomeKit will not be able to detect and record motion, but I haven’t had this happen as an absolute.
3 - Spotlight Settings
Brightness
This only applies to the camera spotlight (if you have a 2C or 2C Pro) and can be set as you wish.
4 - Power Manager
Working Mode
This can be left on Optimal Surveillance. You can adjust this, but it’s been difficult to determine exactly what impact this has on HomeKit.
Power Source
You’ll need this one if you attach a solar panel accessory to ensure it uses that correctly. Doing so is highly recommended.
5 - Video Settings
The streaming and recording quality and resolution are restricted by HomeKit, so these are locked.
Night Vision
You can choose the infrared night vision behavior to your liking; this will affect how the camera responds in low light. Either using IR black and white, using the spotlight for color night vision, or neither.
Privacy Zones
These are internal to the camera and will apply to HomeKit as well. They are essentially rectangular areas of the frame that will be always blacked out. These are provided to ensure no video is ever captured of those specific areas even if recording is triggered by something else and can be used for things like neighbors’ windows.
6 - Audio Settings
Microphone
Turns the microphone on or off. This is used for both live view and recordings. Leave it on if you want to capture audio in HomeKit.
Audio Recording
This determines is audio is encoded for recording to the HomeBase2. You can leave it on and use the HomeKit setting to turn it off for iCloud recordings.
Speaker
This is used for the two-way audio feature. As this is not exposed to HomeKit for some reason it doesn’t have any impact. Leave it on if you want to use the talk feature in the Eufy app.
7 - Notification
These settings only apply to the eufy app notifications and have no impact on HomeKit.
8 - General
Name
This is the name of the camera in the eufy app and does not impact HomeKit. You can name the camera as you wish in the Home app and it doesn’t change here.
Status LED
This shows the recording light on the camera face when it’s active. You can leave this on and disable it through HomeKit settings.
The other settings in this section are no applicable.
HomeKit Camera Settings In Detail
If we’re using the eufyCam primarily as a HomeKit Secure Video camera, then we want to control as much as possible from the Home app. This keeps things simpler by avoiding conflicting settings between the two apps. We have a lot less to worry about in here, but HomeKit takes a distinctly different approach to filtering events.
These settings are accessed from the camera’s live view in the Home app by tapping the gear icon at the top. Keep in mind that Homekit treats motion detection for notifications and recording separately, so one being triggered doesn’t necessarily means the other will.
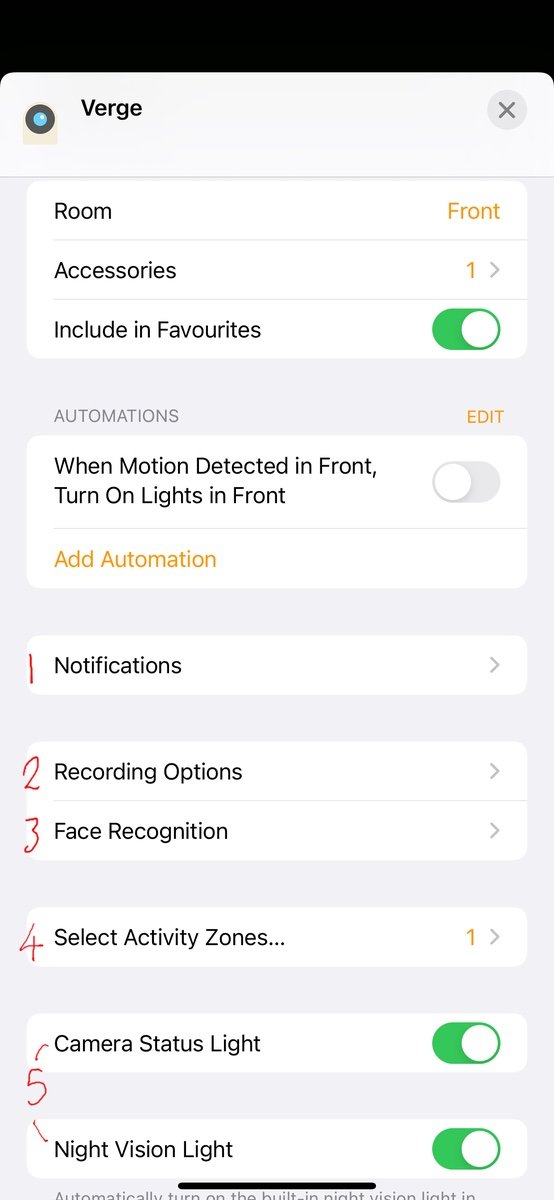
1 - Notifications
You have more control over when to receive notifications here, with the ability to filter by time of day and presence. These are controlled from the Time and People options. These settings are per user, and per camera, so each Home member can decide if and when they can notifications, and from what.
We have three options for what to notify about.
A Clip is Recorded
This effectively filters notifications to the same settings as recording (we’ll get to that in a bit).
Any Motion is Detected
This will send a notification when the cameras motion sensors detect movement, any movement in the frame whether recorded or not. This can be useful with the eufyCam as the Eufy HomeBase2 does some false positive filtering up front. On a pure HomeKit camera like the Logitech Circle View, however, this will lead to a lot of useless notifications.
Specific Motion is Detected
This is the primary means HomeKit relies on to keep the noise down. You can choose to be notified of any of four types of motion events; People, Animals, Vehicles, and Packages. You can only use the options that the camera has been set to record, as the object identification is done by your Home Hub based on the recorded video. This does mean a slight delay with this type as it has to process the video to some extent first, and if an object is not identified then you won’t be notified at all.
There rest of the toggles in this section are personal preference and don’t relate to the camera behavior.
2 - Recording Options
When Home and When Away
These two settings determine what Home members can do with the camera. The states are determined by the presence of members of the Home (have been added in the Home app). Away mode will only apply when everyone is detected as out.
More Options
Here we have similar settings to the Notifications. We can choose to record everything or just the specific types of objects we’re interested in, and if you want audio with that.
3 - Face Recognition
This is a novel feature that allows the event timeline and notifications to report the name of a recognized person. This ties in to the People feature of the iCloud photo library and allows faces recognized from there to be labelled. This is completely separate to anything the eufyCam does.
4 - Select Activity Zones
This is an important filter for recording and notification events by allowing you to define a specific area in the scene to limit triggering motion detection. You can use this to exclude problem plants, or public areas like the street that would trigger a lot of events that you don’t care about.
This is similar to the Activity Zones setting in the eufy app, but can be any shape instead of just rectangles. Zones created here don’t affect HomeBase2 recording, just as eufy zones don’t affect HomeKit.
There also is a known issue where Activity Zones may not affect notifications, so you can still get notifications outside the zone. This could be related to a misbehaving Home Hub.
5 - Light Settings
The last two toggles here allow you to control the status LED on the camera, and the night vision LEDs. By leaving the equivalent settings ON in the eufy app you can consolidate control here along with the other settings.
Troubleshooting Eufy HomeKit Behavior
There can be circumstances where a eufyCam will stop recording in HomeKit, although you may still get notifications. I’m not talking about the odd case where you receive a notification but nothing records, but where nothing ever records.
There are a bunch of home grown fixes floating around the internet, but these are the steps that seem most likely to fix it. I’ve had to do this once, but I can’t say for sure what actually resolved it for me. It seems to vary from case to case.
Restart your Home Hub. I can’t emphasize this enough. HomeKit Secure Video is entirely dependent on the Home Hub, and if it’s misbehaving, you’ll be in for a world of hurt. This can also be an issue if your active Home Hub keeps switching between devices. As with many smart home devices, turning it off and on again really does help.
Restart the Eufy HomeBase2. A hiccup here can cause events to be randomly missed, even when notifications are sent. It can also have an impact on HomeKit’s object detection, even when events are recorded. You can do this in the Eufy Security app at the bottom of the HomeBase2 device settings.
Go into the Eufy Security app, go to the settings for the effected camera, and turn off Motion Detection. Wait about a minute, then turn it back on.
Go into the HomeKit camera settings for the effected camera, and under Recording Options set the When Home and When Away states to Off. Wait a minute then return them to your preferred settings.
In the Eufy Security app, tap the HomeBase2 on the Devices screen, then under General > HomeKit Setup > HomeKit Authentication un-check the camera that isn’t recording. This will remove the camera from HomeKit. Wait a minute then go and select it again to add it back in to HomeKit. This will return all it’s HomeKit settings to default, so you’ll need to set up your mode, recording, and notification preferences again.
In my case, it seems performing step 3, and then 2, got the recording to work again.