Hue Tap Dial Review: A Versatile Scene Controller
When you buy through links in this article, I may earn an affiliate commission. Learn More.
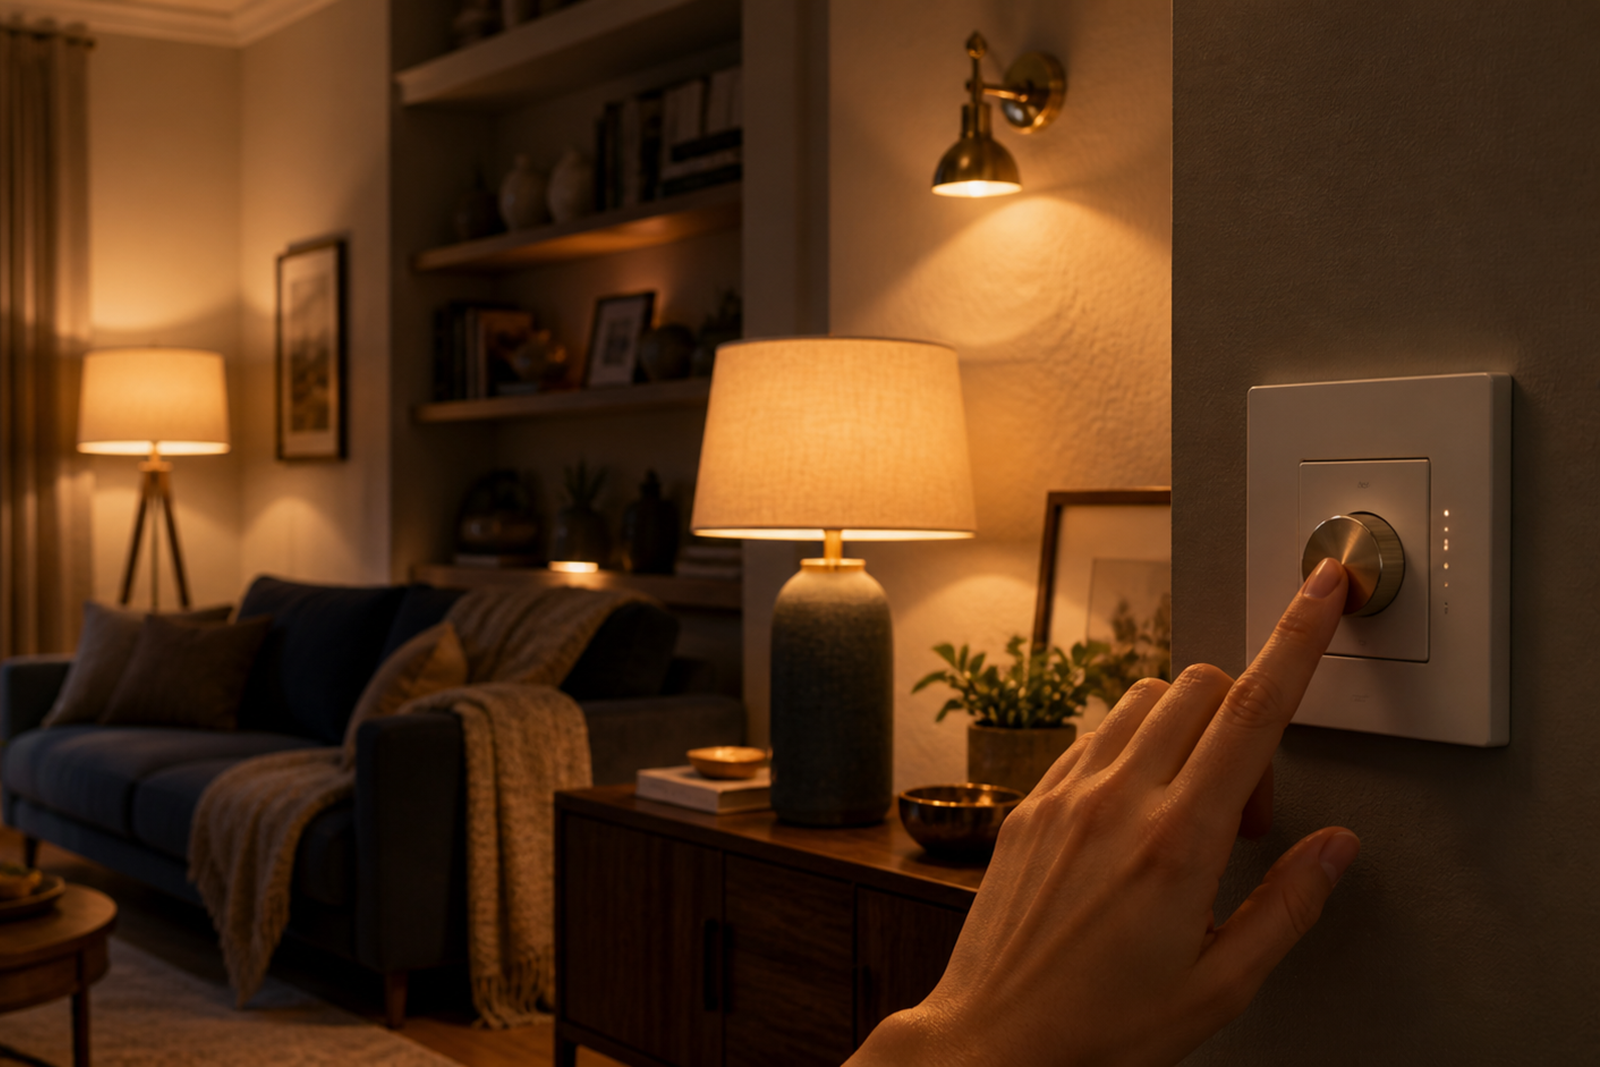
Smart lights are all well and good, but you often want to simply turn them on or off without needing to pull out your smart phone or use a voice command. Smart switches can provide this old-school control, but then you lose the ability to control your lights through other means if the switch is off.
Scene controllers are an excellent way to get around this. These simple devices work like switches and dimmers, but work through your smart home system to control smart lights (and potentially other devices) remotely. I’ve been controlling most of my smart lights via Hue Dimmers for a number of years, having replaced my light switches with these wireless ZigBee devices.
Philip Hue’s latest scene controller is the Hue Tap Dial, and this one enhances the older Dimmer functionality by allowing the selection of 4 scenes and providing an overall dimming function via a rotating outer bezel. Being completely wireless, it’s a very easy way to add a lot of functional control to your smart home, one room at a time.
Let’s take a look at exactly how it works, and what you can do with it.
Hue Tap Dial Overview

Hue Tap Dial Switch
Key Features:
• Works with or without Hue Bridge
• Dimmer control via rotating bezel
• Four scene selection buttons
• Battery powered
• Completely wireless
• Magnetic mount for portability
• Screw or adhesive mounting
• Comes in black or white

✔ Flexible mounting with magnatic attachment
✔ Works with or without Hue Bridge

✘ Battery cover is very tight
✘ Maximum of 9 lights without bridge
The Hue Tap Dial is a remote scene controller that’s intended to be used exclusively with Hue’s extensive range of smart lights. The controller itself attaches to the wall plate magnetically which allows for use as a portable remote control, and for easy access to the battery compartment on the rear.
You get the four scene buttons, as with the Hue Tap switch, but more intuitively laid out, and a rotating outer ring which acts as a dimmer for all lights assigned to the Tap Dial. Powered by a single CR2032 button battery, the Tap Dial should last you a good 6 months thanks to it’s use of the low power ZigBee technology.
Normally the use of ZigBee would indicate a Hue product can only be used with the Hue Bridge, but the Hue Tap Dial can be used directly with Hue bulbs by pairing it to each bulb individually, up to a maximum of nine. These can be paired to different buttons, and then turned on with a press, and off with a long press of that button.
Similar functioanlity is provided via the Hue Bridge as well, and the setup here is simpler. You’ll also get more options in terms of scene control since you can allocate scenes from the bridge to each of the buttons, or use ‘time-of-day’ lighting, which selects a white color temperature suitable for the time of day. Warmer tones for nighttime, and cooler during sunlight hours.
The mounting plate is a fairly solid slab of plastic with a nice clean design and a matt finish. The face plate can be removed via a pry hole slot in the bottom edge, exposing a selection of screw holes. These can be used to attach the mount to a switch box, or you can use the provided adhesive strips to place it anywhere you like.
I like to mount these to completely replace the manual switch as this ensures the power remains on to the smart lights, but manual control is right where people expect to find it. You just need to tie the switch wires together using wire nuts for continuous power and tuck them away behind the mounting plate.
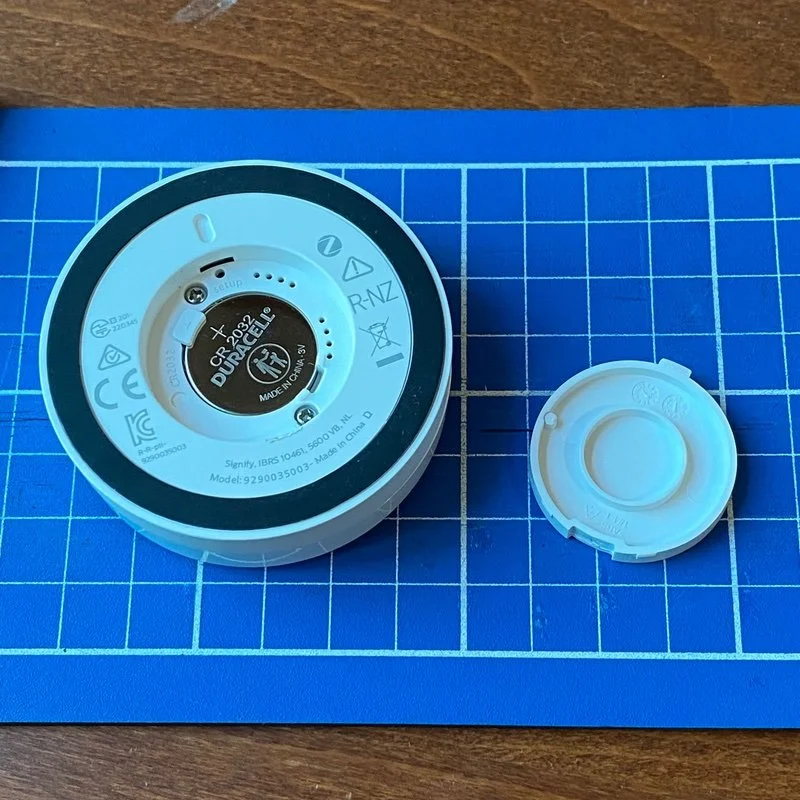
Battery compartment on the rear of the Tap Dial

The controller fits in your palm

Various screw holes are provided on the mount
Installation and Setup
While you can connect standalone Hue lights to the Tap Dial switch, I opted to use my Hue Bridge to explore the full range of features. Setting up each individual lights is a bit tedious and involves removing the battery cover to access to pin-hole setup button, but at least it’s an option.
On the Hue bridge, however, installation is very easy and just involves adding a new device in the Hue app, holding button 1 on the Tap Dial for 3 second and letting the bridge find it. As with other Hue products this works very well, and the switch was identified first time in a few seconds.
After the Tap Dial is discovered by the bridge, you’ll need to select a room (or rooms) in your Hue setup to assign the Tap Dial to control, and then you get given the option to customize the functionality or just accept the default configuration, which is reasonably useful right out of the box.
With that done you can go ahead and mount it using screws or the 3M adhesive strips which are pre-attached to the back of the mounting plate.

Select Tap dial switch from the new accessory menu.

The bridge will detect it.

You’re good to go.
Configuration options
The Hue Tap Dial can be configured to control every light on your Hue Bridge if you want, but it’s more likely that you’ll assign it to a specific room. In fact, you can assign up to 3 rooms, and you can do this for each button. So, each button can perform actions on a different room, or group of grooms if you wish. You can then further refine that control through the scenes you select.
The default button actions assign Time-based light to the first button, the default Dimmed and Nightlight scenes to buttons 2 and 3, and scene cycle to button 4. This latter feature can be customized as well to choose up to 10 of your scenes to cycle through on each button press.
You can mix and match these actions, Time-based light, single scene, or scene cycle, on each button, and using custom scenes you can control specific lights as well rather than all lights in the selected rooms. In all cases you can only modify the ‘Press’ action. The ‘Press and hold’ action is reserved to turning the selected lights off. Keep in mind this will affect all lights in the selected rooms, even if your scene didn’t change them all.

The default button configuration
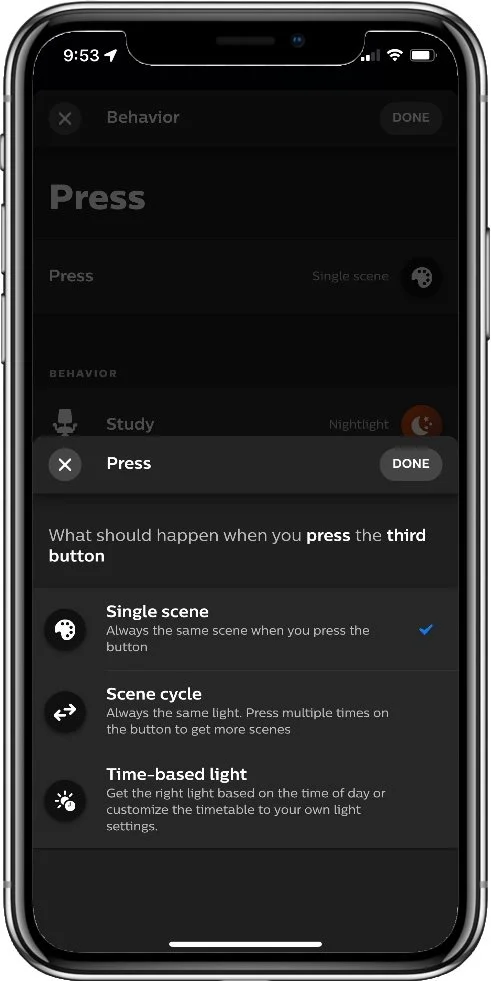
The available button actions
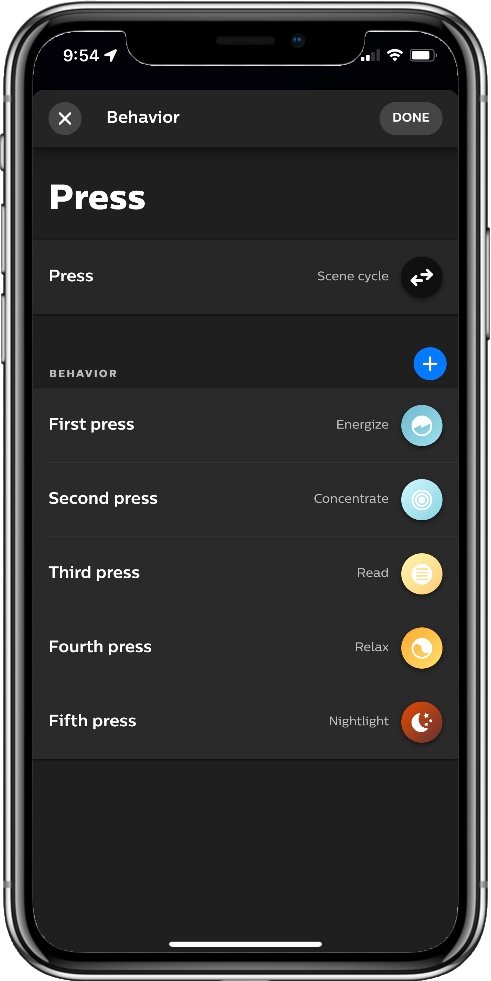
Setting up the scene cycle action
Real World Performance
Reliability and Responsiveness
The one thing I have found consistently great about the Hue ecosystem, at least when doing it right with the Hue Bridge, is the almost instant response to commands. Whether it’s via my voice assistant, a third-party app, or a scene controller like this one, it gives a great end user experience. Nothing is more frustrating than trying to turn on the light only for it to take a few seconds, or worse, not happen at all.
To be fair, you can have the odd delay if you overload you’re Hue Bridge, but you’ve got plenty of headroom there for most people. If you really get into the ecosystem, though, you might find yourself needing a second Bridge. I’m technically over the recommended limit, but for the most part I still get a great experience. The Hue Tap Dial has been no exception, with button presses giving instant results, and the dimming function being very responsive.
My only gripe here will be about battery changes. With accessories like the Hue Dimmer, and their indoor motion sensor, getting to the battery is fairly simple. While they do require removing a single small screw, the battery cover then comes away easily. With the Tap Dial you need to lever the cover off with a flat head screwdriver, and that sucker is really tight.
I found it impossible to get it out without causing some minor damage to the edge of the pry hole. Now, this is on the rear, so it’s no big deal, but over time I worry this damage will get more and more severe if the cover doesn’t loosen up a bit.
Smart Home Support
Normally, a Hue accessory like the Tap Dial can only control Hue lights, anything that is in the Hue app or linked directly to the switch. What makes these devices really cool, though, is when you use it with a smart home platform like Apple HomeKit or Amazon Alexa. These platforms recognize the Tap Dial and allow it to be used as a trigger for automation rules or routines.
What makes that cool? It means you can use the buttons to control any devices you like, or trigger other actions in the case of Alexa, such as sending messages, reading the news, or many other Alexa actions supported by Routines. In the case of HomeKit, you can do away with the need to long press to turn off the lights by setting up a toggle action using Shortcuts. This is an easy and effective way to turn lights (or other devices) on and off with the same button press.
One thing you need to be careful of here is that the configured actions in the Hue app will also take effect when the button is pressed. This can be handy as you can take advantage of the Hue Bridge provided behaviors, and use the Hue scenes if you wish, while also activating something else related to those.
Conversely you can tell the Hue app to set up the Tap Dial in ‘another app’ and it will remove the Bridge configuration and mark it as not configured. This way only your third-party platform will trigger any actions. I’ve done this with some of my Hue accessories where I want to control non-Hue lights as well, or other things like a smart plug.
One thing you can’t configure in a third-party platform is the rotating dial. In both Alexa and HomeKit I only get the buttons presented as triggers, and only the single-press action in both cases. If you want to use the dimmer dial, you’ll have to set it up in the Hue app, which means the dimming only works with Hue lights.
Alternative Controls For Philips Hue

Hue Dimmer
The Hue Dimmer switch is still a great option, and at half the price it may be sufficient for your needs. I have these all over the house, and they can be doubled up if you want convenient access to your lights from multiple places in the same room.
Like the Hue Tap Dial, these magnetically hold onto their wall plate, so they can be easily removed and used from anywhere, and have built-in dimmer functions via the middle two buttons.
You can set up the ‘on’ button to activate a single scene, or cycle through several of your choosing, and all 4 buttons can be used as triggers in third-party systems. A great option if you don’t care about the rotating dimmer function, or you intend to use only third-party automations and scenes.
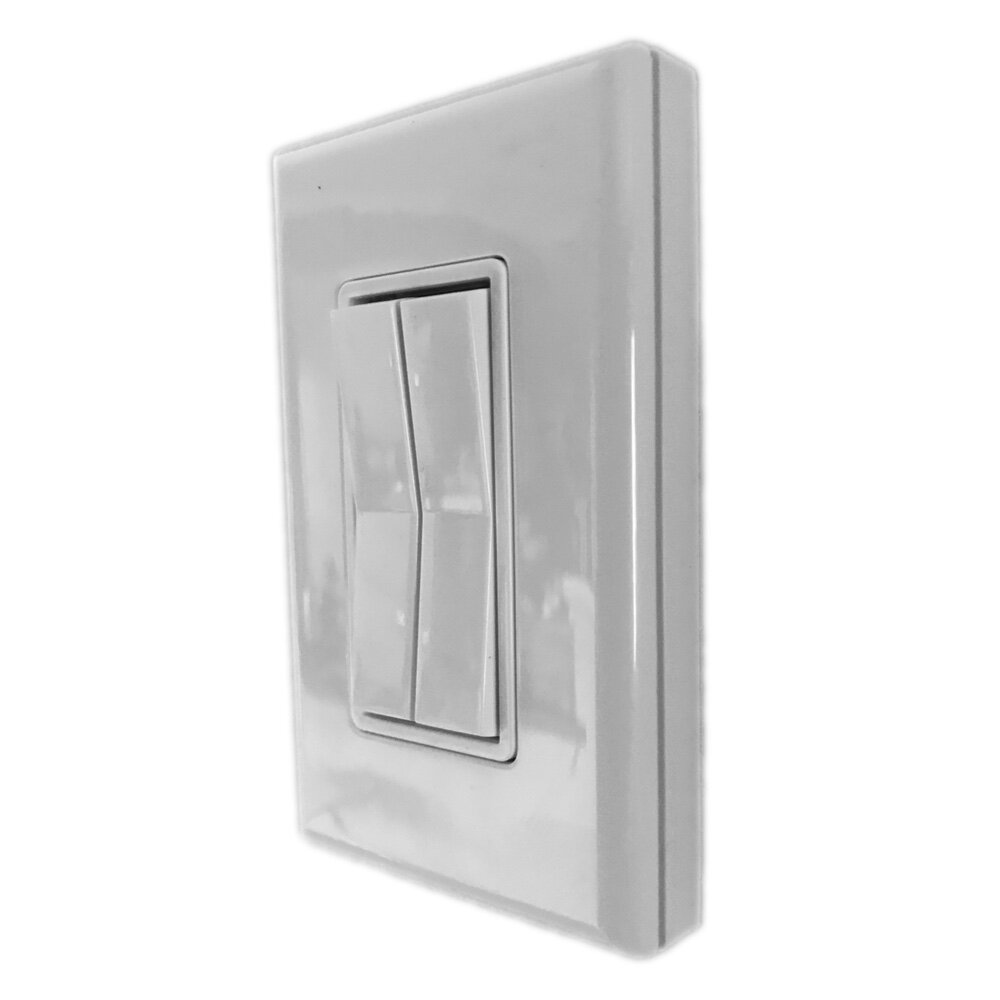
RunLessWire Click
I have several of these, and they are a great wall switch replacement option for smart bulbs, not least because they replicate a normal switch in appearance, if not quite in action.
These use the same kinetic energy harvesting technology of Hue’s older Tap Switch. By using a peize-electric generator that’s powered only by the action of pressing one of the buttons, it’s able to send a signal to the Hue Bridge to indicate the button has been pressed and trigger a scene of your choice.
There’s 4 buttons to configure, like the Tap Dial, and you can also trigger HomeKit and Alexa actions with it in the same way. It even comes with wire nuts to get those old mechanical switches out of the way, and installs right over the switch box with the provided wall plate and screws.
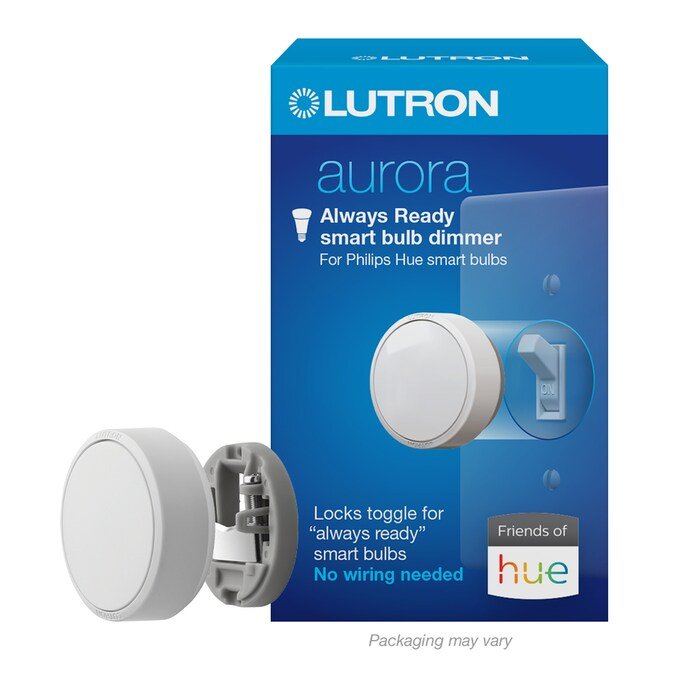
Lutron Aurora Dimmer
The Lutron Aurora is a novel approach to smart switches in that it’s designed to fit OVER you’re existing toggle switch. This does require you have a specific type of standard toggle profile, though, so you’d need to check that before jumping in, but if you do it avoids having to mess with wiring in the switch box - or even open it at all.
Similar to the Hue Tap Dial it has a rotating action for dimmer control, and a single press button in the center for on/off functionality. If you don’t need multiple buttons and have the right wall switches, this is a very simple and effective retrofit option.
The Verdict
When using smart bulbs and other smart lights it’s always a good idea to do something to ensure that the power stays on to those lights - or you lose the smarts. I use a lot of Hue lights, so making use of a scene controller like the Hue Tap Dial is a great way to achieve this.
You can either place the wall plate next to your light switches or, and this is my preference, tie the switch wires so the power stays on and cover replace the manual switch with the scene controller. I’ve done this very successfully with both Hue Dimmer switches and the RunLessWire Click switch, reducing family angst quite a bit, and adding more control over our lighting scenes at the same time.
The Hue Tap Dial takes these options a step further by adding a tactile dimming function thanks to the rotating dial, while still giving us four programmable buttons to cover all the various scenarios we might need. Being able to trigger HomeKit scenes and automations with those same buttons is an added bonus and is great if you have different brands of smart lights working together.
Using ZigBee ensures the experience is fast and reliable, which I’ve come to expect from my Hue system, and the Tap Dial is reasonably inexpensive, especially compared with the usual Hue price points. You can still get a Hue Dimmer for less, but the extra buttons on the Tap Dial could be just what you need.